
Most kitchen cabinet extensions close the gap between the existing boxes and the ceiling, but the range here runs from a simple crown molding finish to open shelf boxes, glass-front additions, and built-in shelving with lighting.
The gap you have decides which approach makes sense: if you have 12 or more inches of clearance, an extension offers real storage for seasonal items or appliances that clutter the counter.
If the gap is narrow, molding or open shelf boxes may be all the space allows.
1. Cabinet Extension to Ceiling
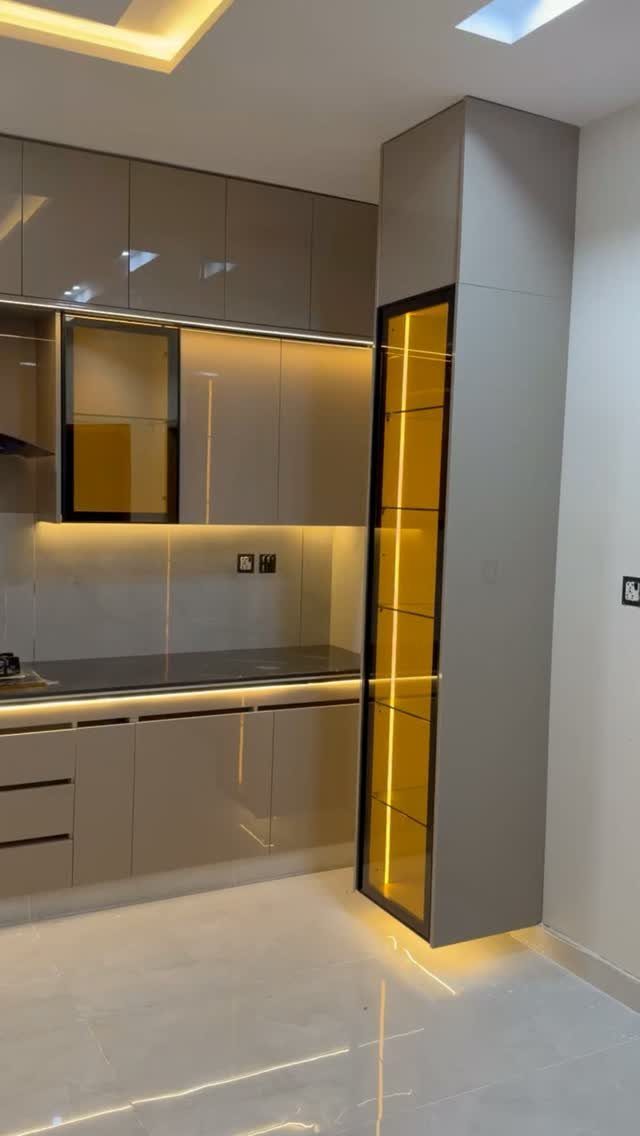
This kitchen closed the gap between the cabinets and ceiling by building a matching extension on top of the existing boxes. The result reads as one tall unit instead of two separate pieces with dead space above.
If your cabinets sit 12 or more inches below the ceiling, an extension offers real storage without replacing anything.
The new section can hold seasonal items or things you rarely use. Match the finish to your current cabinets, or paint everything at once so the seam disappears.
A contractor can build and install the boxes in a day or two, depending on how many linear feet you need covered.
2. Add Crown Molding
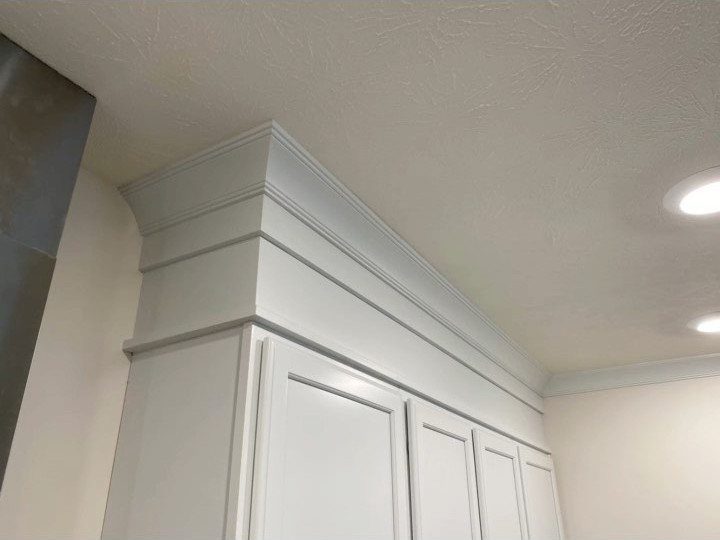
Crown molding finishes the transition between cabinet and ceiling without adding a full storage box. The tiered profile here fills vertical space and gives plain cabinets a more polished edge.
This option works well when the gap is narrow or when you want a finished look but do not need the storage an extension would provide.
You can install molding yourself with a miter saw and finish nailer, though outside corners take practice.
Paint the molding to match the cabinets or the ceiling, whichever makes the cabinets feel taller.
Extending kitchen cabinets to the ceiling is one trick some homeowners use to create more storage space in their homes. Another option is to install a custom glide-out shelving system that would create up to 50% more storage space in any existing cabinets.
3. Open Shelf Boxes
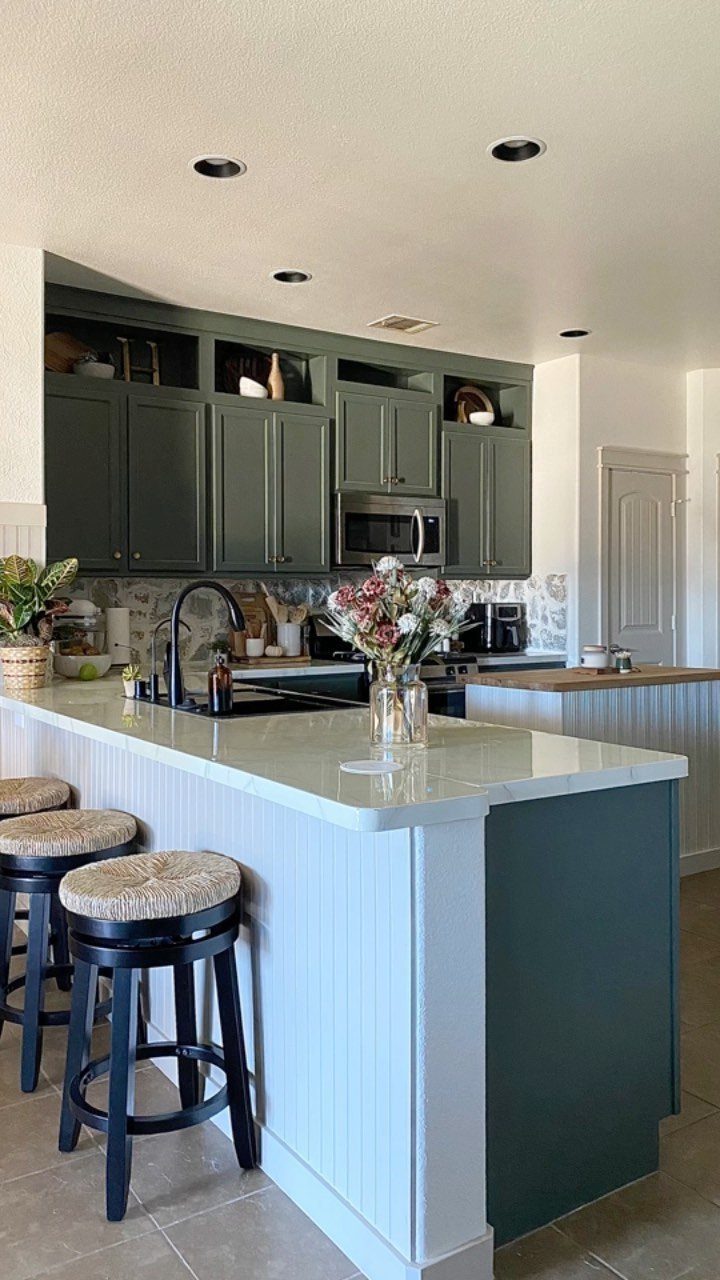
Open boxes built above existing cabinets turn unused vertical space into display or working storage. The boxes in this kitchen sit flush with the cabinet fronts and hold items that do not need to be hidden behind doors.
Size the boxes to match the width of the cabinets below so the stack reads as intentional. If you have 8 or more inches of clearance, the shelves can hold cookbooks, serving bowls, or baskets for less attractive bulk items.
Finish the boxes to match your cabinets or leave them as a contrasting material. Pine boards work fine if you plan to paint them.
4. Glass Cabinet Doors
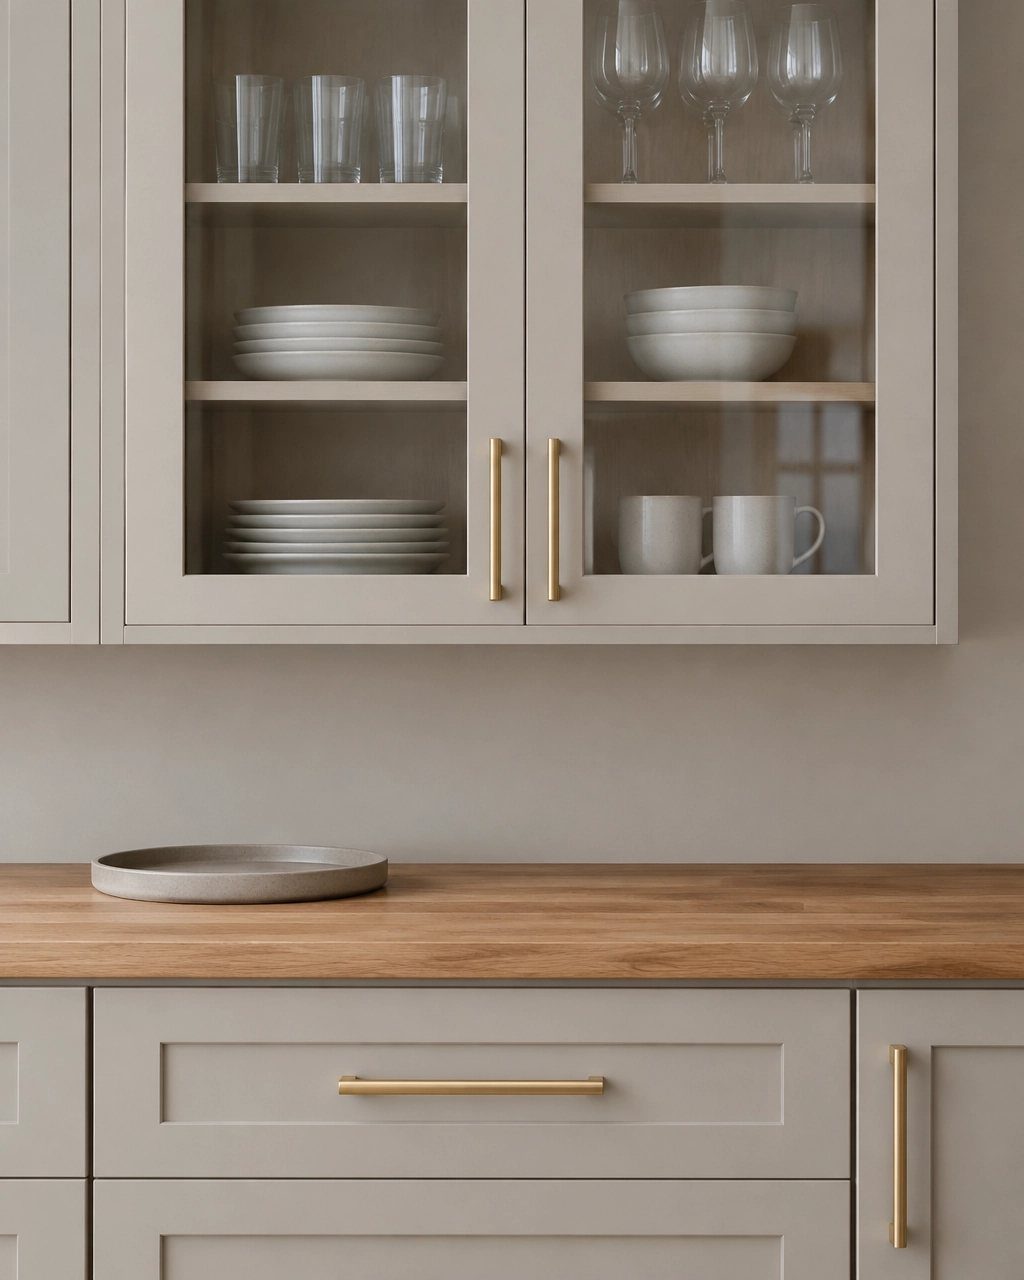
Glass doors turn added upper cabinets into a display that keeps dust off your dishes. The grey cabinets here use clear glass, but you can choose frosted, seeded, or reeded glass if you prefer a less exposed look.
This approach suits kitchens where you want the storage of a full extension but do not want the space to feel heavy. Glass lightens the visual weight, especially if the lower cabinets are dark or the room is narrow.
Swap standard cabinet doors for glass-front versions, or build new boxes with glass from the start. Either way, keep what is inside organized since it will be visible.
5. Add a Cabinet Ladder
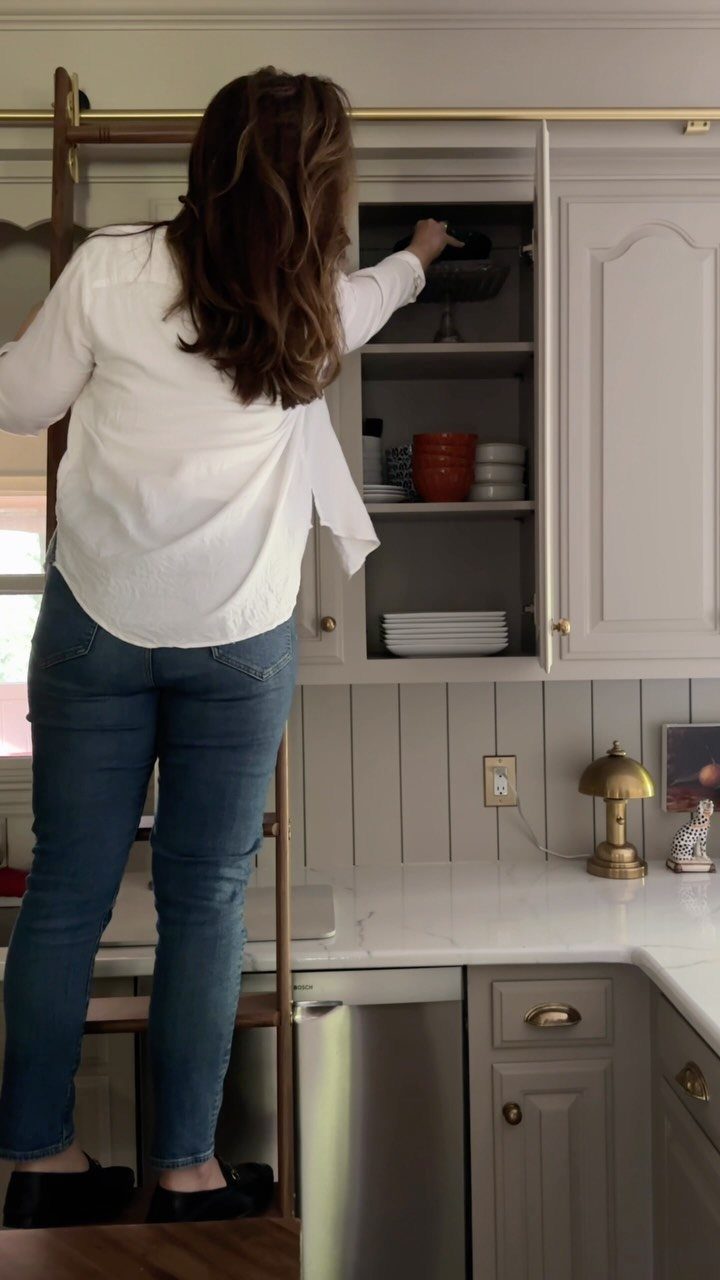
A rolling ladder makes high cabinets functional instead of decorative. The wooden ladder here moves along a track so you can reach any section of the upper storage without dragging a step stool across the room.
Library ladders suit kitchens with tall ceilings where extending cabinets all the way up provides real square footage. The hardware mounts to the wall or the cabinets themselves, and you can find kits in wood or metal finishes.
Expect to spend on a basic ladder and track, more if you want custom sizing or a specific finish.
6. Vertical-Raising Cabinets
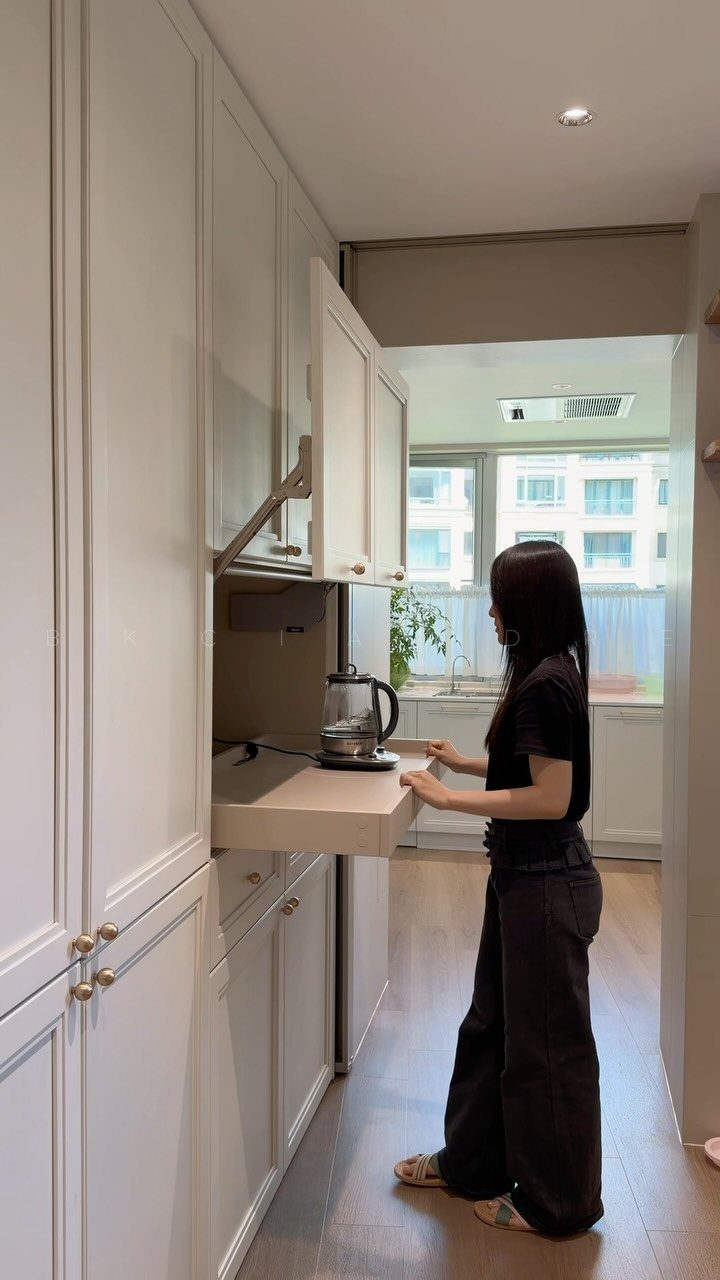
A vertical-raising cabinet pulls down to counter height when you need it and lifts back up out of the way when you do not.
The system here holds a kettle, but the same mechanism works for mixers, blenders, or anything else you use regularly but do not want sitting out.
This option requires a motorized lift or a spring-assisted mechanism, which a cabinet installer can retrofit into an upper cabinet.
The cabinet needs clearance below to drop without hitting your head or the backsplash, so it suits kitchens with standard spacing between upper and lower cabinets.
The lift hardware price varies depending on weight capacity.
7. Add a Recipe Bookshelf
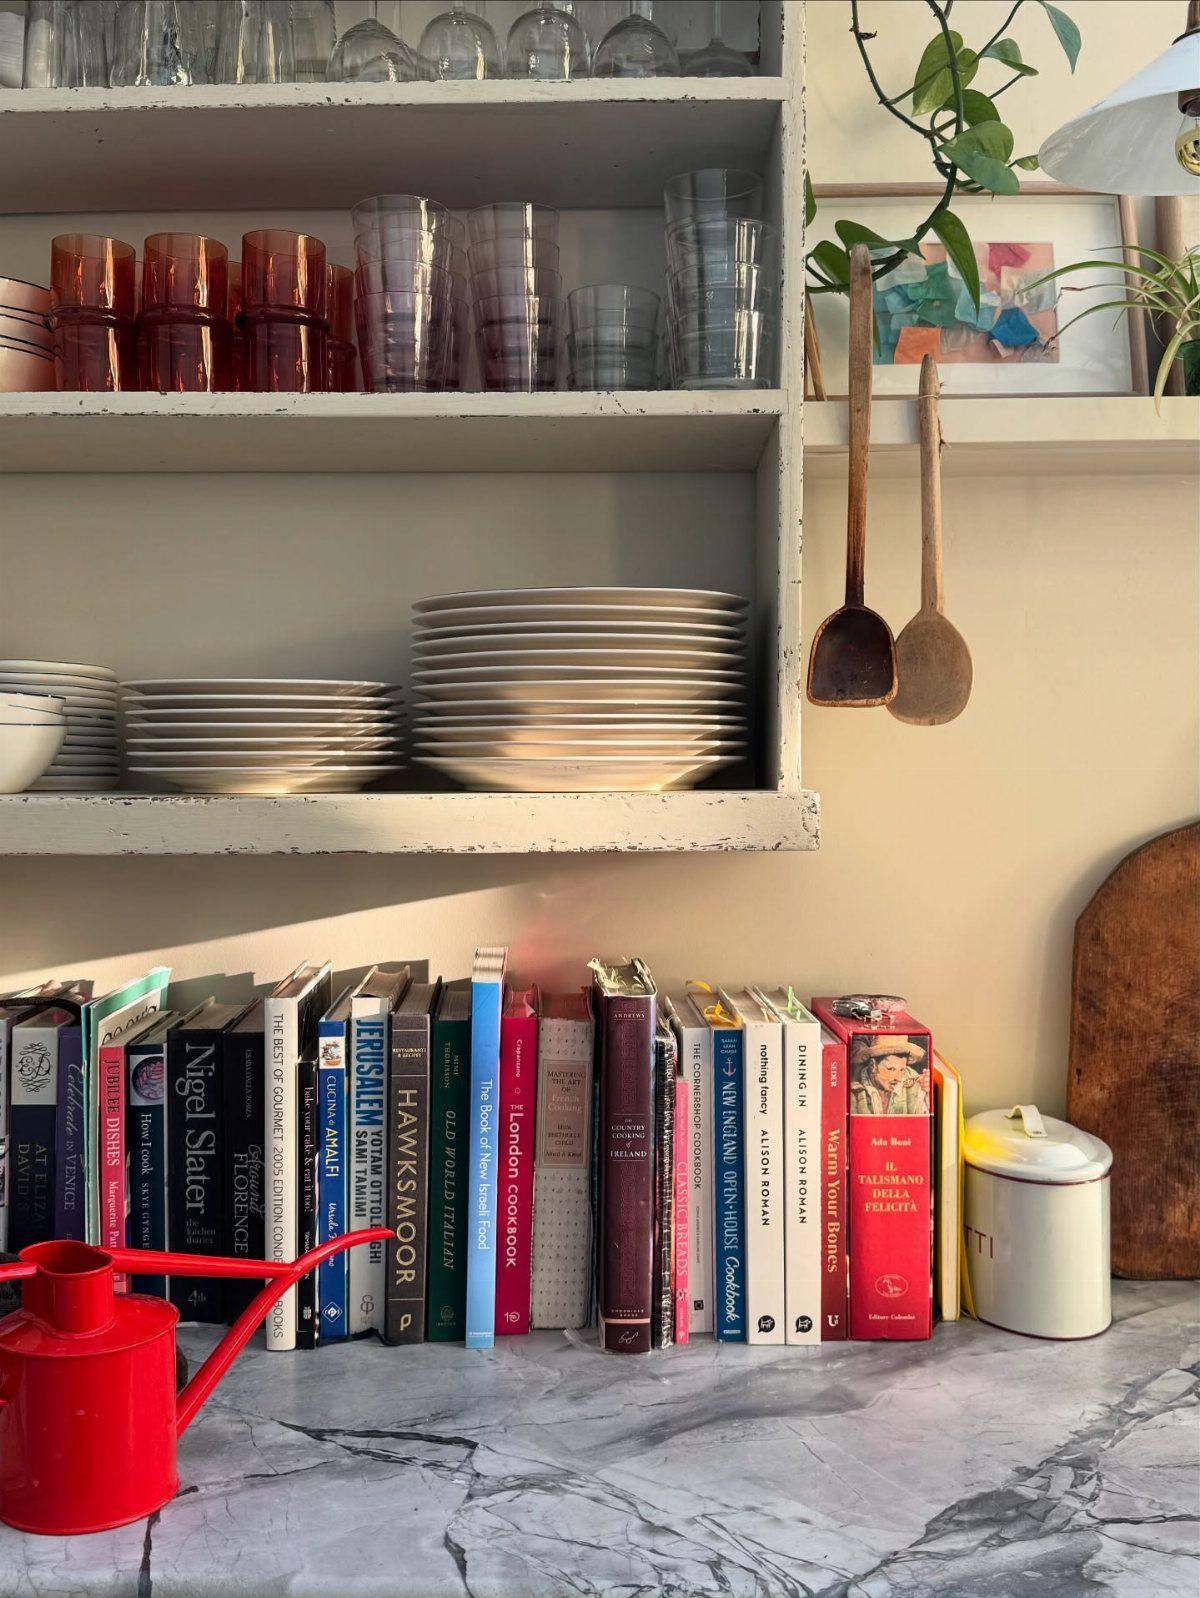
Pulling the doors off an upper cabinet turns it into open shelving for cookbooks you actually use. The recipe spines line up in view, and you can grab one without opening anything.
This works when you cook from books regularly and want them closer than a living room shelf.
If the cabinet already has adjustable shelves, set them to fit the tallest spine. Otherwise, leave the existing shelves in place and stack shorter books.
Paint the interior if the current finish feels too dark for an open display.
8. Appliance Pantry Cabinet
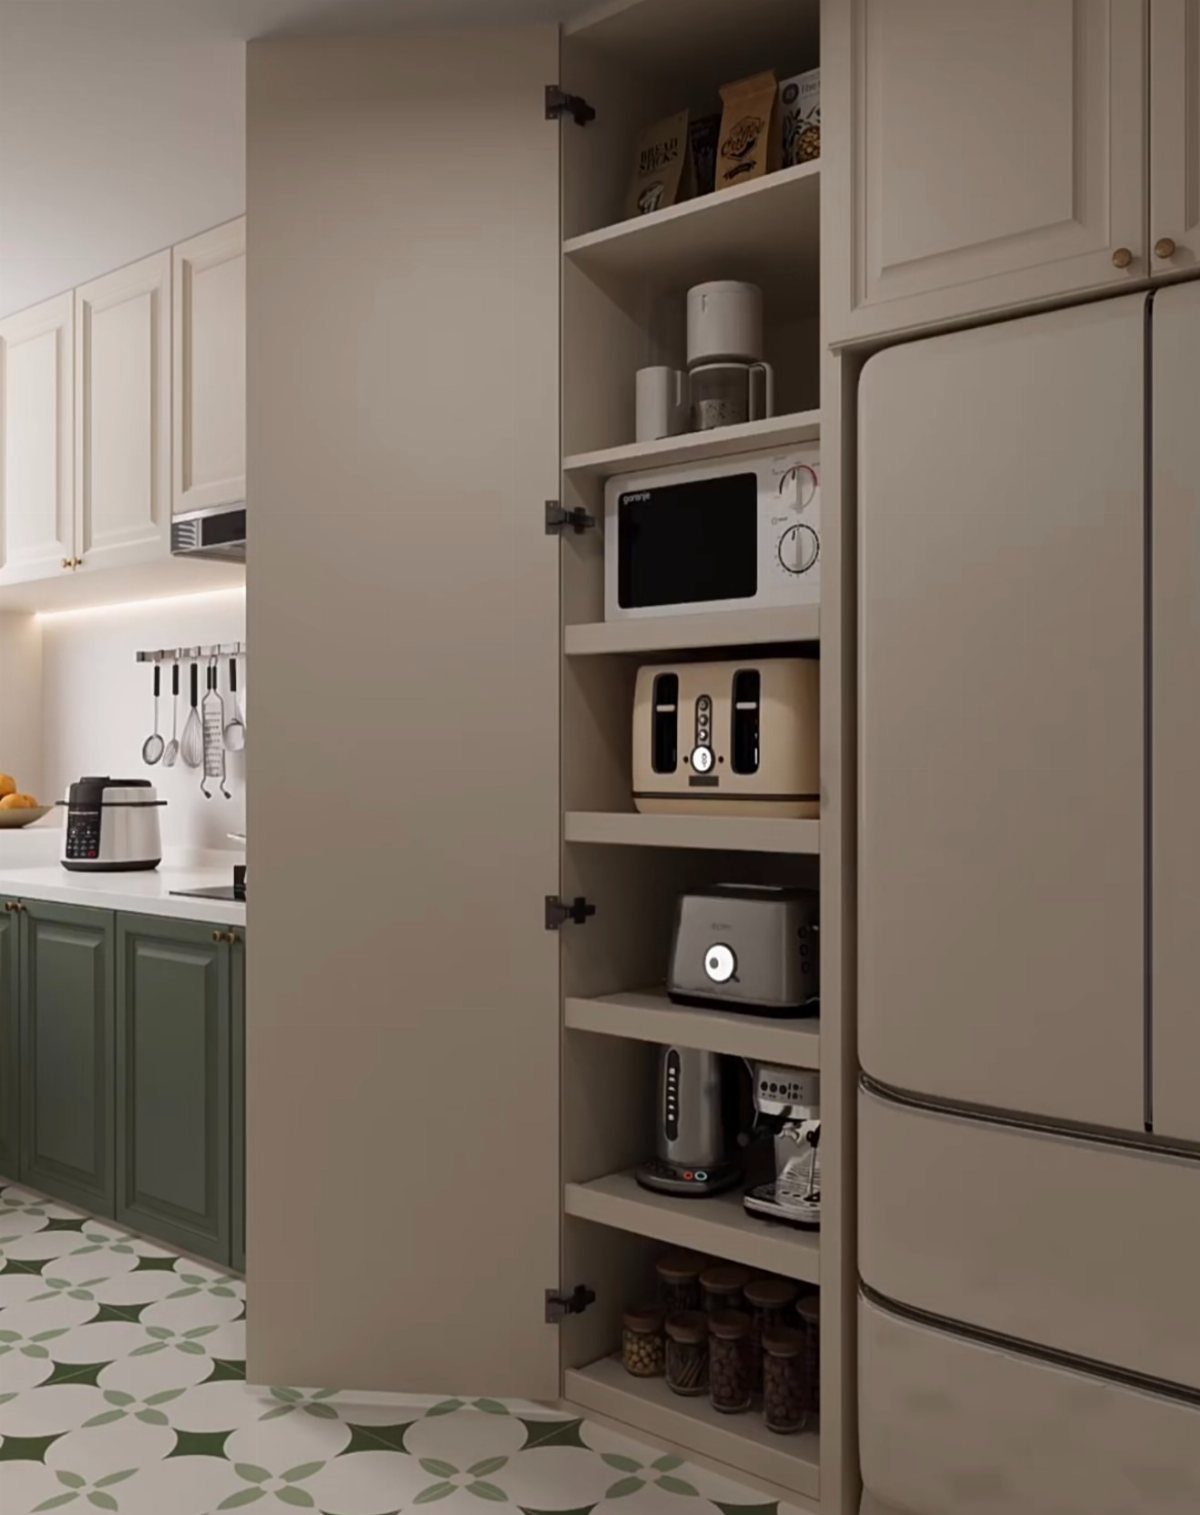
A tall pantry cabinet next to the fridge holds the appliances that clutter counters but get used too often to store in a low cabinet.
The toaster, blender, and microwave each get a shelf, and jars or dry goods fill the remaining height.
Size the cabinet to fit your widest appliance without wasting horizontal space.
If you are building it from scratch, leave an inch of clearance above the microwave so heat can escape. A cabinet this tall needs to be secured to the wall, not just the floor.
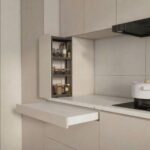
9. Hidden Pantry Shelves
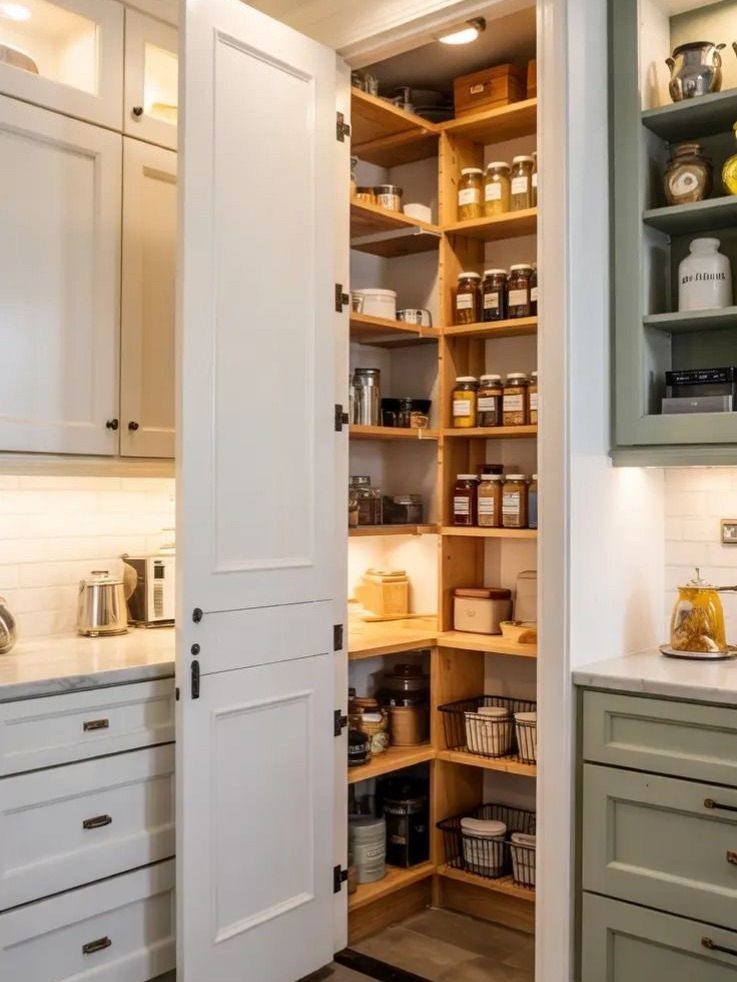
A floor-to-ceiling pantry behind a cabinet door uses narrow shelves to hold jars, cans, and baskets where you can see everything at once.
The door blends in with the rest of the cabinetry, so the pantry stays out of sight until you need it.
This setup suits kitchens without a walk-in pantry or a dedicated closet. The shelves can be shallow enough to hold most packaged goods, which makes this option work in a space too narrow for standard base cabinets.
10. Lit Open Pantry Extension
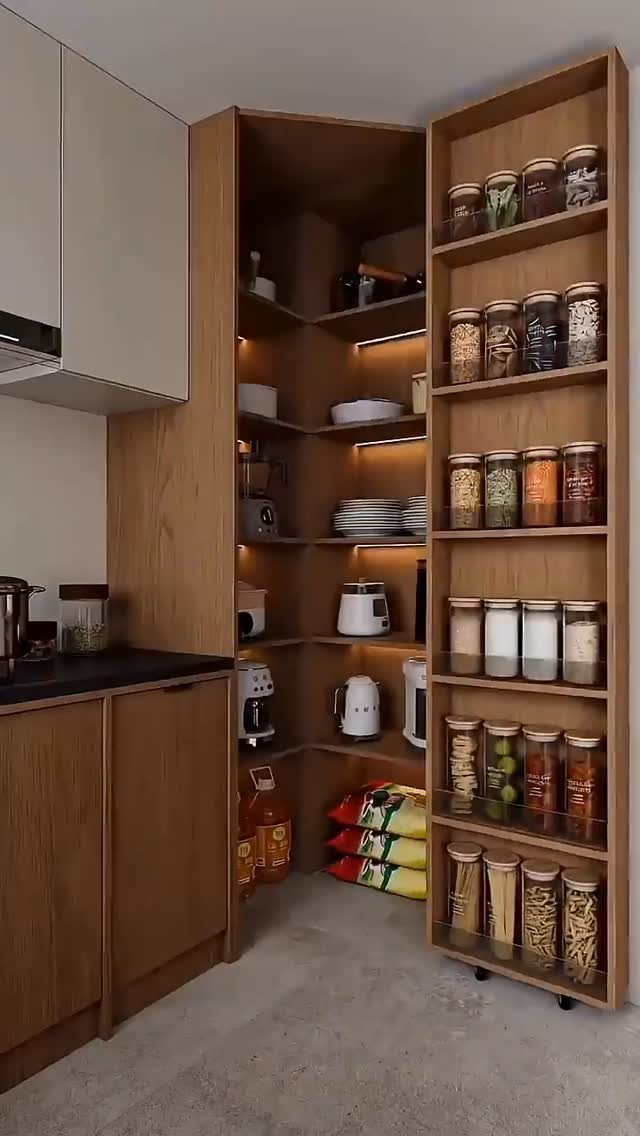
Corner shelves added above or beside existing cabinets give you a place for bulk ingredients and small appliances you reach for daily. LED strips mounted under each shelf light the contents without switches or visible cords.
Open shelves in a corner make use of a spot that is often wasted, and the lighting keeps the area from reading as a dark afterthought.
Battery-powered LED strips work if you do not want to run electrical, though plug-in versions stay brighter longer.
11. Built-In Shelving with Lighting
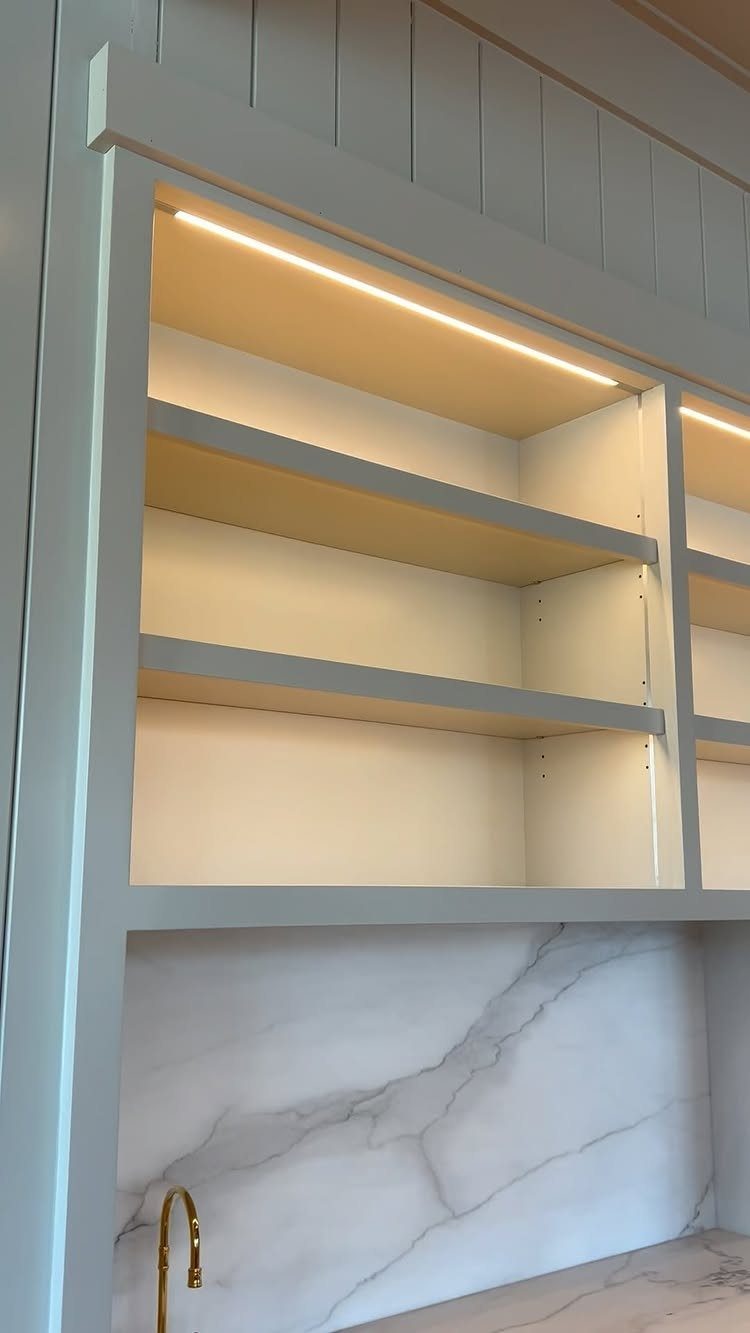
A shallow shelf unit built between the upper cabinets and counter adds a place to set dishes, mugs, or the oils you use while cooking.
Strip lighting mounted under the shelf highlights the backsplash and keeps the counter below well lit for prep work.
This option works when you have 12 or more inches of clear wall space and want storage that does not block the backsplash. The shelf can stay shallow if you are only holding mugs or small jars.
12. Extended Glass-Front Cabinet
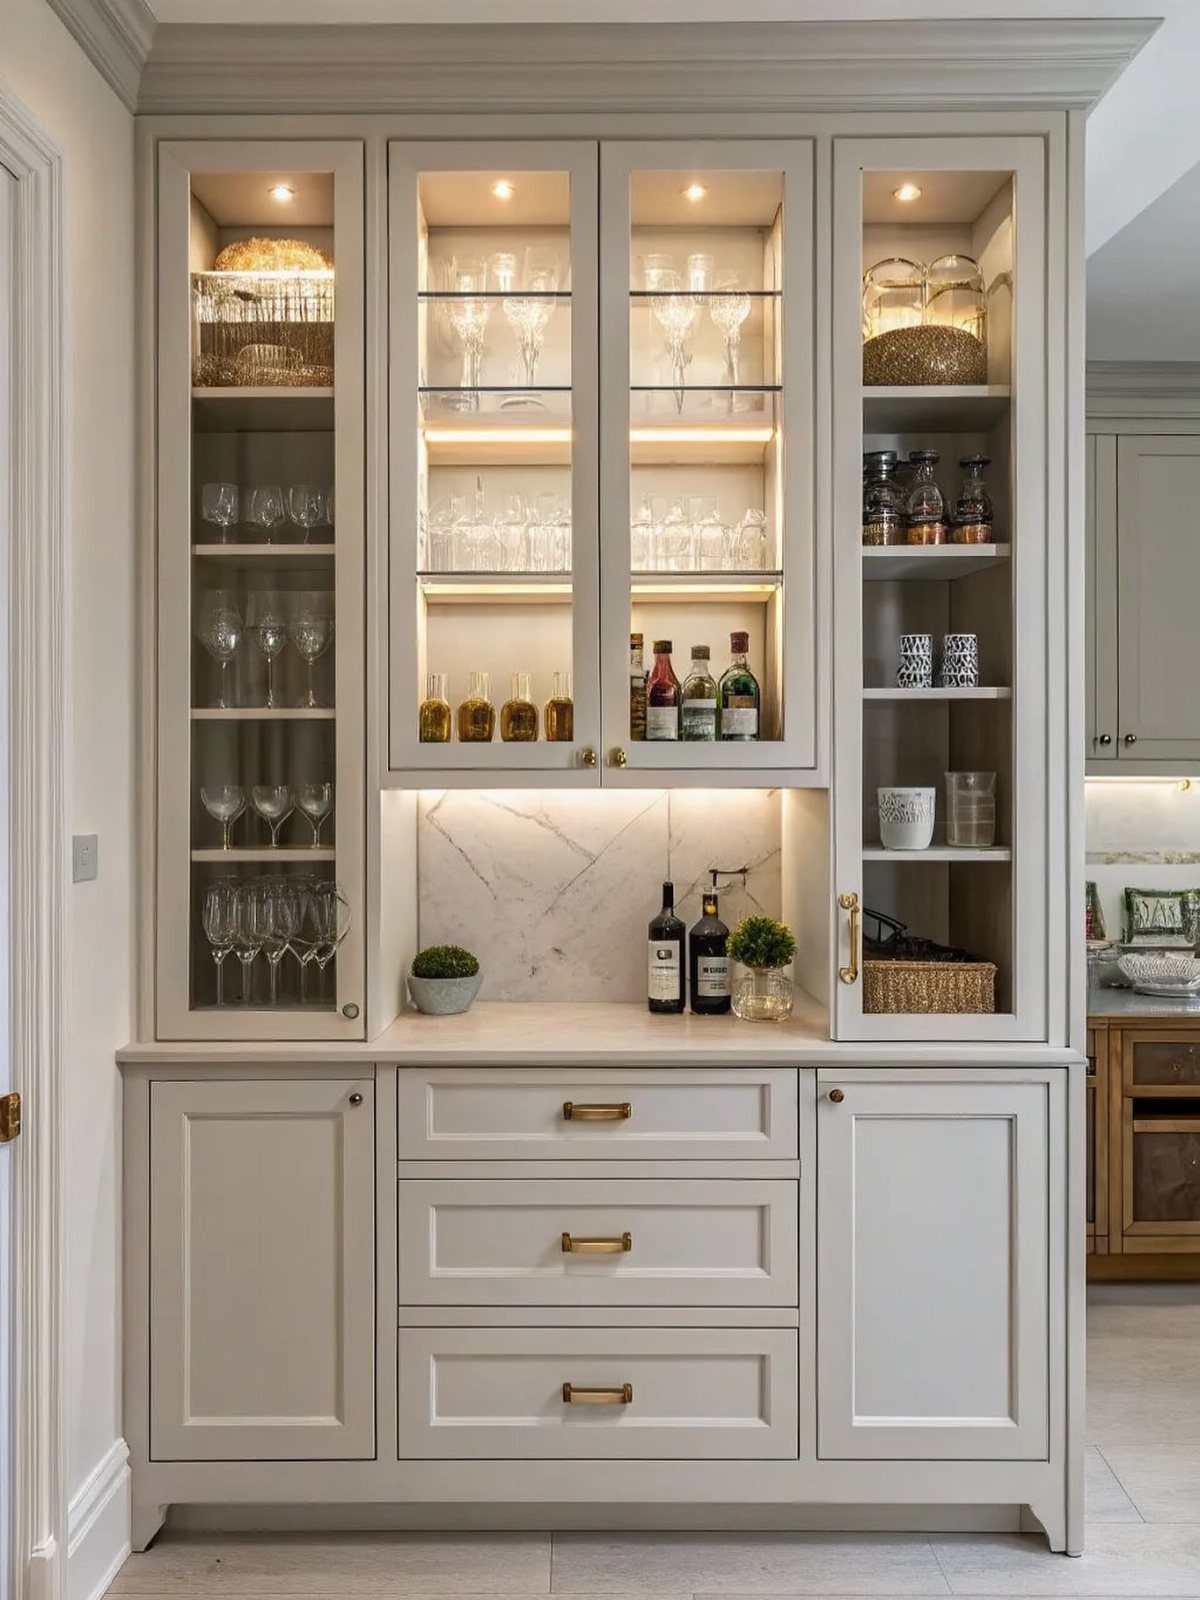
A built-in cabinet that runs floor to ceiling combines lit glass-front storage on top with closed drawers and cupboards below. The glass section displays dishes or glassware, and the lighting keeps the upper half visible after dark.
This approach suits a kitchen with enough wall space to treat one section as a feature.
The glass doors can be frameless for a cleaner look, or framed if you want the style to match traditional cabinetry. LED puck lights or strips mount inside the upper cabinet and connect to a switch or a motion sensor.
Match and Finish the Existing Cabinets
Match the extension material to what is already on the wall.
If your cabinets are painted MDF, build the new boxes from MDF and paint them the same color. If they are wood with a stain, use the same species and finish it to match.
Measure the face-frame width and the reveal around the doors so the proportions stay consistent from one tier to the next. If the lower cabinets have a rail or trim detail, carry it through to the extension.
Sand any visible joints, fill screw holes with wood filler, and caulk the seam where the new box meets the old one. Prime and paint both sections together so the color reads as one continuous surface.
If crown molding already caps your cabinets, you can notch the new header to sit behind it or remove the molding, install the extension, and reinstall the trim across the full height.
Check Ceiling and Cabinet Suitability
Measure the gap between the cabinet top and the ceiling before ordering or building anything. Check the cabinet depth front to back, since the extension needs to sit flush without overhanging.
Look for vents, electrical boxes, or plumbing that runs through the wall or ceiling in that space. A vent register or recessed light may force you to adjust the box height or cut an opening in the side panel.
Ceilings are rarely level. If yours slopes or has coffers, plan for filler strips or custom-sized boxes to close the gap without leaving a visible wedge of space.
Extending cabinets above 10 feet can make the kitchen feel top-heavy, and anything over 12 feet becomes hard to reach even with a ladder.
Secure Extensions to Structure
Attach the extension to wall studs, not just drywall. Locate the studs with a finder, mark them, and drive screws through the back of the new cabinet into solid wood.
A horizontal cleat screwed into studs at the height where the new box will sit gives you a solid ledge to rest the extension on while you fasten it.
Screw the new cabinet to the old one through the side panels or the face frame so the two boxes move as one unit.
If the ceiling joists run parallel to the cabinets, secure a header board to the joists and attach the top of the extension to that board for additional support.
Frequently Asked Questions
How do I extend my kitchen cabinets?
Measure the gap between your cabinets and ceiling, then build or buy boxes that match your cabinet depth and the gap height. Fasten the extension boxes into studs, then screw through the cabinet sides to join them.
Can you put kitchen cabinets up to the ceiling?
Yes. You can build extension boxes on top of existing cabinets without removing what is already installed.
Do I need to remove my existing cabinets?
No.
Extensions sit on top of the cabinets already on the wall and attach to both the studs and the existing boxes. Some installers remove cabinets temporarily to make the work easier, but most projects leave them in place.
Can you add upper cabinets above existing cabinets?
Yes. Build matching cabinet boxes sized to fit the gap, then set them on top of the existing cabinets and screw through the back into wall studs.
How do you fill the gap between kitchen cabinets and ceiling?
Build a facing or cabinet boxes that match your existing cabinetry, then finish the top with crown molding.
The new section can be closed storage, open shelves, or just a facing with no interior if you only want the finished look. Crown molding fills a narrow gap without taking on a carpentry project.
What’s the cost of extending kitchen cabinets to ceiling?
DIY materials run about $2–3 per square foot for facing boards, $25–35 per gallon for paint, and around $40–50 per cabinet door if you add fronts to the extension.
A pro can frame and hang the boxes in one or two days; cost climbs with the linear feet you cover and how much trim and finishing you want.