
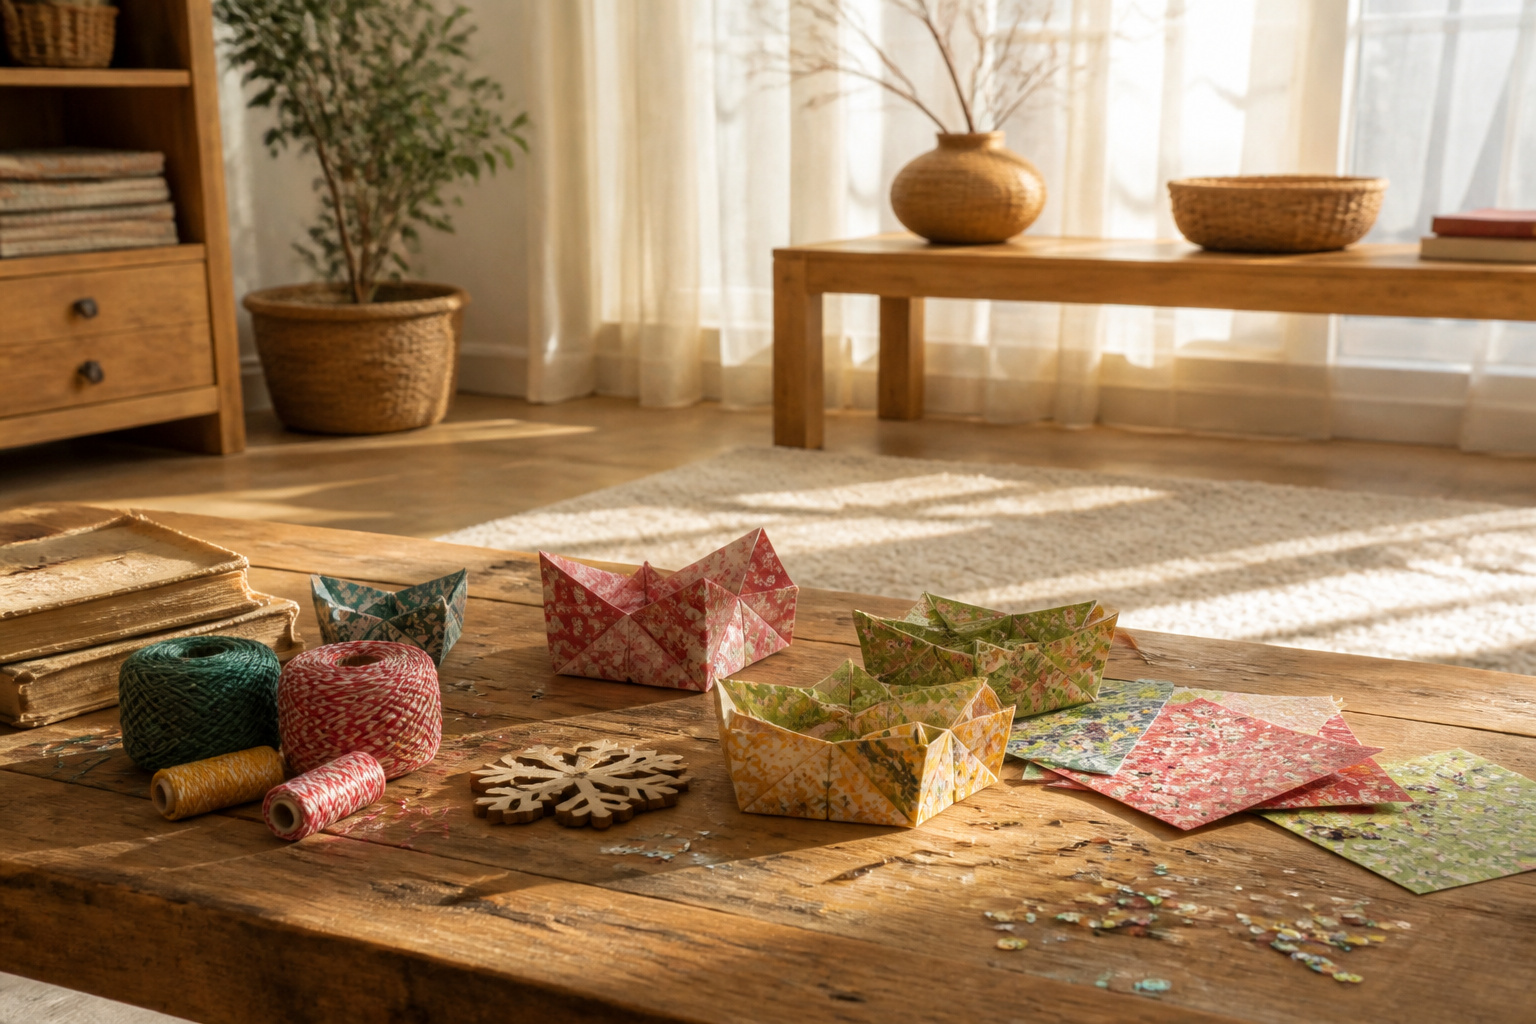
Easy Christmas crafts for kids are paper and pantry projects that actually finish in an afternoon instead of dragging into evening.
The difference is knowing which materials hold up before you start: printer paper springs open on origami star bowls, so 80-lb cardstock is what makes the fold stay.
A single square turns into a candy dish in ten minutes once a child has the sequence down, and they will want to make a dozen.
Easy Origami Star Bowl
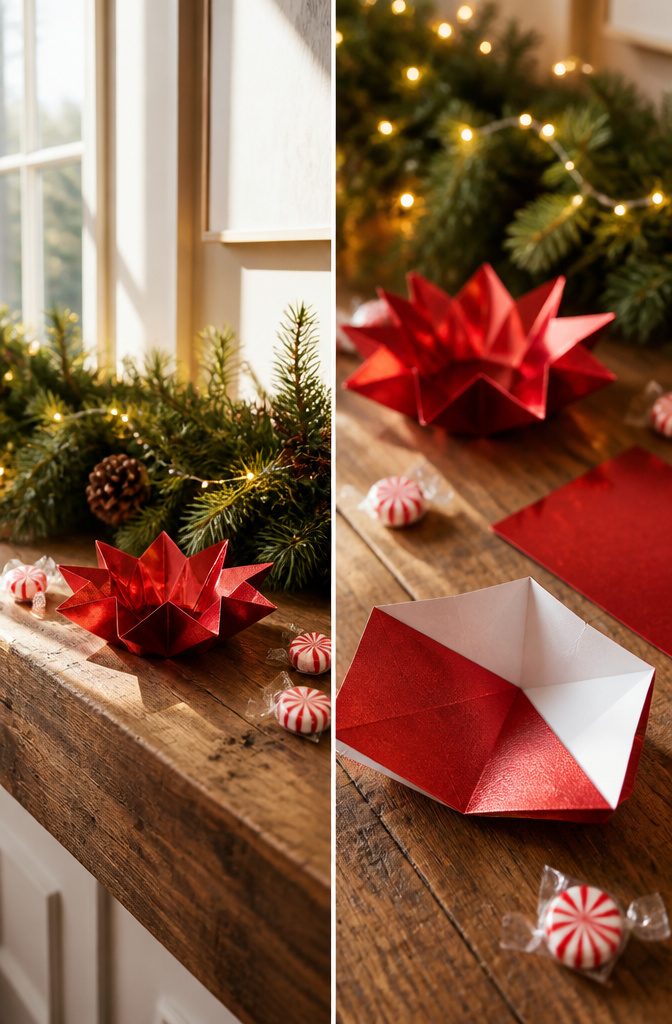
A single square of paper, folded right, turns into a shallow bowl that sits on a mantel or holds a few peppermints.
The process is straightforward: a diagonal crease, a couple of reverse folds to raise the sides, and the corners tuck underneath to form the base.
Printer paper is too light and will spring open; 80-lb cardstock or a sheet of origami paper holds the shape without bulging.
Kids can make these in ten minutes once they have the sequence down, which means they will want to make a dozen.
The finished bowl works for candy, a single bauble, or nothing at all if they just like the look of stars nested along a windowsill.
A metallic or printed paper reads as Christmas; plain white with a red interior fold line looks clean enough to leave up past New Year’s.

【PACKAGE INCLUDED】:1080 sheets origami stars paper in 10 different beautiful colors for paper arts crafts kids. You can fold total 1080 paper star strips. Perfect for any DIY project, holiday decorations, school teaching, have fun with your origami talents.

Enough Quantity& There are 540/520/136/50 sheets of star origami paper strips, and there is enough quantity to fill star-shaped bottles. It is wonderful to write notes to your friends on the star paper strip.

Paper Santa Lanterns
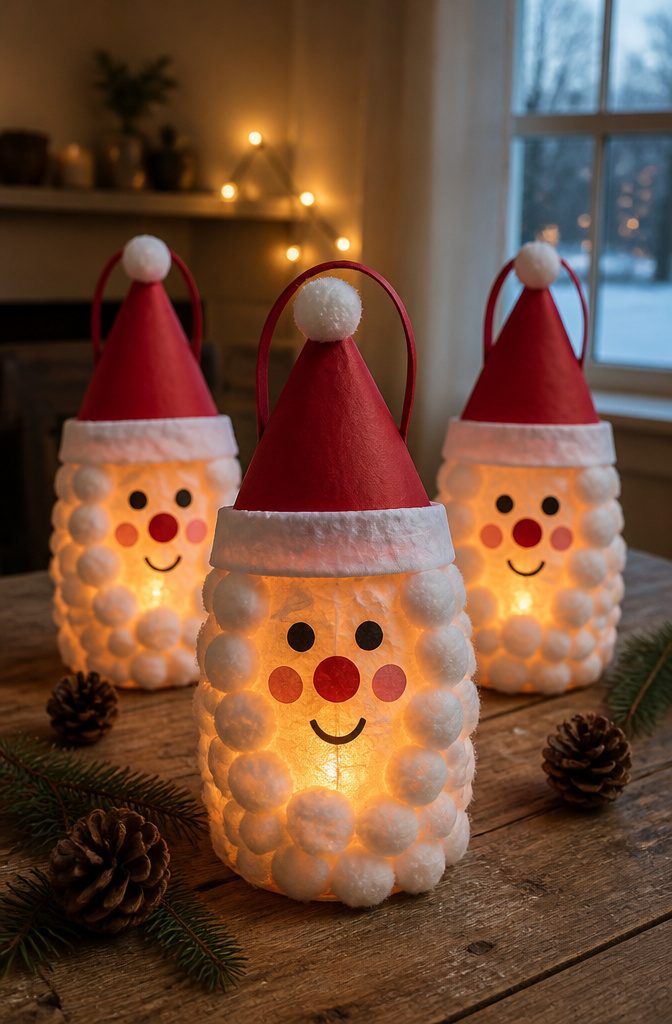
Paper Santa lanterns give a tabletop or mantel that warm, flickering glow without the risk of open flame near little hands.
The trick is building the cylinder so the face sits at the height where the tea light will sit, not dead center on the strip, because the light pools upward and the beard will disappear if the features are too high.
I start with a rectangle of heavy cardstock, maybe eight inches tall, scored at each end for a clean overlap seam.
The face goes on after the flat sheet is decorated but before it is rolled: cotton-ball beard at the bottom edge, eyes and nose above where the light will rest.
A few snips at the beard edge let the paper curve without buckling.
For the light source, battery-operated tea lights are the only sensible choice. The paper is thin, the glue is paper glue, and a real flame turns this from a craft into a hazard.
The little LED ones cost next to nothing, run for hours, and can be switched off through the chimney hole with a chopstick. My daughter learned that last part herself after watching me fumble the first one.

Complete Set for Easy Hanging: Get a set of 24 warm white lantern lights, each with a string for easy hanging anywhere; Each light includes 2 CR2032 batteries for up to 36 hours of illumination; Perfect for creating a warm, inviting atmosphere with minimal maintenance

🎁 【Complete Decoration Set】---Includes 12 assorted white paper lanterns in 4 sizes (6, 8, 10, 12 inches), 12 battery-powered small LED lights, and a 54-yard roll of clear fishing line. Unlike other kits, our paper lantern provide everything needed for immediate setup, saving you time and money on extra accessories.

【Complete Value Pack】20 paper lantern led lights with built-in batteries +60 Extra Batteries(20 sets:3 x 1.5V LR41).(Note: As these lights are battery-powered, each light’s brightness will gradually dim after approximately 2-3 hours of continuous use. Please review this detail before purchasing to ensure it meets your needs)
3D Paper Christmas Gnomes
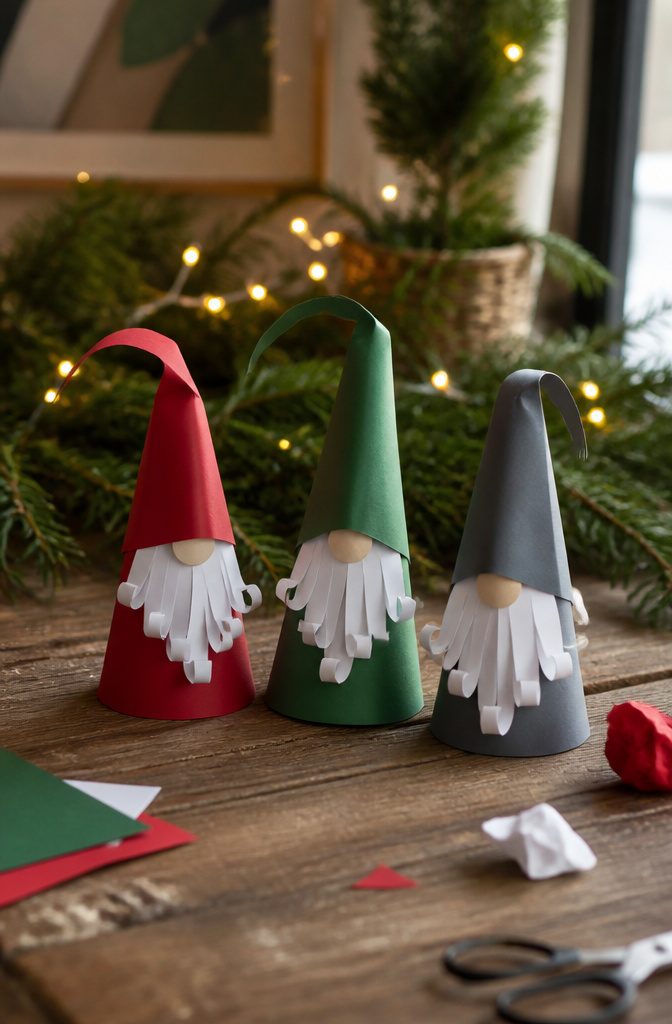
Layered paper gnomes stand up on their own without glue tabs or slots, which is what makes them worth the extra cutting. The body is a simple cone, rolled from a half-circle of cardstock and taped inside.
What gives the figure its shape is the beard, cut from an arc of white paper and curled under with the edge of scissors so it fans forward, and the hat, a separate cone with a wide brim that gets the same curl treatment.
The 3D effect comes from that tension, not from folding scores or interlocking pieces.
A dab of glue at the back of the beard and the point of the hat holds everything to the body while the curls keep the parts proud.
Cardstock under 65 lb will sag by day two, so buy the heavier pack even if it costs a dollar more. My first batch used standard weight, and by morning the hats had wilted like old lettuce.
The curls themselves are the step kids want to do, and the only place the craft can go wrong: too tight and the paper creases, too loose and the figure looks like a flat collage.
Two or three practice arcs from scrap paper settle the motion.

Long Battery Life: Each LED tea light uses a CR2032 button cell which is very efficient and easy to buy online or from local store. Last about 200 hours with a new battery. Batteries Included

1.LONG BATTERY LIFE: Each LED tea lights use a CR2032 button cell which is very efficient and easy to buy online or from local store. Last about 200+ hours with a new battery. Batteries Included

VALUE SET FOR LARGE DISPLAYS: This bulk pack includes 48 ivory wax-look tea lights with a warm white flicker with pre-installed 240mAh CR2032 batteries, ready to glow right out of the box; each provides 200+ hours of light—about 40 times the runtime of a typical 5-hour wax tea light—helping cover wedding receptions, memorial tables, candlelight vigils and formal banquets with fewer battery changes
Light Up 3D Paper Christmas Trees
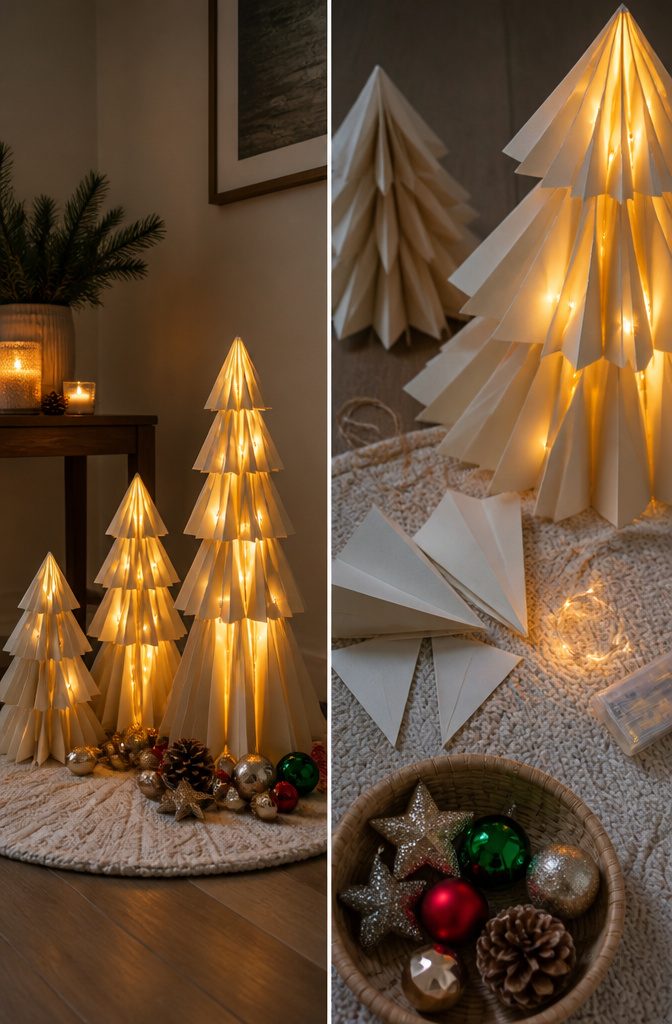
A folded paper tree that lights up from inside starts with a single slit down the center of two identical tree shapes.
Cut the slit from the bottom edge to the midpoint on one piece, from the top edge to the midpoint on the other.
Slide them together at right angles and the slots lock the whole form into a standing cross shape without glue, tape, or drying time.
The hollow center hides a string of battery-operated fairy lights. Tuck the battery pack flat under the trunk so the weight anchors the tree, then feed the wire up through the open seam where the two pieces meet.
Warm white bulbs glow through the paper like a tiny lantern; colored ones read more festive but throw less actual light, so use warm white if the glow matters more than the theme.
Cardstock holds the fold creases cleaner than construction paper, but anything heavier than printer paper works.
A cereal-box grade cardboard still scores and folds with a thumbnail run along the edge before bending. The trickiest part is cutting both slits to exactly half the height.
Too shallow and the pieces wobble; too deep and the top splits open. I mark the midpoint with a pencil dot before cutting, then check the fit before any lights go in.

Create 8 unique handmade holiday cards featuring charming festive gnome scenes.

【Unleash Your Creativity】Dive into the festive spirit with our 3D Christmas Fabric Poke Art Kit! This adult needle punch kit allows you to create stunning winter wall hanging decor that brings the joyful ambiance of the holidays right into your home.

Bulk DIY Christmas Gnome Craft Kits: This pack provides materials for creating 24 peel-and-stick Christmas gnome ornaments. The kit includes 24 gnome-shaped foam bases, 180 Christmas-themed foam stickers spread across 24 sheets, 24 foam stickers for gnome beards, 72 foam stickers for gnome noses and hands on 4 sheets, 36 glitter snowflake and star foam stickers, 2 sheets of jewel stickers, 24 satin cords for hanging, 24 cellophane bags, 24 twist ties, a step-by-step guide, and 24 gift stickers.
Victorian Paper Toys
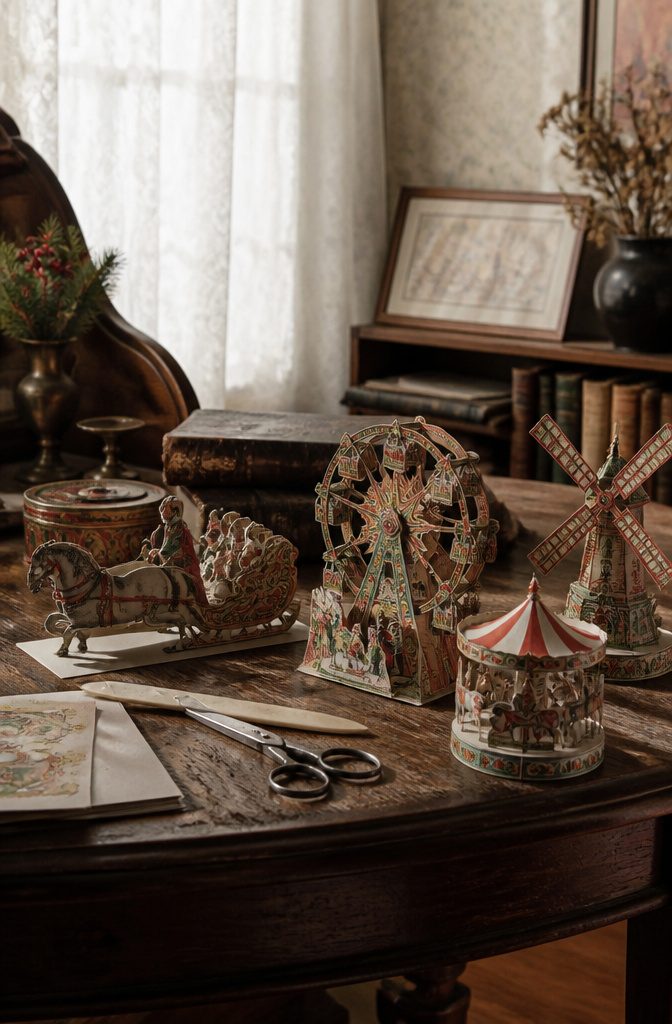
Victorian paper toys rely on a simple mechanical trick that still feels like magic.
A folded card or circular wheel hides a second image beneath slats or inside a pocket, and pulling a tab makes the scene change: a calm face becomes a laughing one, or a bare tree sprouts ornaments.
The mechanism is just angled folds or a spinning disk viewed through narrow slots.
What makes these better for older kids, around eight and up, is the precision required. The slats must be cut evenly and the pull tab glued exactly center, or the illusion breaks.
The Victorian era loved this kind of parlor entertainment, and Christmas versions typically showed a snowball fight, a candlelit window, or Father Christmas arriving through a door that actually opened.
Reproducing one starts with a printed template, heavy cardstock, an exacto knife, and a bone folder for crisp creases.
The cutting takes steady hands and the better part of an afternoon, which is why younger children usually abandon it halfway through.
A patient older child, though, gets the payoff of a toy that actually does something, not just something to hang. The finished piece folds flat to mail, which may be its most practical Victorian feature.

Premium Quality & Versatile Use: This heavyweight 85lb/230 GSM white cardstock (8.5 x 11) is ideal for professional printing, crafting, and invitations. Its acid-free, archival-safe material ensures durability for scrapbooking, DIY cards, writing, drawing, invitation and business documents.

[HIGH QUALITY]: Our white cardstock 8.5 x 11 is made from heavyweight 85 lb (230 GSM) offset paper with a smooth matte finish, and even ink absorption and measures 11 inches x 8.5 inches, Cardstock paper is perfect for writing, drawing, doodling and creating fun and unique covers.
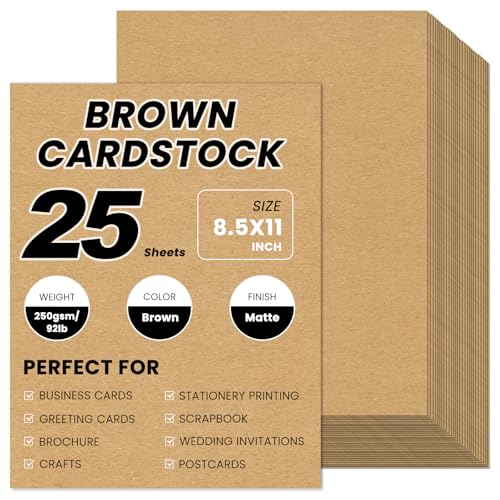
【Measure and Package】You will receive 25 sheets premium brown cardstock paper, measuring 8.5 x 11 inches and weighing 92lb/250gsm. Sufficient number providing ample supply for multiple projects or bulk printing needs.
3D Paper Bag Star
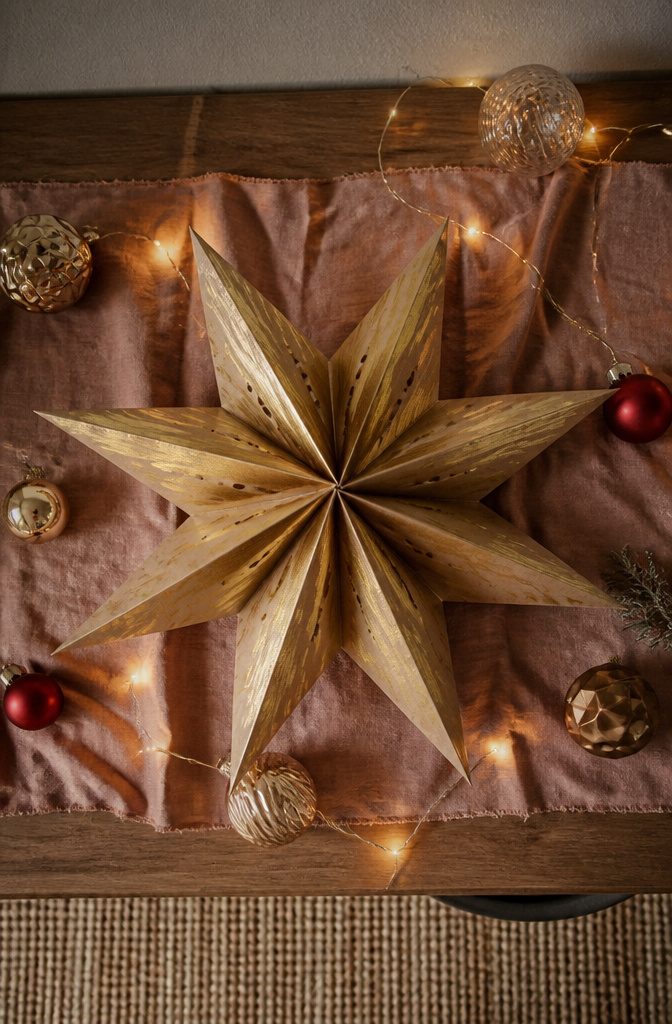
The first time I tried a paper bag star, I stacked eight lunch bags and glued every edge. The thing opened about two inches and sat there like a sad accordion.
Too much glue, wrong spots. What actually works is a thin line of white school glue down the center seam of each bag, from the open end to about an inch above the bottom.
Stack them so every seam lines up, press the stack under a book while it dries, then cut the closed end into a point. A standard lunch bag, roughly 5 by 10 inches, fans out to about a foot across.
Smaller bags work too, though the star gets fragile under four inches. Snip the tips of the points if you want softer edges, or leave them sharp.
My daughter painted ours with metallic acrylic after we opened it, which works better than painting flat bags because the ridges catch the light once the star is fanned.
The glue stays on that center seam only; touch the side edges and the layers stick together instead of flaring.

Abundant Quantity & Vibrant Color Selection: This star origami set includes 1030 paper strips in 27 bright, fade-resistant colors—from vivid reds and blues to soft pastels. It provides enough materials for large-scale crafts, long-term use, or sharing with friends and classmates.

Abundant Crafting Supply: Get creative with 520 vibrant star paper strips, perfect for all your DIY projects and artistic endeavors.

COLORFUL ART OF CAPTURING WISHES: Featuring 540 sheets of 7-color gradient blue and purple and 400 sheets of star models, the 940pcs star origami set offers colorful options to express your personality and emotions. Each hand-folded lucky star is a symbol of good wishes for your friends and family, whether as a gift or for your own collection, it can convey love and hope.
Giant 3D Snowflake
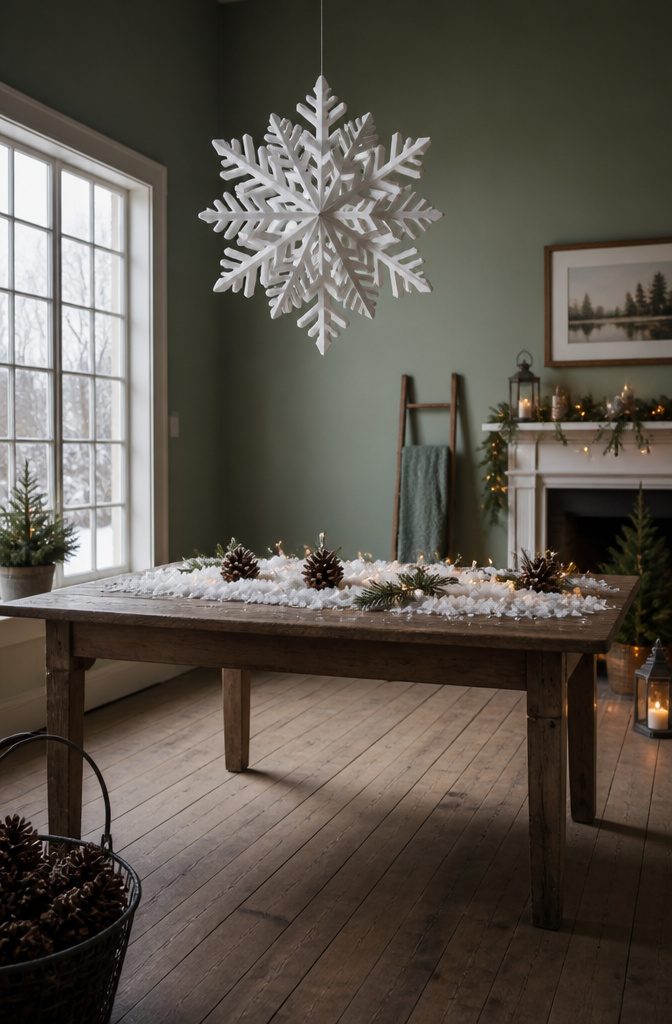
A single sheet of printer paper makes a six-pointed arm, and six of those arms lock together into something that fills a doorway.
The trick is the slot: each arm gets one cut halfway up the center fold, and the pieces slide into each other at the middle so they stand away from the wall in a shallow dome.
I tried this first with standard copy paper and tape, which held up for about two hours before the arms sagged.
Card stock changes everything. The heavier paper keeps the points rigid, and the slots grip tight enough that you can skip the tape entirely if the fit is snug.
The scale is what sells it. At twenty inches across, the geometry actually reads from the floor.
Hang it where light hits from the side, not flat against a wall. A corner near a window, or centered in an open archway, lets the shadow become part of the shape.
My daughter’s hung three from our living room ceiling at staggered heights, low enough that adults duck slightly, which makes the room feel like a set piece rather than decoration.
Cutting six identical pieces matters more than perfect scissors. A half-inch difference in length throws the whole thing off balance, so I fold and cut all six sheets together in a stack, then separate them for the slot cuts.

▶HIGH QUALITY LED PAPER LANTERN LIGHT◀ - The use of high-quality plastic that are non-toxic and tasteless will not cause harm to the human body. And high-brightness bright led light can shine the whole paper lantern.

PAPER LANTERN SET INCLUDED- White party decorations set including 6 pieces of 10 inch paper lanterns, 6 pieces of 12 inch paper lanterns, 12 pieces of battery operated mini LED lights, set comes in white colors

Value Pack: you can get 30 pieces of Christmas luminaries bags and 30 pieces of flameless candles in the package, the luminary bags are designed in 6 styles, including Christmas tree, truck, cute snowman, hanging Christmas ball ornament, snowflake, Santa Claus and more classic Christmas elements, 5 pieces per design, ample quantity and rich styles can easily meet your decorative and share requirements
Classic Paper Snowflakes
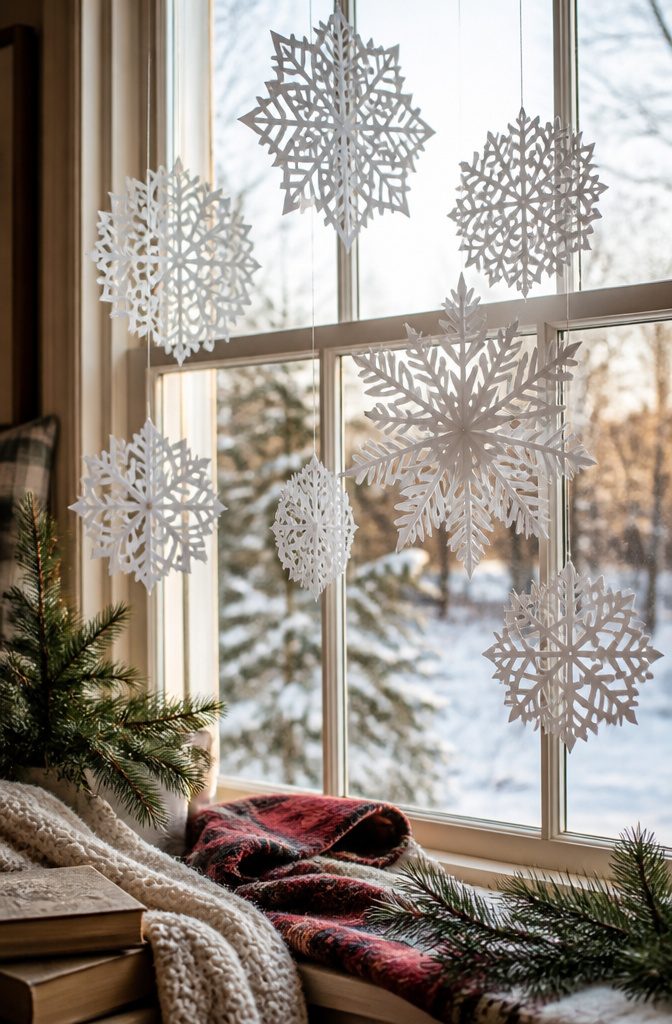
The six-fold symmetry of a real snowflake is what makes paper versions look right instead of like a star.
Fold a square of paper into a triangle, then fold that triangle in half twice more so you end up with six identical wedges.
A coffee filter already comes as a circle, which skips the first step and gives preschoolers a head start.
For cutting, a wedge-shaped notch along the outer edge becomes a diamond-shaped hole when opened.
Cuts into the long folded side create the lacy center. Younger kids do better with pre-drawn lines to cut along, either dashes you add with a pencil or a printable template they follow.
Scalloped edges are forgiving; straight lines that meet at sharp angles are not, because one slip tears the whole flake.
Thinner paper folds cleaner but tears easier.
Standard printer paper works for six-year-olds who are still learning pressure on scissors. Construction paper holds up to clumsy cutting but bulks up in the final folds and loses detail.
My own compromise is lightweight copy paper for kids under eight, and letting them open the flake slowly so the cuts don’t rip through at the last second.
LONG BATTERY LIFE: Each LED tea light uses a CR2032 button cell which is very efficient and easy to buy online or from local store. Last about 200 hours with a new battery. Batteries Included

LIFELIKE FLICKERING CANDLELIGHT: The warm white glow flickers like a real candle from across the room, while the melted-edge design adds realistic detail up close; create cozy candlelight across votive holders, table centerpieces, mantels and seasonal displays

【Flicking and Realistic】- LED tea lights has a realistic appearance and flashing and warm lights, which can create a romantic and warm atmosphere.
Toilet Paper Roll Snowmen
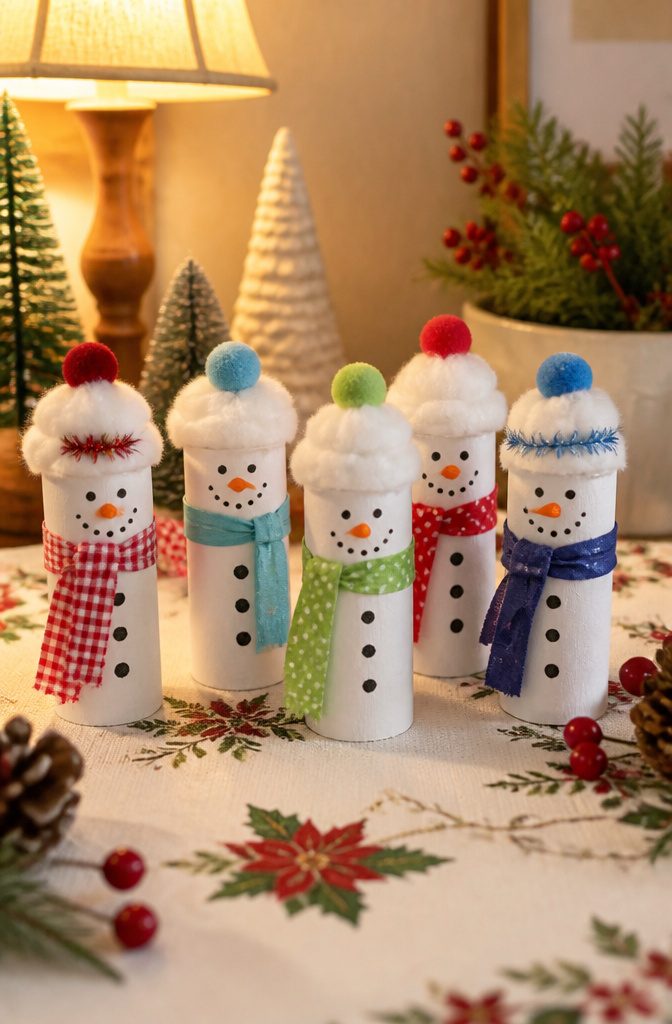
Cardboard tubes from toilet paper or paper towels make a solid base for snowman figures, though the raw brown surface needs work before it looks like anything a child would want to keep.
I have found that white acrylic paint covers in two coats, or wrapping the tube in plain white paper held with glue stick avoids the drying wait entirely.
The paper route also means younger kids can start decorating immediately, which matters when the whole project needs to fit inside an hour.
For the hat, a scrap of black felt cut into a brim and crown, or a painted bottle cap hot-glued on top by an adult, both read as "hat" without requiring precision cutting.
A strip of plaid fabric or even a length of yarn wrapped and tied makes the scarf. Paint the tube inside the rim too, or the brown cardboard flashes every time the snowman tilts.
Buttons down the front work best as stickers or marker dots; actual buttons need stronger glue than children manage alone and tend to pop off within a day.
A small triangle of orange paper for the nose and two dots for eyes complete the face.
The whole figure stands on its own if you leave the bottom flat, or you can cut a slight curve so it rocks slightly when pushed.

5 CHRISTMAS THEMES IN ONE CRAFT KIT: Explore five magical holiday paper-folding themes in one DIY Christmas origami kit, including Magical Holiday World, North Pole Magic, Gingerbread Candy Wonderland, Nativity-Inspired Christmas, and Woodland Cozy Christmas. Create festive characters like Santa, snowmen, reindeer, penguins, gingerbread friends, woodland animals, and more.

FESTIVE SANTA AND GNOME DESIGNS: This set of 12 features adorable holiday gnomes and Santa Claus. The special shaped 5D diamond art adds a sparkling 3D relief texture, making your handmade greeting cards stand out from traditional ones

Kit contents: 6 A4 sheets of Christmas gnome or Christmas gonk die-cut decoupage sheets for card making, 6 A4 sheets of garden scenes & card-making supports, 2 sheets of double-sided adhesive foam pads, instructions, and 12 matching classic white envelopes. The finished gnome and garden-themed Christmas card size will be approximately 4.7 inches tall by 4.3 inches wide.
DIY Christmas Fortune Tellers
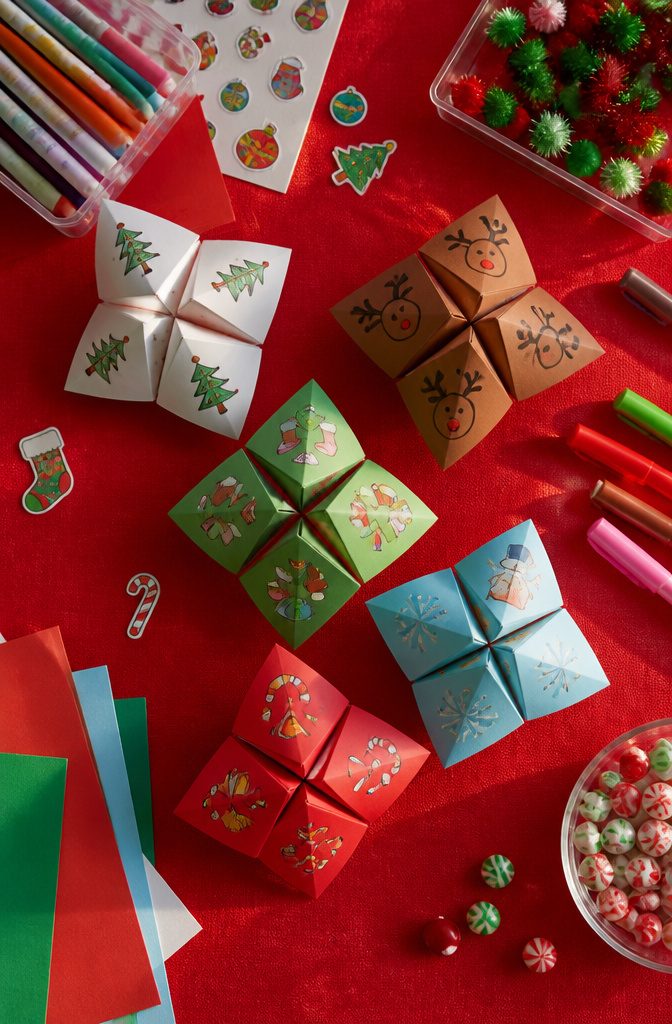
A folded paper fortune teller needs nothing but a square sheet and a few minutes, which makes it one of the most reliable crafts for a snowed-in afternoon.
The classic schoolyard shape, with its four corner pockets and eight numbered triangles underneath, adapts naturally to Christmas.
Rudolph works well because the corner flaps become his antlers once you draw on eyes and a red nose; Santa turns the whole thing into a beard and hat brim.
What goes under the flaps matters more than the outside. I have seen kids lose interest fast when the hidden messages are generic, so holiday-specific fortunes keep them playing: "You will eat three cookies before bed" or "Santa saw that."
Small stickers or a piece of candy tucked inside turn the reveal into a tiny event.
Kids use them two ways once the folding is done. The first is the traditional counting-and-choosing game, which younger children treat with surprising seriousness.
The second, which I did not expect, is as a puppet or character in improvised stories. The Rudolph version in particular gets held by the bottom point and moved around while the child narrates.

CARD SIZE: 8.5" x 11" letter-size cardstock sheets measuring 11.0 inches long & 8.5 inches wide provide ample space for booklets, report covers & brochures

【Colorful Cardstock】:Our construction paper assorted colors 50 Sheets contains 50 beautiful and popular colors to meet your handmade needs. You'll get 1 sheets of each color, including:Pink, Light Yellow, Bright Red, Light Green, Light Blue, Lavender, Golden, Lake Blue, Light Olive, Light Gray, Black, Crimson, Wine Red, Forest Green, Royal Blue, Lemon Yellow, Parrot Green, Hot Pink, White, Fluorescent Green, Fluorescent Yellow, Hot Pink, Silver Gray, Wine Red, Scarlet, Fluorescent Orange, Lilac, Orange, Light Green, Fluorescent Vermilion, Lake Blue, and so on.

【Matte Finish & Diverse Colors】This pack features 8 curated colors, each with 4 sheets, offering a balanced mix of light and dark tones across sage green, dusty rose, dusty blue, burgundy, terracotta, purple, yellow, and blush, warmly welcomed by crafters and hobbyists in the U.S. The simple and versatile palette suits all occasions and seasons. Made of heavyweight paper with a smooth double-sided matte finish and excellent ink absorption.
Christmas Cards
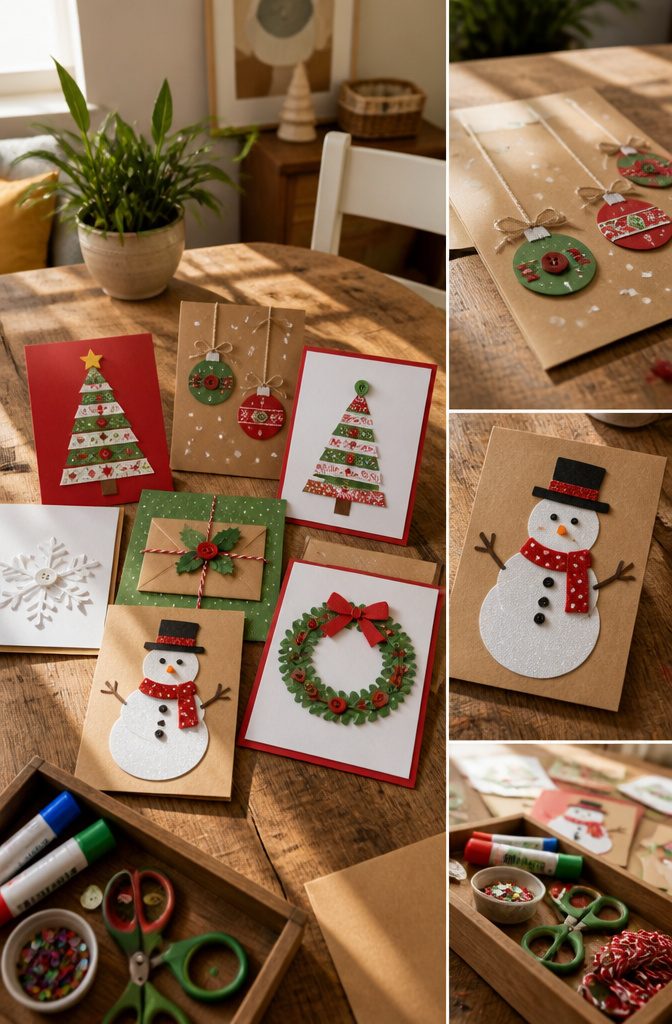
Handmade Christmas cards survive the weekend because the setup does the heavy lifting, not the technique.
Three approaches cover most ages without buying much: collage builds from scraps and cotton wool pads for the youngest hands, origami folds into penguins or trees for kids who can manage a crease, and recycled magazine pages layer into textured trees or gingerbread houses for anyone who likes scissors and glue.
The same few supplies stretch across all of them. Cardstock gives the base, double-sided tape or a glue stick handles assembly, and a small tray of sequins or buttons finishes the front.
Puffy paint and clear plastic lids turn into snowglobe cards if you want one standout piece on the batch, but that stays optional.
Covering a whole class list means drying time is the bottleneck, so the assembly line matters more than the design.
One station folds bases, the next applies the main element, the last adds faces or names. Glue stick work goes straight into a box; puffy paint or collage needs overnight drying, so those cards start Saturday morning and finish Sunday.
My own rule: skip anything requiring a hair dryer or baking, because twenty-four cards with a four-year-old already tests the schedule enough.
Popsicle Stick Crafts
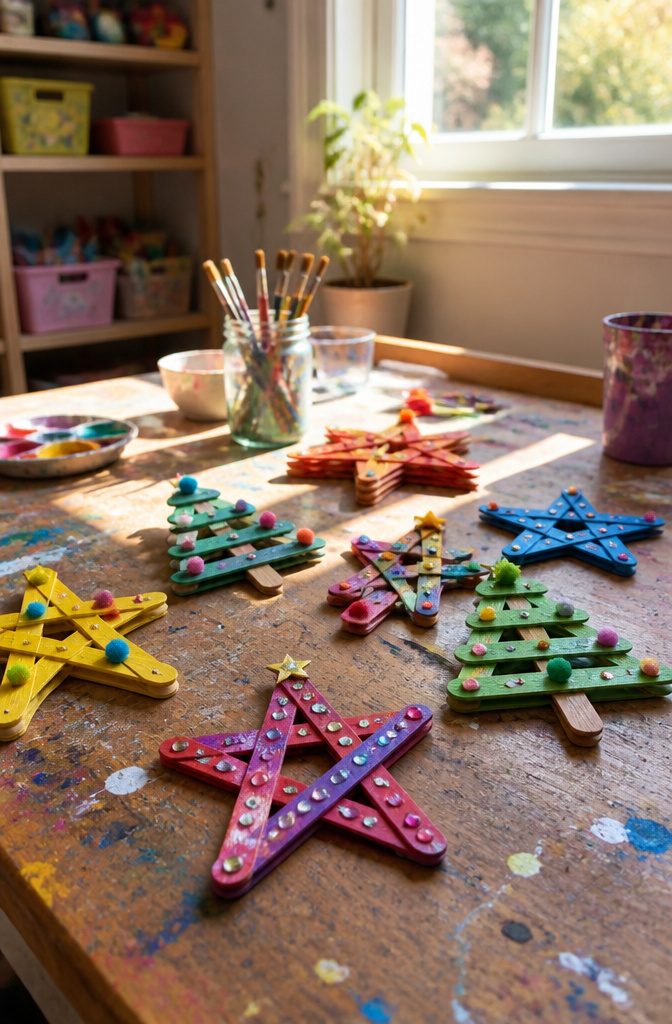
Wooden craft sticks earn their keep because they cost next to nothing and a bag of them survives multiple weekends. The flat shape looks limiting until you start notching the ends and gluing them into triangles or hexagons.
Those joints dry fast with ordinary white school glue, though a dot of hot glue at the center of a joint speeds things up when small hands are waiting.
Paint choice matters more than you’d guess.
Tempera cracks and flakes on bare wood; acrylic craft paint grips better and covers in one coat. A quick brush of Mod Podge or thinned white glue over the finished piece keeps the color from scuffing during tree storage.
The weight problem shows up fast. A six-point star built from full-length sticks wants to sag unless you glue a second triangle inside the first, rotated, to brace it.
Single-layer shapes work fine for flat garlands or gift tags, but anything meant to hang needs that cross-bracing or a center disk to keep its geometry.
I learned that the hard way with a reindeer whose legs slowly splayed until it looked more like a bison.
Christmas Ornaments
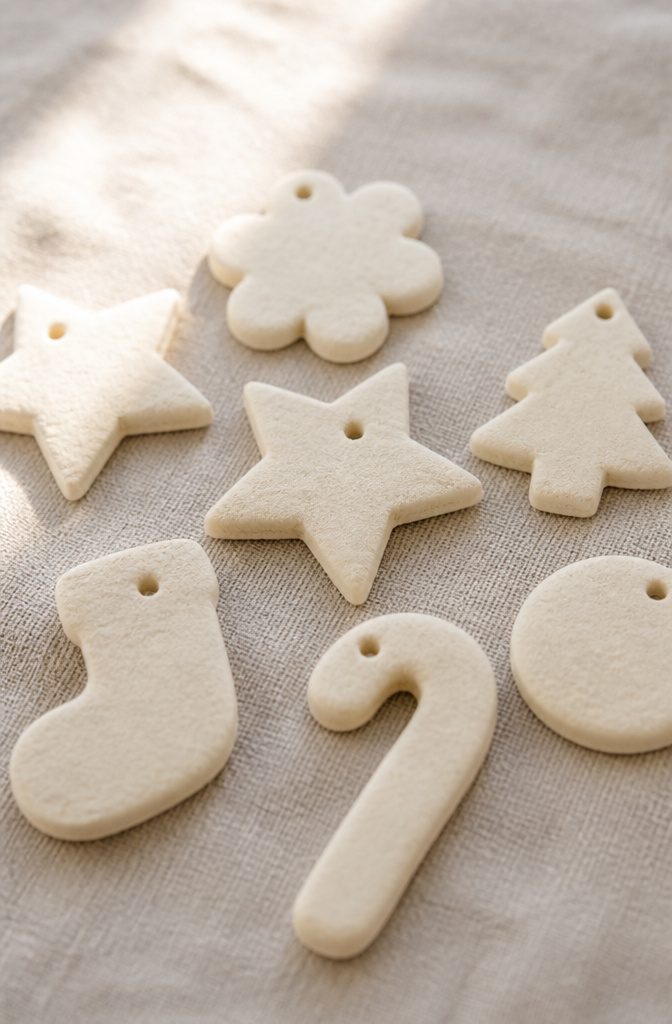
Salt dough ornaments look handmade in the best way, but the dough has to be fully dried or they grow mold in the box by next December.
I bake mine at 200°F for two to three hours, then let them sit out another day before painting. Acrylics hold color better than tempera, and a coat of clear spray sealant keeps fingerprints from smudging the finish.
For hangers, a drinking straw punched through the raw dough makes a cleaner hole than a toothpick, and the opening stays round after baking.
Ribbon looks festive but twine lasts longer; either way, knot the ends so the loop cannot pull through.
Felt shapes stitched with a blanket edge survive drops and storage without chipping, and a small button or bead sewn at the top is stronger than glued-on caps.
Paper ornaments, even laminated ones, tend to curl in humid closets, so I keep those off the main tree and use them for garlands instead.
Christmas Bookmarks
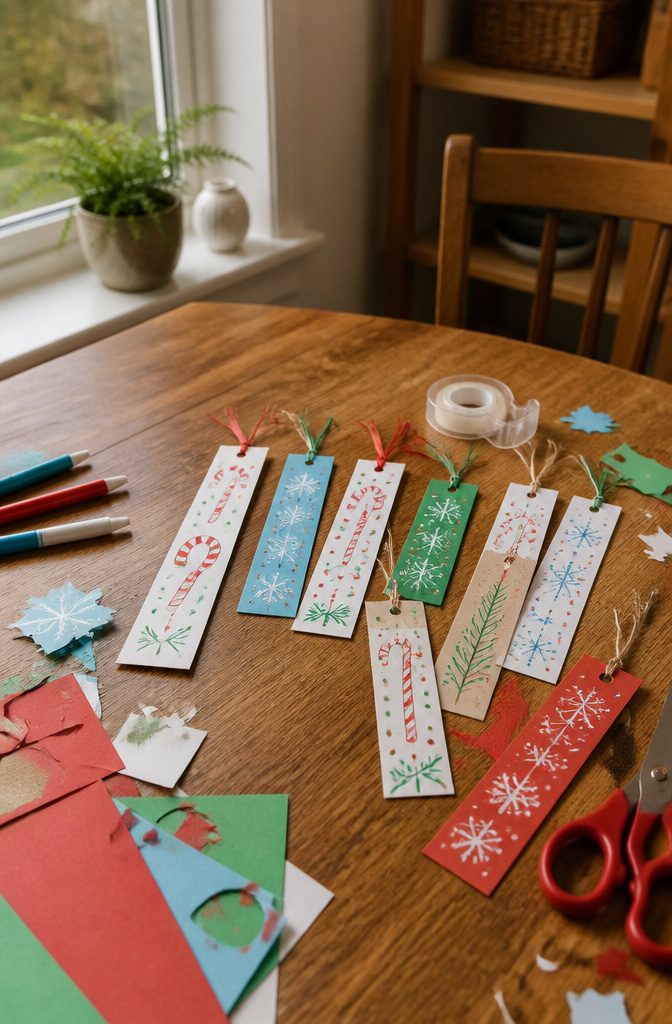
A flat paper bookmark lands right in the sweet spot for kids who already have a book in their hands. The project takes maybe twenty minutes, and the finished piece actually gets used instead of cluttering a shelf.
I like to start with cardstock rather than plain printer paper; it holds up through a few weeks of bedtime reading without curling at the corners.
The size matters more than most people think.
Two inches wide by six inches tall marks a standard paperback page without the top sticking out past the cover and getting dog-eared in a backpack. For hardcovers, you can push to seven inches and still stay tidy.
Laminating with clear packing tape is the move that saves these from the recycling bin. Run a strip across both sides, press out bubbles with a gift card, and trim the edges with a slight overhang so the seal holds.
A bookmark that survives juice spills and backpack crumples gets kept, and that matters more than glitter ever did.
Simple designs, a tree or a candy cane in marker, tend to get finished. Overly ambitious scenes usually end up half-colored and abandoned on the kitchen table.
Christmas Cookies

Baking sits right on the edge of what counts as a craft, but the decorating is where kids take real ownership and the line stops mattering. The question is how much of the process they actually run.
Pre-made sugar cookies from the grocery bakery save the whole first hour. Kids as young as three can squeeze icing tubes, press sprinkles, and place candy eyes with zero help.
The tradeoff is the price, usually three to four times the cost of scratch dough, and the cookies themselves are often blander than what comes out of a home oven.
Making dough from scratch pulls the activity back to age six or seven, when measuring and stirring become genuinely useful rather than tolerated make-work.
A stand mixer helps, but a bowl and wooden spoon work fine if you accept that flour will reach the floor.
The younger ones still get a job: cutting shapes with cookie cutters, which is physical and satisfying and hard to mess up.
The sugar-fueled disaster part is solvable. Raw dough is the enemy, so I set a hard rule: no bowl-licking until the last tray is in the oven, by which point the batch is small enough that the risk is minor.
Decorating happens after baking, never during, because warm cookies melt icing into puddles and trigger the kind of frustration that ends the afternoon early.
One small bowl of toppings at a time prevents the dump-everything-on-one-cookie impulse. The result is more edible, and the kids stay busy for the full two hours instead of crashing at minute forty.
DIY Snowglobes
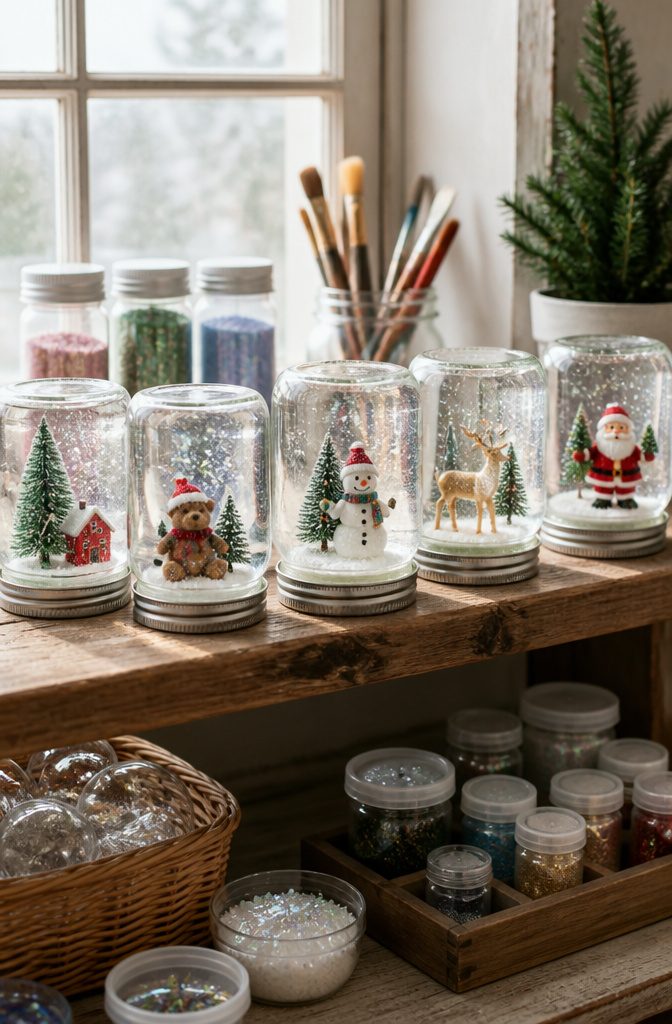
The jar matters more than most people think.
A straight-sided mason jar with a smooth interior wall lets the glitter fall slowly instead of clumping in the corners. I learned that the hard way after trying a rounded jelly jar where everything sank to the bottom in seconds.
Glycerin is what slows the fall. Water on its own sends glitter straight down; a spoonful or two of glycerin mixed in gives that drifting snow effect kids want to shake and watch.
Too much and the liquid turns syrupy, so start small and test before you seal anything.
For the figurine, waterproof resin ornaments hold up where clay softens and paper dissolves. A small plastic deer or snowman from the craft aisle, checked for holes or hollow spots, usually survives years of shaking.
Sealing against leaks means more than screwing the lid tight. A ring of waterproof epoxy around the inside rim of the lid, pressed down while it is still wet, creates the actual barrier.
Turn the finished globe upside down on a paper towel overnight before you trust it near a couch or carpet.
Pinecone Christmas Trees
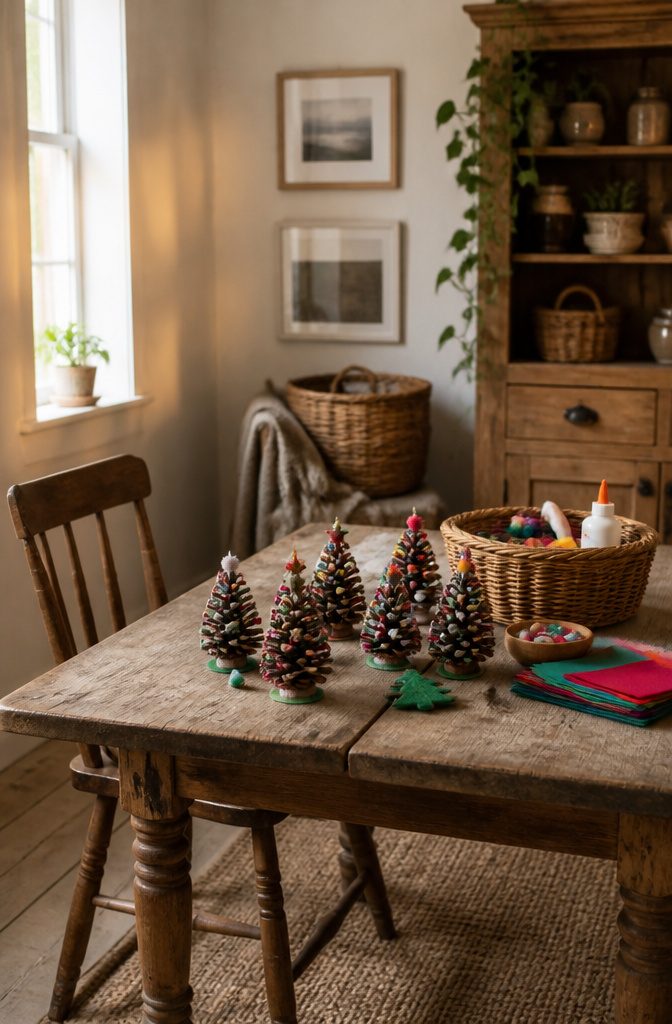
Pinecones with wide, open scales make the best trees because the silhouette already reads as branches.
A plain white craft glue works for attaching sequins, pom-poms, or bits of felt; the scales give you a natural ledge to press against while it sets, which saves a lot of frustration.
Tacky glue grabs faster if your kids are impatient, though it costs more and dries with a faint yellow cast that shows on pale decorations.
The real headache is sap. Cones collected fresh from the ground in late fall often weep sticky residue that will not hold glue and gets fingers messy enough that children abandon the project.
Dry cones in a warm oven for half an hour, or buy a bag from a craft store where they have already been baked and cleaned.
The heat hardens any remaining sap into a brittle glaze you can flake off with a fingernail.
A small wooden bead pressed into the flat base with hot glue gives you a trunk, though a blob of air-dry clay shaped around the core works fine too and keeps the whole thing kid-handled.
I skip the trunk entirely when time is short; the cone stands on its own if the base sits level.
Felt Chain Garland
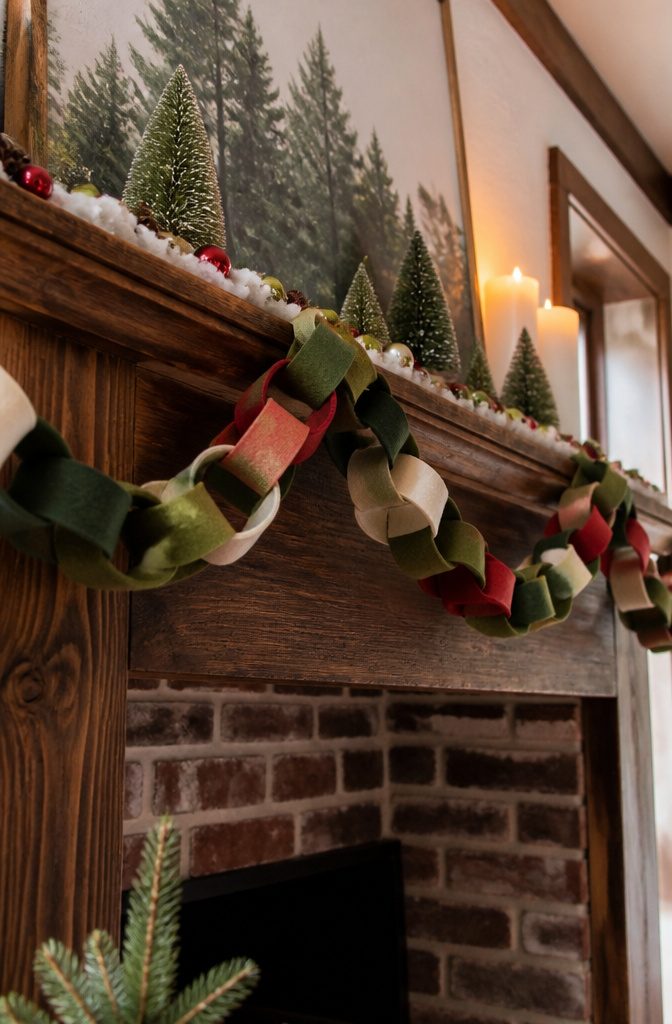
Paper chains never really left, but felt gives the same idea a weight that paper never manages.
Felt strips hold their shape through seasons of storage and do not tear at the staple or split along a crease the way construction paper does after a month.
The loop-and-glue construction stays identical: overlap the ends of a strip into a ring, hot-glue the seam, thread the next strip through and repeat.
A child old enough to manage scissors can cut the strips from a yard of craft felt, and the soft edges forgive rough cuts in a way cardstock does not.
Against a wall or mantel, the finished garland hangs in low loops rather than crisp paper angles, which reads more like something found in a textile shop than an elementary classroom.
The matte surface catches light evenly, so the color stays true in both morning sun and lamplight.
My own preference runs to alternating two tones, deep green and cream, in widths that vary slightly so the chain does not flatten into a stripe.
Stored in a shoebox, the same garland has come back out three years running with no creases to smooth and no torn links to replace.
Book Page Ornament
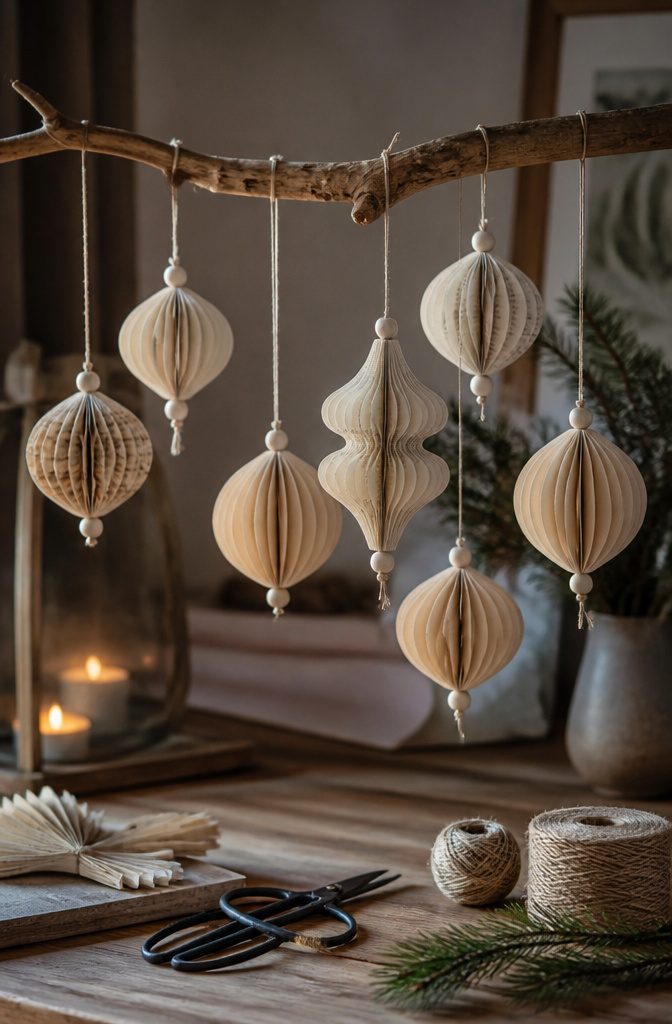
Book page ornaments sound fancy until you watch a seven-year-old fold one in front of the TV. The pages need to come from something thrifted or out-of-copyright, not your current nightstand reading.
Old dictionaries, damaged novels, and sheet music from estate sales all work; the paper is already yellowed and the type is small enough to read as texture rather than text.
The folding pattern is simple once you commit muscle memory to it. Each page gets folded into a sharp triangle toward the spine, then folded again so the point tucks inward.
Do this thirty or forty times around a circle and the shape becomes a geometric bloom, something between a lantern and a flower.
Glue is unnecessary if the folds are crisp; the tension of paper against paper holds the form open, which matters when you are trusting a child to hang it without destroying it.
A cluster of three or four at varying heights reads as intentional over a mantel or in a doorway.
Single ornaments work on the tree, though the paper catches light differently than glass and you notice it more from across the room than up close.
Window Drawings

White paint pens meant for glass are the tool to reach for here, not permanent markers or acrylic paint you already own.
The paint pen washes off completely with window cleaner once January arrives, which is the difference between a fun afternoon and a long scrubbing lesson.
Drawing at scale takes a little planning. A tree or snowman that looks fine up close turns into a smudge from the sidewalk.
Kids do better with a single large shape than with detail: a five-point star fills the pane and reads from the street, while a crowded nativity scene dissolves into scribbles.
Tape a paper template to the inside of the glass so they can trace the outline from the outside, then fill in with the pen.
Limited drawing confidence is actually an advantage. Bold, simple lines in white against dark glass look intentional; hesitant, wobbly ones still charm.
My own preference, having watched this go both ways, is to hand a kid one clear instruction: "Fill this whole space with one big thing." The results hold up better than the elaborate scenes they planned and abandoned halfway through.
Frequently Asked Questions
What are some easy Christmas crafts for kids?
Easy Christmas crafts for kids include origami star bowls, paper Santa lanterns with battery tea lights, 3D paper gnomes, light-up paper Christmas trees, Victorian paper toys for older kids, paper bag stars, giant 3D snowflakes, classic paper snowflakes, toilet paper roll snowmen, DIY fortune tellers, handmade Christmas cards, popsicle stick ornaments, salt dough ornaments, felt bookmarks, decorated cookies, DIY snowglobes, pinecone trees, and felt chain garlands.
Most use basic supplies like paper, cardstock, glue, and scissors, and many take under an hour to complete.
How can I make Christmas crafts with my kids?
Start with simple materials like paper, scissors, and glue, then follow the step-by-step methods in each project. For younger children, choose crafts with pre-drawn lines or minimal folding, such as coffee filter snowflakes or toilet paper roll snowmen.
Older kids can handle precision work like Victorian paper toys with slats and pull tabs. Set up assembly-line stations for batch projects like Christmas cards, and always use battery-operated lights rather than open flame for any lantern or illuminated craft.
What materials do I need for Christmas crafts?
Basic materials include paper in various weights, cardstock at least 65 lb for anything structural, scissors, white school glue, glue sticks, and acrylic paint.
Specific projects add items like battery-operated tea lights and fairy lights, cotton balls for beards, glycerin for snowglobes, pinecones, felt strips, popsicle sticks, salt dough ingredients, and mason jars.
Printer paper works for practice and simple snowflakes, but 80-lb cardstock or heavier holds shapes for bowls, gnomes, and standing trees without sagging.