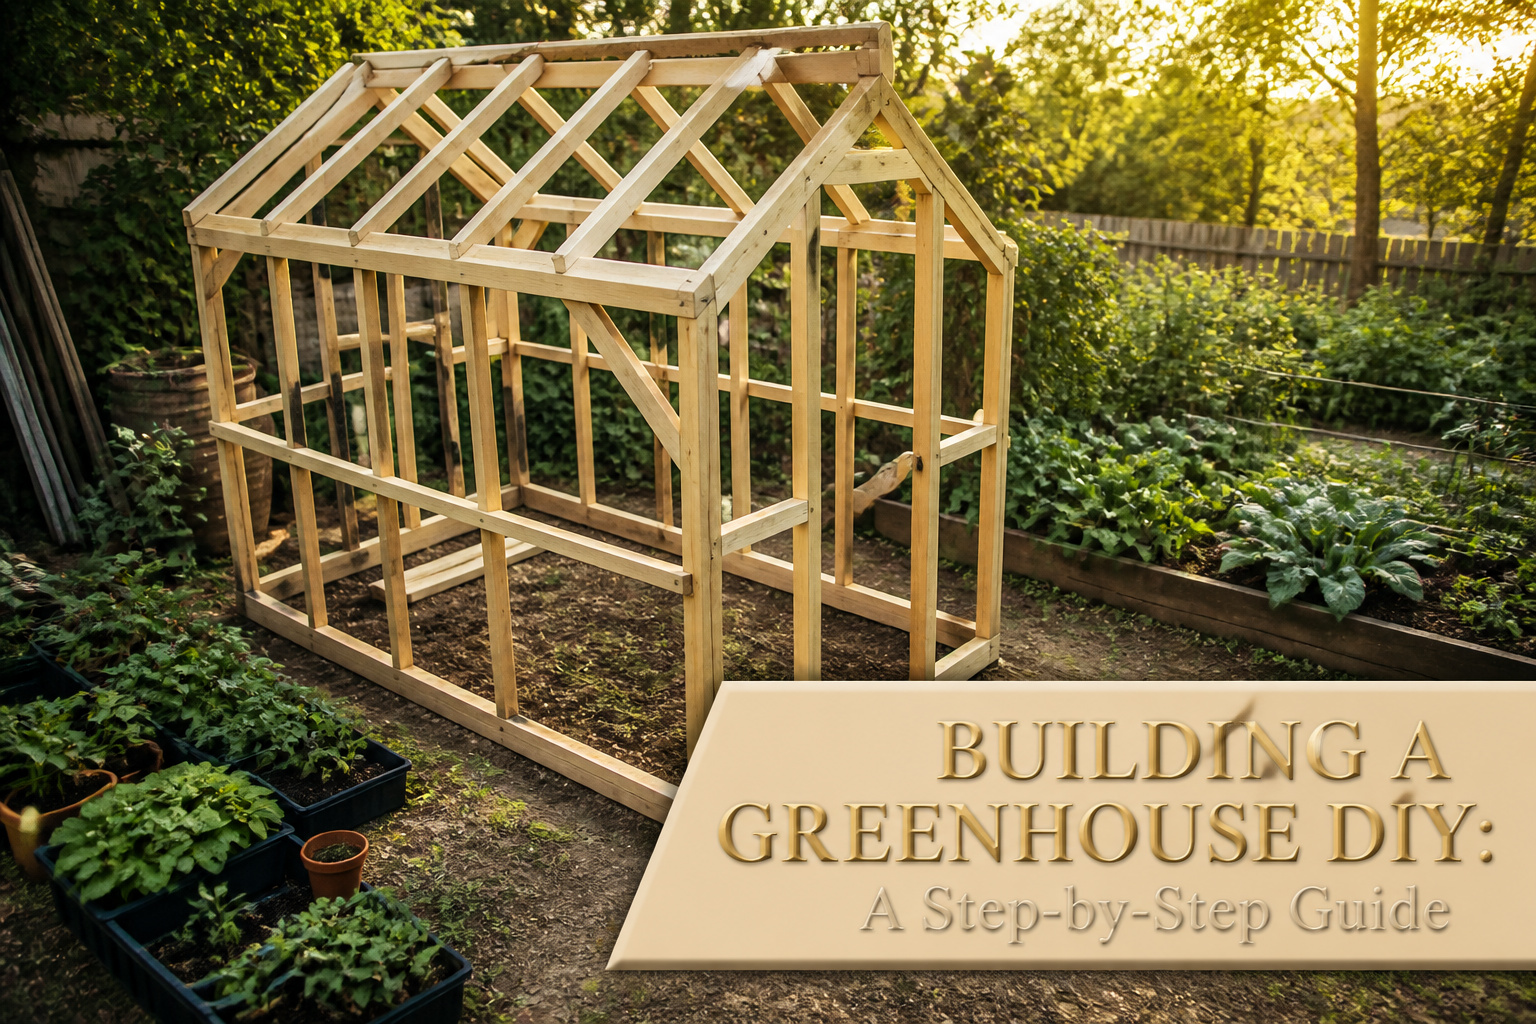
Building a greenhouse DIY means assembling a weatherproof frame and covering on your own property, usually over one or two weekends, for a fraction of what prefabricated kits cost. The catch is that a bright-looking spot at noon can drop into shade by midafternoon, and a call to your city zoning office takes ten minutes that separate a Saturday build from a slab you have to tear out. A six-by-eight-foot footprint holds enough vegetable starts for most beginners and keeps lumber costs within the $220 to $440 range that a simple PVC or wood frame actually requires.
Planning and Measuring
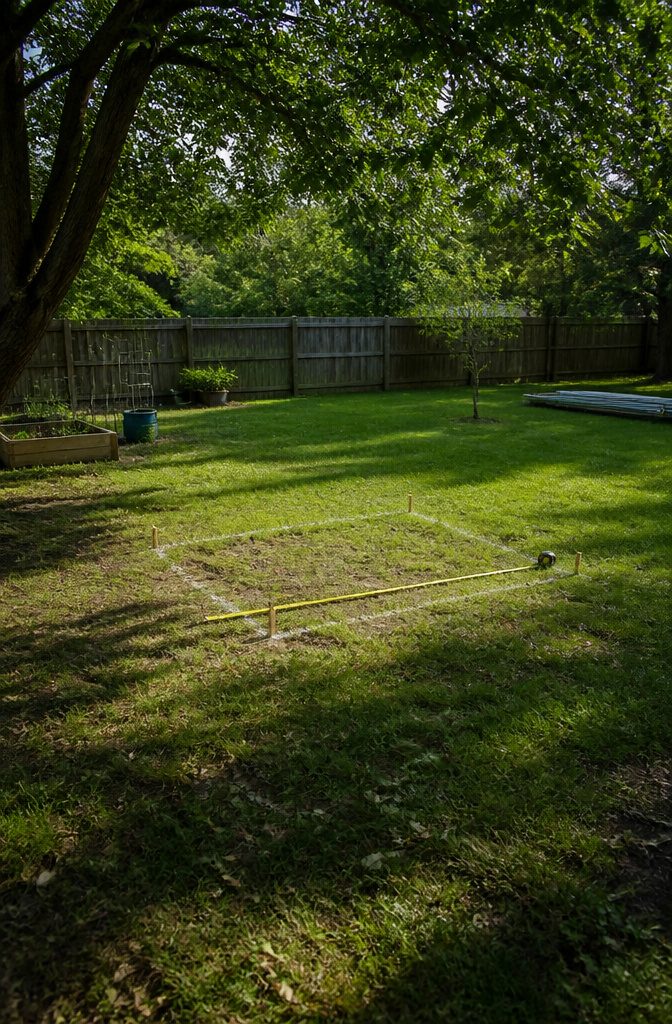
A six-by-eight-foot greenhouse is the footprint most beginners settle on once they map out what they actually plan to grow. That size holds enough vegetable starts and a few tomato vines without turning the yard into a construction zone, and it keeps lumber costs within the range most weekend projects allow.
Sunlight matters more than convenience. A spot that looks bright at noon can fall under tree shade by three in the afternoon, so I watched my yard through a full day before marking anything. Flat ground saves hours of leveling later, but the real mistake I almost made was ignoring the property line. Local ordinances often require a greenhouse to sit a fixed distance back, and in my case that minimum was 50 feet from the line. I had sketched the pad at 20 feet before checking, which would have meant either moving the whole plan or requesting a zoning variance after concrete was already poured.
Most small backyard greenhouses never trigger a permit requirement, but building codes vary block by block. A quick call to the city zoning office costs nothing and takes ten minutes. That ten minutes is what separates a Saturday build from a slab you have to tear out.

14MIL CLEAR VINYL TARP: Our 400g/m² Clear Tarpaulin is made of 14 mil Durable Heavy Duty PVC Vinyl.The clear design of the tarpaulin makes it an excellent choice for outdoor activities such as camping, picnics, or outdoor events where you want to enjoy the view while still being protected from the elements.Clear vinyl tarp allows light to pass through it .The sun shines through and gives us some much needed sunlight while protecting us from the cold

36 PCS Garden hoops for Raised Bed : Greenhouse Hoops frame widely used indoors and outdoors, great for the yard, vegetable garden, and garden raised beds. DIY Garden Hoops Grow Tunnel Kit works well to protect your plants, seedlings, herbs flowers,strawberry in any season gardening plant.Plant support for climbing plants,plant stakes for outdoor plants,Tomato support garden stakes.
Preparing the Site
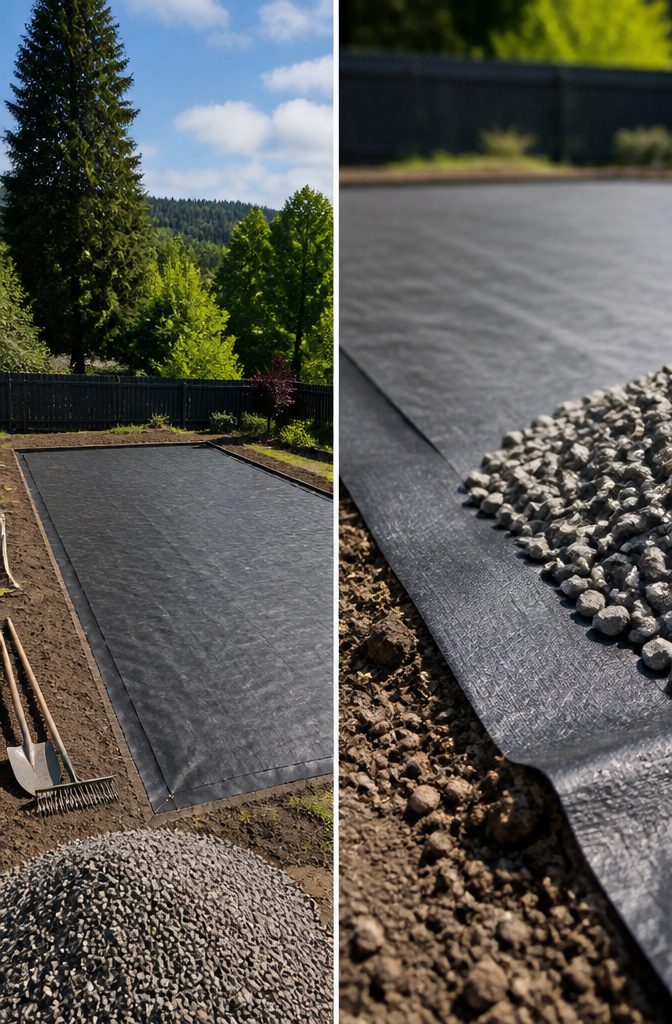
I tend to rush site prep because the frame and covering feel like the real project, but skipping it means weeds poking through the floor and water pooling where seedlings sit. The ground needs to be as level as possible, which can mean grading, bringing in soil, or digging down to even the footprint. For anything larger than a modest hobby structure, a permanent foundation of poured cement or stacked cinder blocks gives the frame something solid to sit on.
Once the grade is set, landscape fabric is the layer that actually stops weeds from finding daylight. I lay it over the bare soil before adding gravel or any surface material, overlapping edges by several inches so roots cannot sneak through a seam. The fabric also keeps the base from sinking into mud after heavy rain, which matters more than I expected when I first read about it. Removing debris comes first, obviously, but the real work is getting the slope right so water runs away from the structure instead of collecting against it.

Sturdy Wood Frame: Greenhouse built with premium wood and metal hardware for durability. Strong wind resistance and weight capacity ensure stability in various weather conditions

Sturdy Structure: The cold frame greenhouse is made of fir wood which is durable and sturdy, offers long-term reliable use. And the polish and cutting workmanship on this outdoor greenhouse is smooth, allowing painting and staining on it without any other process

Premium spruce wood frame construction:This heavy-duty outdoor greenhouse is built with high-grade natural spruce wood and reinforced hardware. Its solid structural design delivers exceptional wind and rain resistance, providing stable protection for your plants in backyard, garden, patio and lawn spaces throughout the year.
Building the Base
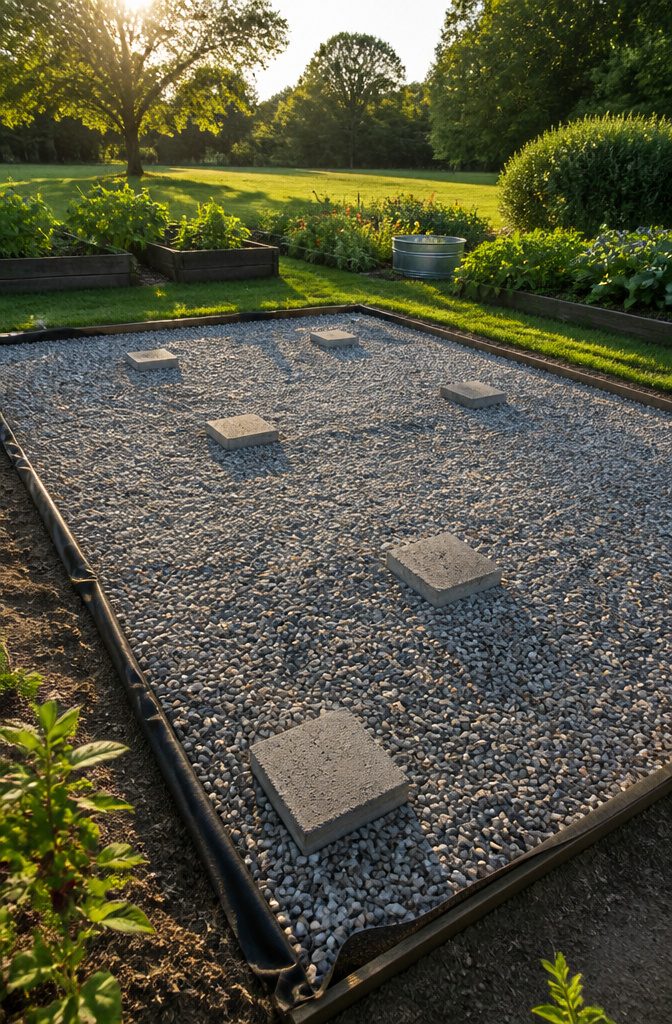
Gravel or deck blocks give a greenhouse the stability it needs without pouring concrete. A 40–80 dollar layer of gravel handles drainage and keeps the frame from sitting in mud after rain. Limestone screening works here because it locks together under pressure but still lets water pass through, though pea gravel or concrete are options if you already have access to them.
Deck blocks on paver stones will raise the floor above ground level, which some people want for stepping up into the space. The tradeoff is deciding before you set them: moving blocks after the fact means lifting everything you have already leveled. I have seen the regret in project diaries where the builder realized too late they wanted the entry flush with the yard instead. For a weekend build with a few hundred dollars in play, gravel spread over landscape fabric and leveled with a rake keeps the timeline honest and the budget intact.

Polycarbonate Panels: The greenhouse roof panels allow 80% light transmission into the greenhouse, which greatly benefits plant growth. Polycarbonate roof panels are different from traditional iron sheds as they are less prone to water seepage and provide ample sunlight for the plants
Polycarbonate Panels: The greenhouse roof panels allow 80% light transmission into the greenhouse, which greatly benefits plant growth. Polycarbonate roof panels are different from traditional iron sheds as they are less prone to water seepage and provide ample sunlight for the plants
Polycarbonate Panels: The greenhouse roof panels allow 80% light transmission into the greenhouse, which greatly benefits plant growth. Polycarbonate roof panels are different from traditional iron sheds as they are less prone to water seepage and provide ample sunlight for the plants
Constructing the Frame
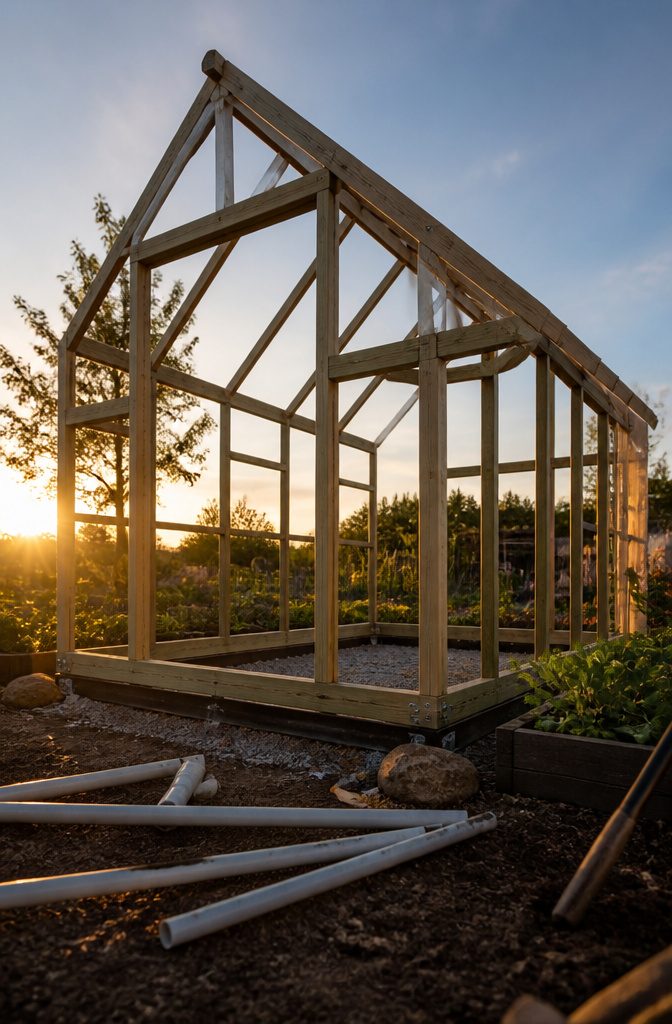
PVC pipe bends easily into hoop-house curves and the whole run of piping and connectors lands between $50 and $100, which is why so many first builds start there. The tradeoff shows up fast on a windy afternoon. EMT metal conduit costs a little more upfront but carries the same vinyl covering without the sway, and for anything longer than ten feet the stiffness matters.
Wood still wins for anyone who owns a saw already. Pressure-treated 2×4 lumber frames up square and true, and spacing rafters 16 inches apart gives you the ridge-line strength to hang a shade cloth or a small fan later. Cedar holds up longest if you can find it; otherwise seal every cut end with the same treatment you brush on the posts. Skip that step and the frame turns spongy where the posts meet the soil.
I have watched aluminum kits go up in half a day, and they look sharp in the photos. For a renter or a first homeowner working a weekend, though, the $220 to $440 total of a PVC or lumber build against thousands for commercial framing is the gap that actually decides it.
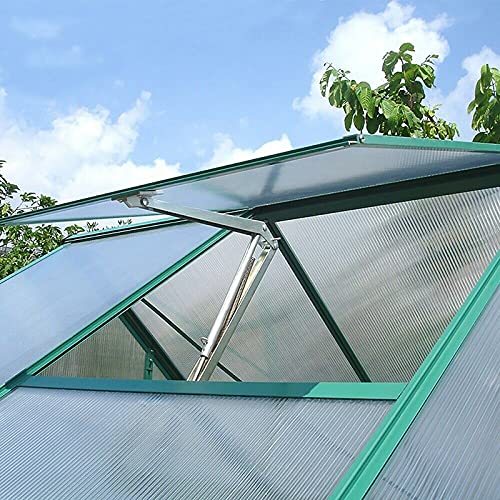
【Optimal Ventilation System】Your plants are optimally ventilated through temperature-controlled opening and closing. Depending on the temperature, the piston of the cylinder moves and opens or closes the window.


Adding Cross Supports and Covering
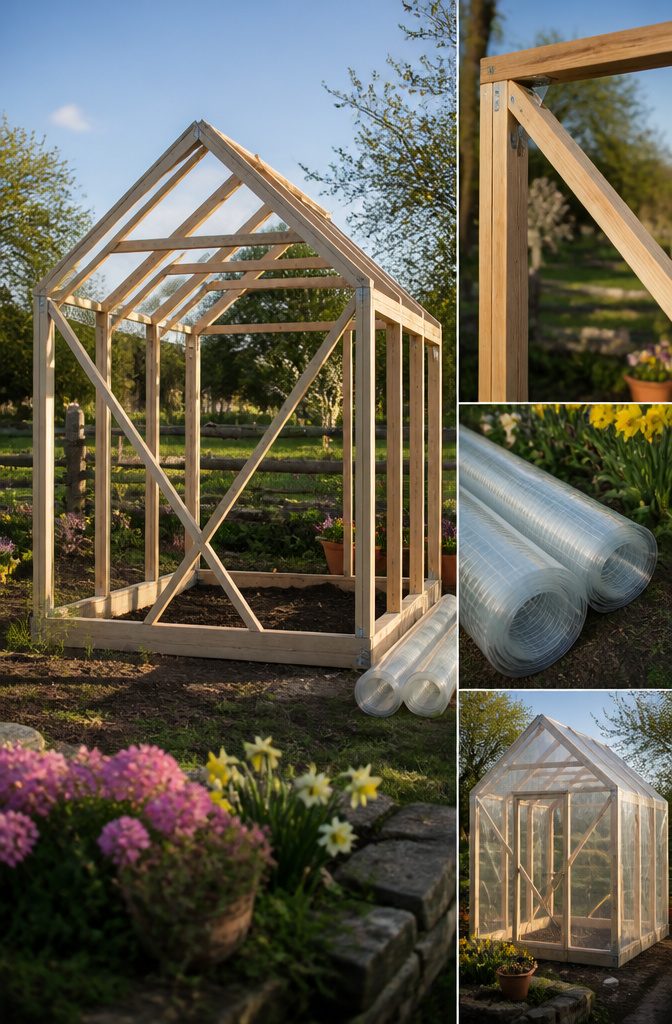
Cross supports matter more than they look like they should. The frame will rack sideways under wind or the weight of hanging baskets unless you brace it, and a greenhouse that leans is a greenhouse that tears its own covering. I use 2-by-2s or scrap from earlier cuts, set diagonally from corner to mid-span and screwed in place. The material is cheap; the stability is not optional.
Covering is where the real choices stack up. Clear vinyl sheeting runs $100–$200, lasts well, and flexes enough to roll back in summer if the greenhouse overheats. Poly film is the cheapest route and fine for a season or two, though sun degrades it faster than you would hope. Polycarbonate panels cost more upfront and stay clear for 10 years or better, which pays off if you are building something permanent. Recycled windows or salvaged glass cost nothing if you have the sources, but the weight is real and every pane is a fracture waiting to happen. Corrugated metal roofing skips the light entirely, so it works only for sidewalls or shade houses, not for the roof itself.
Fasteners, clips, and zippers add another $30–$60. Whichever skin you pick, stretch it drum-tight. Loose material flaps, and flapping shreds. Calm days help; so does using your forearm rather than your fingers to press the sheet over the frame, which spreads the load and avoids stretch marks or punctures. Weigh the ground edges with boards or bricks, or staple to a buried wooden strip, but do not rely on the edge alone. Wind finds the gap you left.

Garden Hoops for Raised Beds: Note: There is NO netting included. You are no strangers to voracious critters, disease-ridden bugs and winter harsh weather conditions. FuBegi garden tunnel hoops helped to provide the protection your veggies needed, improving the quality of your harvests big time! You will have a lot fewer problems with insects eating your crop as well as the sun scorching the tender leaves.

Quick & Easy Assembly: This polycarbonate greenhouse kit features a simplified setup system designed to make installation faster and easier. The upgraded lock installs smoothly and adds extra stability. For best performance, please install the reinforcement bar according to the instruction manual.

Easy Assembly-Our greenhouses for outdoors come with clearly labeled parts, detailed instructions, and the necessary tools for quick setup. With a helping hand and by following the manual, you can easily build a sturdy green house for your backyard garden
Creating an Entrance and Ventilation
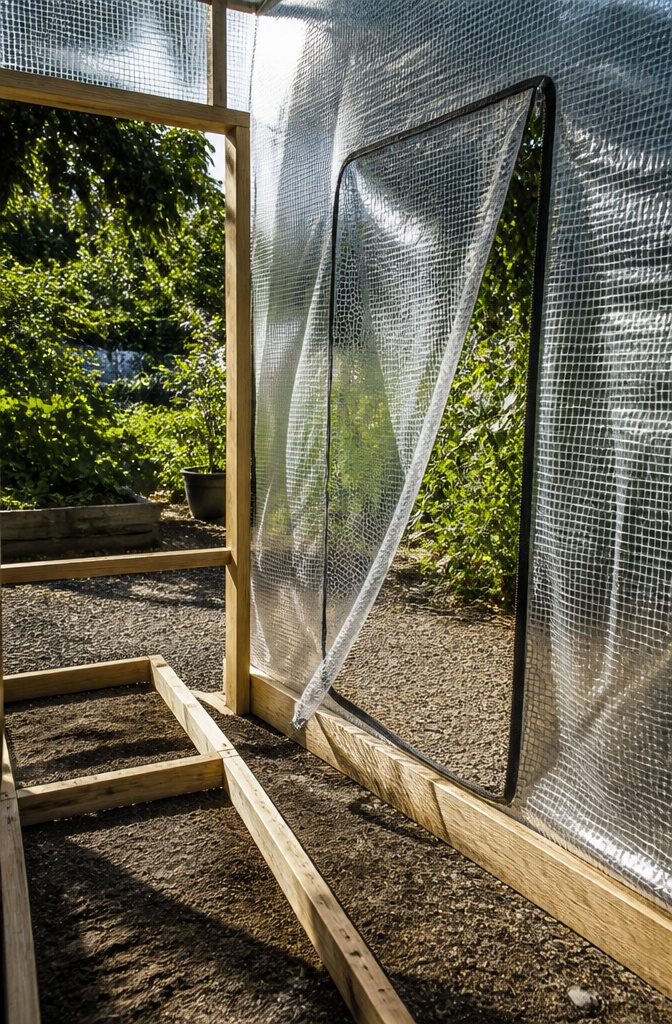
A door in a greenhouse is one of those details that seems simple until you are standing in the frame with a drill and nowhere to pivot. The vinyl cover on my build got a slit cut down the middle, reinforced with zippers along the edge so it could open and seal back up without letting wind tear the seam. That works for a season or two. The sturdier route is framing an actual wooden door into one end wall, which costs more time upfront but survives the real abuse of hauling pots and soil through it fifty times a spring.
Ventilation is where a greenhouse lives or dies. I set a temperature alert after hearing about a grower who hit 103° inside while she was out running errands; her daughter had to sprint over and throw open every window and the door before the plants cooked. Automatic vent openers on the windows solve this by pushing the sash up as interior heat climbs, no phone alert or neighbor required. A fan mounted at the ridge line pulls that hot air out the top, and if you are wiring one in, place the sensor at plant height, not up near the peak where the reading runs fifteen degrees cooler than what your tomatoes are actually feeling. Hot air rises, so that height gap matters more than you would guess.

{ More Light for Your Plants } High-transparency PC panels let in plenty of sunlight. This creates a bright space where your plants can grow strong and stay healthy.

Effective Protection: Transparent polycarbonate board cold frames for garden keeps your plants warm and protects them from light wind and light rain. This mini greenhouse wooden can also extend growing season and offers ideal temperature for your lovely plants.

【CLASSIC DESIGN】Cathy's Flower House features a transparent, pointed-arch structure and a variety of plants, creating a lush, botanical greenhouse. The inspiration for the complex and elegant design comes from classic aesthetics and the beauty of nature, making it a captivating addition to any decor.
Final Touches
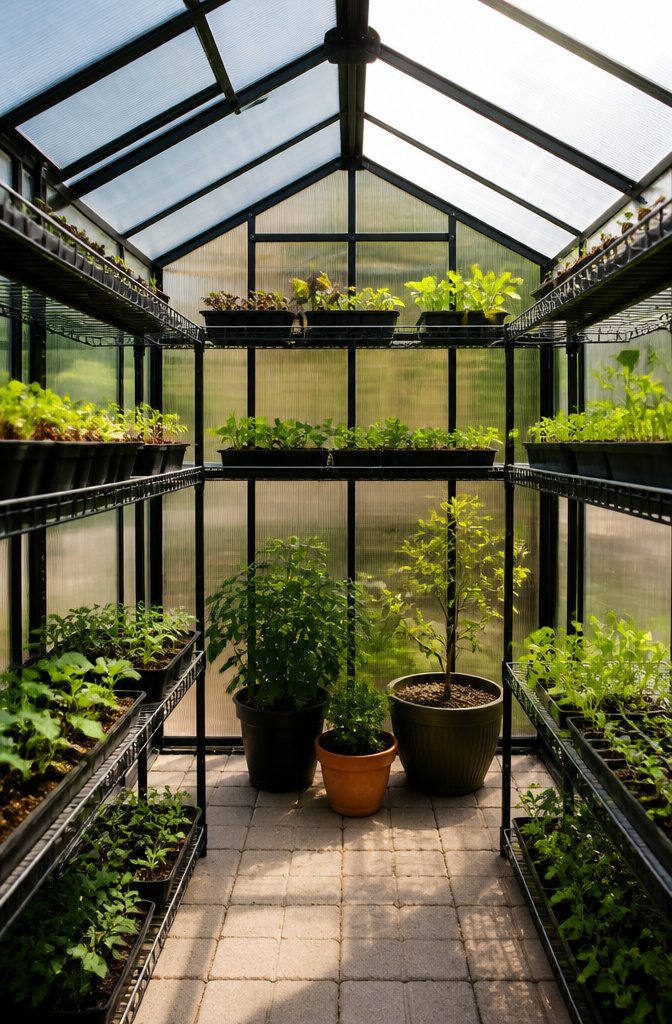
The inside of a greenhouse changes everything once you add surfaces at the right heights. Wire closet shelving cut to 24 inches wide, paired in rows, gave me two levels that drain water from top flats down to larger plants below while letting light pass through. Each flat is 11 by 21 inches, so that width was chosen for the trays, not for looks. I could start 50 flats at once and still keep floor space open for bigger pots.
Tables and benches are harder to get right than they look. Ordering them with the greenhouse meant they fit the first time; building them after meant guessing at angles that were already set. I paid extra for the match and did not regret it.
Electrical is the same gamble. Running an extension cord for germination mats or heaters works until it doesn’t, and then you’re either hiring an electrician to wire the shell or living without. I wired mine during assembly because the builder knew where moisture collects and where it doesn’t.
Water is where I drew the line. A stub in the concrete slab sat ready for plumbing, but tapping the main line and running pipe under the driveway came back at $5,000. A hose and a watering can handle it fine. The $5,000 water line is not where a weekend budget goes.
Ceiling fans and extra windows went in for airflow front-to-back and side-to-side, and that made more difference than any supplement I could have bought. Polycarbonate roofing, not glass, went up last: lighter than corrugated steel, ten times stronger, 95 percent light transmission, and a 20-year hail warranty that glass cannot match.
Some builds add aquaponics or automated watering systems. Those are projects of their own, not weekend additions, and this guide stops where they begin.

[High Transmittance & UV Protection] Made of optical-grade material, this polycarbonate sheet has over 90% light transmittance. Sunlight slips through easily, giving plants a full "sunbath" for photosynthesis. Its UV-resistant coating blocks 99% of UV rays—no wilting plants, and unlike low-quality greenhouse plastic, it won’t yellow or age.

80% Light Transmission: With 80% transparency, these roof panels allow ample light while blocking 98% of UV-rays, preventing overheating and supporting stable, plant-friendly temperatures year-round.

[RIGHT SIZE OPTIONS] RITOLLO 0.24 in / 6 mm polycarbonate greenhouse panels come in multiple pack and size options, making them suitable for greenhouse roof panels, wall repair, cold frames, raised beds and outdoor garden DIY projects.
What a DIY Greenhouse Costs
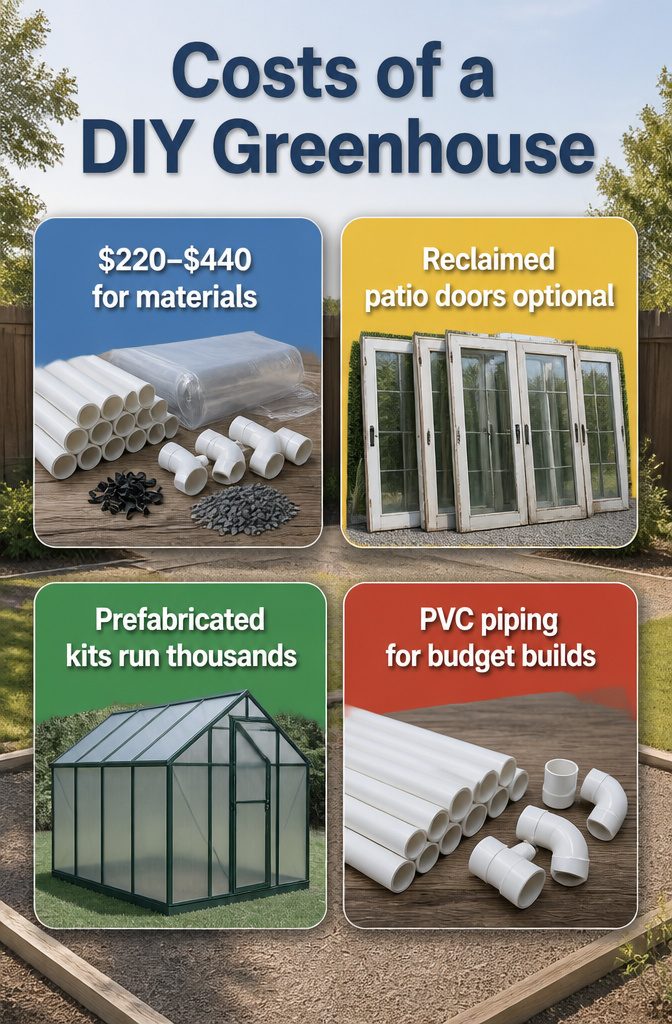
A functional DIY greenhouse runs $220–$440 in materials if you keep it simple: PVC piping and connectors at $50–$100, clear vinyl sheeting at $100–$200, fasteners and clips around $30–$60, and gravel or base material for another $40–$80. That is the floor that actually works.
Spending closer to $1,000 opens up better salvage. One builder hit just under that mark using five reclaimed patio doors per side, 8-by-8 corner timbers, and closet shelving from Craigslist. The doors came from a ReStore, which is where the savings live if you have patience and a truck.
Prefabricated kits run thousands for anything comparable. The gap is not small, and it is the main reason most people who type this search end up with a cart full of pipe and a weekend of cutting rather than a delivered box.


【Heavy-Duty Weatherproof Construction for All-Season Use】 Crafted with 720g/m² high-strength polycarbonate panels and reinforced aluminum-steel frame, this walk-in greenhouse boasts exceptional durability to withstand heavy rain, strong winds, and snow loads—perfect for winter gardening
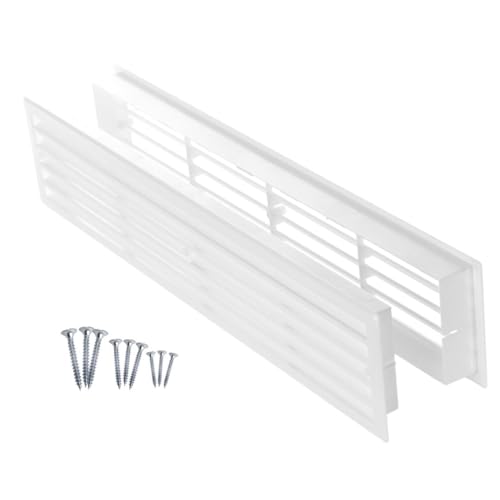
17.7x3.6 inch Louvered Door Vent Grill designed specifically for doors and furniture pieces, providing efficient airflow circulation between rooms. High-quality plastic Construction of the Ventilation Grill provides durability and long-lasting performance.
Materials That Last
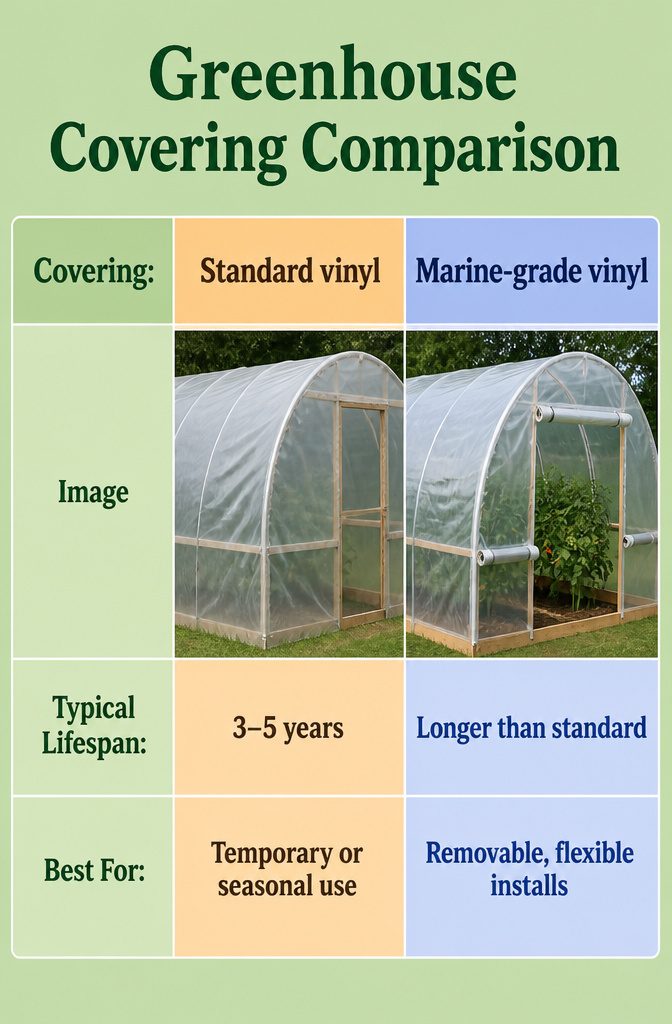
The covering you choose decides whether your greenhouse makes it to a second presidential term or needs a rebuild before the midterms. Marine-grade vinyl stretches that window past the standard 3–5 years you get from regular vinyl sheeting, and you can roll it up in summer if your tomatoes need real air. Polycarbonate panels cost more upfront but cross the ten-year mark without the UV brittleness that kills poly film; that 4–8 mil plastic sheeting is fine for a season or two, then it turns to shards. Recycled glass is free if you have the source and the muscle; the weight is real, but so is the permanence.
Frame material works the same math. PVC tubing handles small and medium builds fine, though heavy snow loads push you toward metal conduit. Wood frames the half-wall look that blends with a house, but the upkeep is ongoing. Metal outlasts both if you mind the rust.
| Covering | Typical Lifespan | Best For |
|---|---|---|
| Standard vinyl | 3–5 years | Temporary or seasonal use |
| Marine-grade vinyl | Longer than standard | Removable, flexible installs |
| Poly film (4–8 mil) | Short-term | Tightest budgets |
| Polycarbonate panels | 10+ years | Permanent greenhouses |
| Recycled glass | Permanent | Salvaged-material builds with structural support |
For a weekend build on a few hundred dollars, the polycarbonate upfront cost stings less than a re-covering in year four.

8-SHELF GREENHOUSE KIT - The 8 greenhouse shelves provide plenty of room for trays, pots, or planters of anything you want to grow. Each shelf comes with zip ties to secure...
Frame Materials and Ease
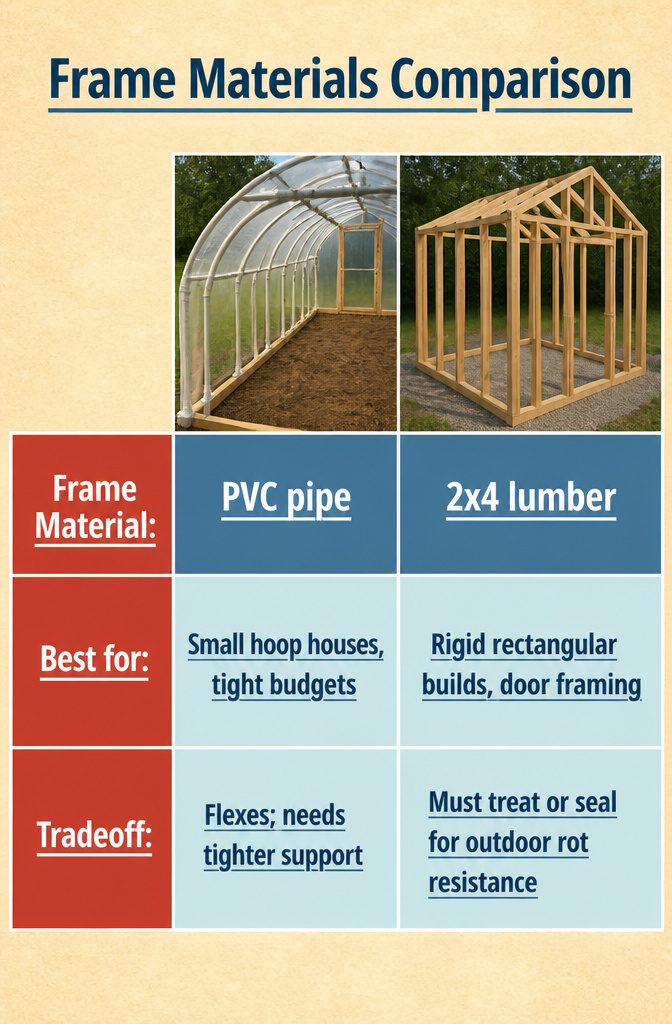
PVC pipe bends into hoops without tools, which is why so many first builds start there. The tradeoff shows up fast: a 16-inch rafter spacing in wood stiffens the whole roof, but PVC at that same spacing still flexes under snow load. EMT metal conduit costs more than PVC and demands a pipe bender, yet the strength difference matters once you span past a walk-in width. Wood 2x4s split the difference on labor. A circular saw and a box of screws gets you a rigid rectangle in an afternoon, though pressure-treated cedar or sealing adds a step PVC skips.
| Frame Material | Best for | Tradeoff |
|---|---|---|
| PVC pipe | Small hoop houses, tight budgets | Flexes; needs tighter spacing or extra support |
| 2×4 lumber | Rigid rectangular builds, door framing | Must treat or seal for outdoor rot resistance |
| Metal conduit (EMT) | Wider spans, wind-prone sites | Requires a pipe bender and more upfront cost |
For my own priorities, wood wins on a weekend build. The 2×4 frame accepts hardware directly, no specialty fittings to order, and the scrap doubles as purlins if you keep your cuts clean. Metal conduit earns its keep once you are covering more than 10 feet without a center post, but the tool rental or purchase pushes it past a single-Saturday project unless you already own the bender.

Ventilation & Light Control:This wooden outdoor greenhouse features an adjustable roof design, securely fixed with durable connectors, allowing you to easily customize the opening angle. It helps regulate airflow, temperature, and humidity while maximizing natural sunlight for healthier plant growth

Ventilation & Light Control:This wooden outdoor greenhouse features an adjustable roof design, securely fixed with durable connectors, allowing you to easily customize the opening angle. It helps regulate airflow, temperature, and humidity while maximizing natural sunlight for healthier plant growth

[SOLID WOOD CONSTRUCTION] Expertly crafted from premium solid fir and spruce, this outdoor wood greenhouse kit features reinforced metal hardware for superior stability. Engineered to withstand wind and heavy rain, it provides a reliable, long-term sanctuary for your backyard plants.
Why Ventilation Matters
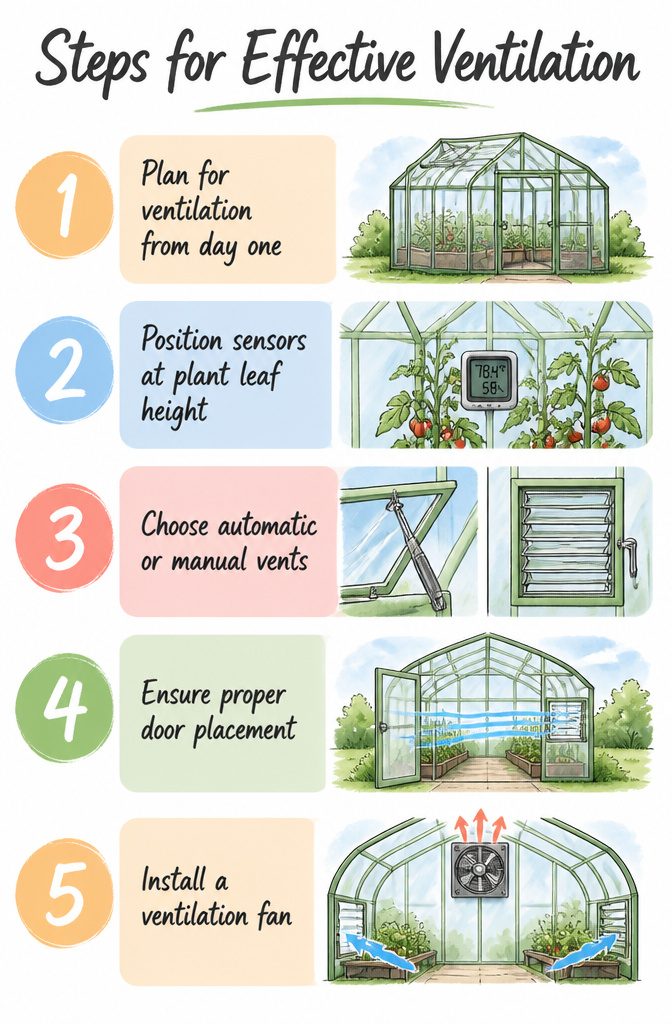
A greenhouse turns into an oven on a blazing day, and the plants inside will not survive it. That is why ventilation belongs in the plan from day one, not as an afterthought once the frame is up.
Temperature control works two ways: letting hot air out and keeping sensors where the plants actually live. One grower I read about mounted a sensor nine feet up in a twelve-foot greenhouse; hot air rises, so the reading ran fifteen degrees cooler than the soil level where the tomatoes sat. The plants fried while the sensor said everything was fine. I now picture any sensor at the height of the leaves, not the ridge line.
For airflow itself, there are three paths worth comparing. Automatic vent openers use wax cylinders that expand in heat and push windows open without electricity; they are the set-it-and-forget-it choice for anyone who works away from home. Manual vents cost less but demand you remember, and on a day that hits 103 degrees while you are out, that memory gap can melt plastic trays. Door placement matters too: a door on one wall and a vent or second opening on the opposite wall pulls air straight through, rather than letting it pool in corners.
A ventilation fan at the back of the structure, pulling air out while cooler air enters low, completes the loop. Ceiling fans help but do not replace it; they move air around without exhausting the heat.
Frequently Asked Questions
Do I need a permit for building a greenhouse DIY?
Most small backyard greenhouses never trigger a permit requirement, but building codes vary block by block. A quick call to the city zoning office costs nothing and takes ten minutes, and it can save you from having to tear out a slab that violates local ordinances. One grower spent ten months applying for a zoning variance after placing a greenhouse too close to the property line, so checking setbacks before you mark anything matters.
How long will a vinyl-covered greenhouse last?
Standard vinyl sheeting holds up for 3 to 5 years with decent care. Marine-grade vinyl stretches that window past the standard lifespan, and you can roll it up in summer if your plants need more air. Poly film at 4–8 mil turns to shards even faster, while polycarbonate panels cross the ten-year mark without UV brittleness.
What materials are best for a DIY greenhouse?
PVC pipe and connectors run $50–$100 and suit small hoop houses, though they flex in wind and under snow load. EMT metal conduit costs more and needs a pipe bender, but it stiffens wider spans. Pressure-treated 2×4 lumber frames up square with basic tools you probably own already, and cedar holds up longest if you can find it. For covering, clear vinyl sheeting at $100–$200 balances cost and flexibility, while polycarbonate panels cost more upfront but stay clear for a decade or better.