

The span runs from a ten-minute luggage-tag label to a full paper village that can swallow a weekend, and the deciding factor is how much permanence your space allows. Rental mantels and rotating stockings favor the safety-pin solutions; owned walls and steady households can take the nail hole and the hot glue.
What most of these share is a thrift-store stop or a yard gathering on the front end. The hymnal for the gallery wall, the orphaned sweater sleeve for the jar, the pinecones that need half an hour in the oven before they go near a bowl: the cost stays low because the labor includes the hunt.
1. Stocking Labels from Luggage Tags
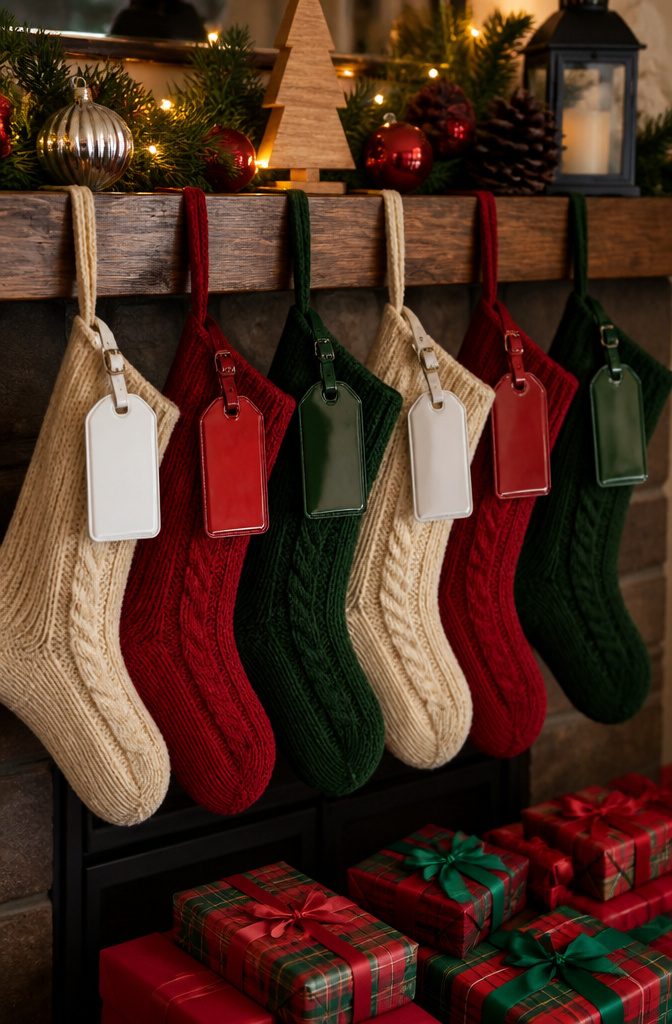
Standard luggage tags, the kind with the clear plastic window and the paper insert, cost less than a dollar each and take a surprising amount of abuse. The paper pulls out, the surface underneath accepts a Sharpie or a quick swipe of acrylic paint, and suddenly you have a stocking label that looks deliberate instead of desperate. A safety pin through the reinforced hole at the top attaches it to the cuff without committing to anything permanent, which matters if the stockings rotate between family members or if you are renting and the mantel is not technically yours.
The paper insert is the weak point; it warps in humid rooms and the ink can smear if someone bumps it with wet hands. Painting or writing directly on the tag itself fixes that, and the slight sheen of the plastic gives marker work a finished look that paper alone never achieves. Someone who wants names in a matching font can design a strip in Canva, size it to the window, and treat the tag like a tiny framed print. Either way, the swap from luggage tag to stocking label takes about ten minutes and survives the season without curling at the edges.

DIY Stocking signs: the wooden tag is blank and can be printed on it with vinyl or colored pen, so you can DIY your own name for the decoration of Christmas socks

Easy to Identify: Choose from bright colors for easy luggage identification at a glance

Sufficient Quantities: The package included 12 Pcs of stocking name tags personalized, and 12 ropes for you to decorate your home with these beautiful Christmas tags, it will be full of festive atmosphere.
2. Thrifted Sheet Music Gallery Wall
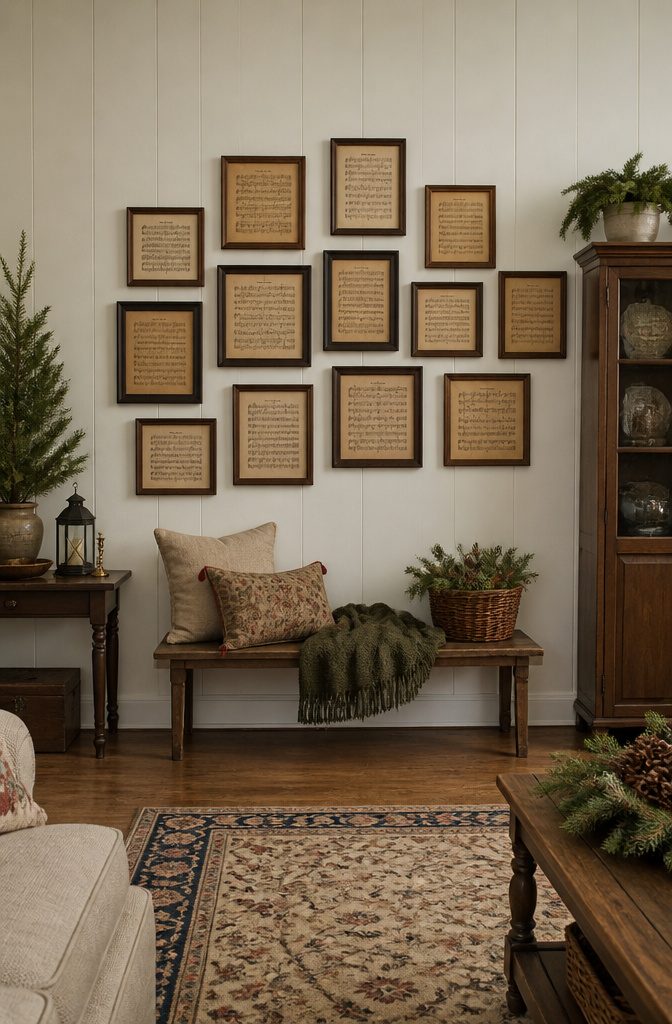
A single hymnal from a thrift store or a church giveaway covers an entire wall for the price of one latte. I look for the thick, cloth-bound editions from the 1940s to 1970s: the paper is already yellowed, the notation is dense, and the carols print large enough to read from across a room. Rip the pages cleanly at the gutter so you keep the full margin; a torn edge reads as damage, not character.
For backing, skip the craft-store matboard and use the hymnal’s own cover boards instead. The front and back covers of most old hymnals are heavy binder’s board, often with a cloth surface that looks intentional behind glass. Trace your frame opening, cut with a utility knife and a metal straightedge, and tape the page at the top edge only so it hangs flat. The matching stock across every frame keeps the wall from looking like a scrapbook.

Music-Themed Gallery Wall Art: We offer two standard sizes: 12x16 inches and 16x24 inches, easily creating a professional-style music-themed gallery wall.

MUSIC-INSPIRED DESIGN – Features a bold black treble clef accent paired with classic sheet music for a stylish display piece.

Our exclusive mounting process is quick, easy, safe and completely interchangeable
3. Jingle Bell Place Card Holders
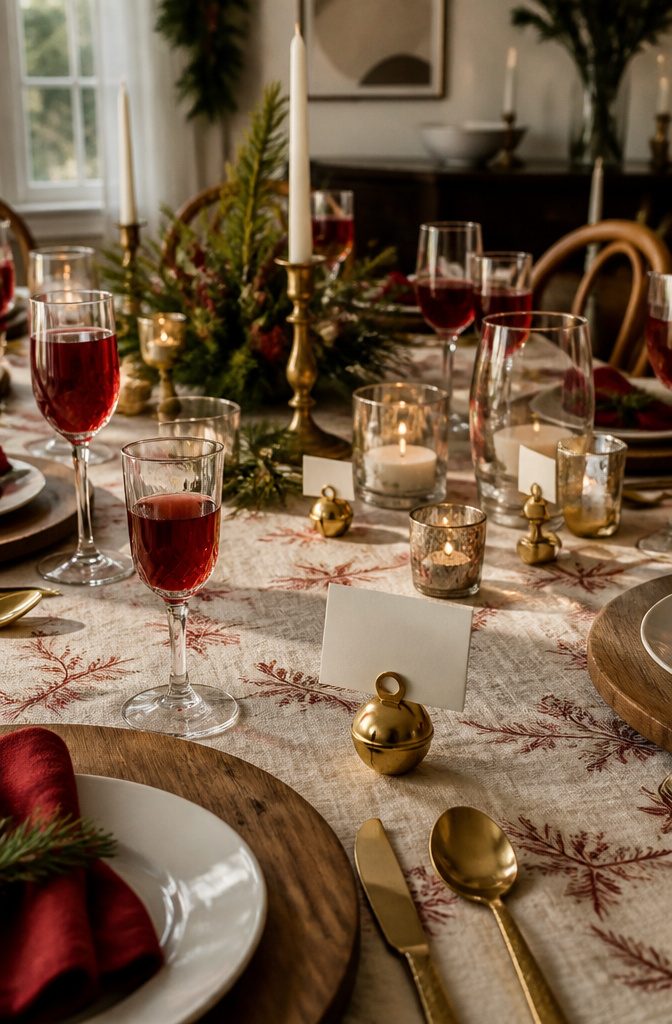
Small bells with a slit cut into the top rim make surprisingly stable place card holders, and the weight is what sells it. A 30-millimeter bell sits flat on a tablecloth without sliding, even when someone bumps the edge reaching for the rolls. The card slides into that slit just deep enough to stand upright through dinner service, though I would test it with your actual cardstock first; the cheap stuff from the drugstore flops over by dessert.
Skip the craft-store jingle bells and buy the solid brass ones meant for sleighs or door hangers. The tone is deeper, they look like something you found rather than something you assembled, and the metal takes a sharpie for numbering tables if you are seating more than one. A set of twelve runs about the same as a single ceramic holder from a boutique, and they store flat in a sandwich bag until next year.
The only real mistake is cutting the slit too wide. A razor blade or jeweler’s saw gives you control; scissors will flare the opening and the card leans like a drunk guest. If you do overcut, a dot of hot glue inside the bell buys back some grip, though you will hear it rattle when someone shifts their plate.

Bell Diameter:40mm/1.6";Total Height:63mm/2.5"

Set of 4 metal bell place card holders in antique brass finish with 12 paper cards

3 Sizes: The bells diametal size are about 8mm, 10mm and 6mm. 100pcs for 8mm, 80pcs for 10mm, 60pcs for 12.5mm. The different sizes can meet your different needs.
4. Dried Orange and Leaf Trimmings
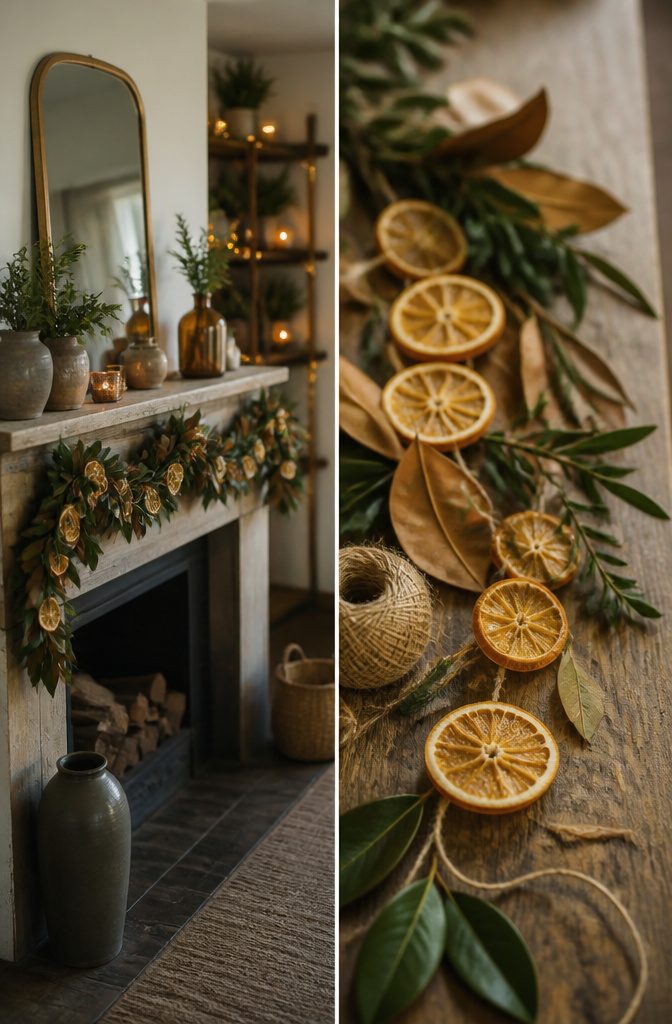
Dried orange slices and preserved leaves build the kind of trimmings that look like they came from a farmhouse auction instead of your kitchen counter. Dried orange slices last several weeks if stored properly, which matters when you are stringing garlands the Sunday after Thanksgiving and want them to hold through New Year’s. The fruit and the foliage do not share a timeline. Oranges need low, slow heat, usually four to six hours at 200 degrees, while leaves like magnolia and boxwood demand a faster method, glycerin or pressing, before they turn brittle and brown. I learned the hard way that timing them together wastes half the batch. For garlands, twine reads cleaner than wire, and a few miniature bells threaded between the slices keep the line from feeling too rustic. Tuck these into tree branches, wind them through a centerpiece, or pin them across a mantel. The whole project sits under ten dollars if you have oranges on hand and a yard with leaves worth saving.

Package include: 160pcs mini pine cones. Enough quantity can meet your different needs.

Package Include: you will get 150 pieces mini brown pinecones ,enough for you to DIY craft, Fall and Christmas decoration .It can remind your childhood memories and give you a special feeling.

Great Favor: These pine cones could well decorate your Christmas tree and promote the exciting atmosphere;Can give full play to your imagination,make the great arts and crafts
5. Cinnamon Salt Dough Ornaments

Cinnamon salt dough ornaments smell like a bakery and cost next to nothing, which is why I keep coming back to them even after the occasional batch cracks. The dough comes together with about two cups of flour, one cup of salt, and one cup of warm water, plus a generous tablespoon or two of ground cinnamon for color and scent. Some years I need a splash more water, some years the dough wants less; humidity matters more than any printed recipe admits.
Roll it to roughly a quarter inch, cut your shapes, and bake low and slow, around 200°F for two to three hours, flipping once. Thicker pieces take longer, and rushing at a higher temp gives you puffed, cracked disks. I learned that the hard way on a batch of stars I pulled too early, only to find them soft in the center the next morning.
Once fully dry, these take acrylic paint well and hold up for years if you seal them with a quick coat of matte Mod Podge. The cinnamon fades slightly over time, but never enough to lose that warm, spicy note when you open the ornament box.

【Assorteded Safety Pin Pack】 Our pack includes 250 durable safety pins in 4 different sizes: 40 pins of 3.7cm (1.47"), 60 pins of 2.7cm (1.06"), 100 pins of 2.2cm (0.87"), and 50 pins of 1.9cmcm (0.75"), Our pack ensures you have the right size of safety pin for any task you need to complete

What you will receive: the package includes 100pcs rusty jingle bells, 40pcs rusty star, 140pcs safety pins 20m/ 21.87yards jute cord. Sufficient quantity to meet your daily requirements for usage and replacement, you can share them with your friends and family

HIGH QUALITY - Alamic safety pins are made of high quality metal, durable and very sturdy, not easy to bend.
6. Craft Stick Trees
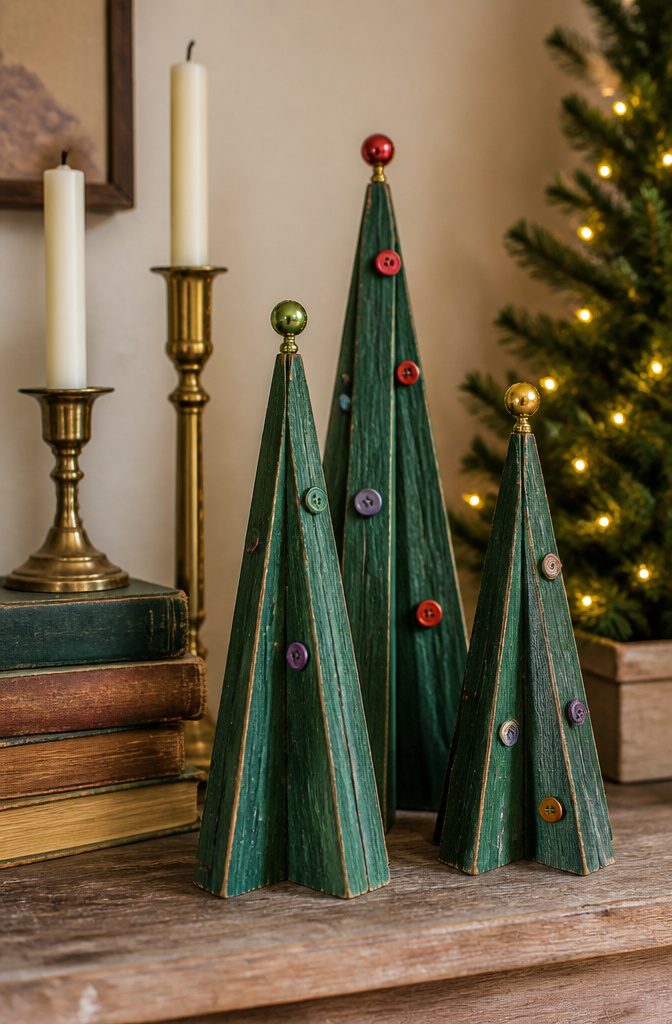
A green acrylic paint finish on craft sticks reads unmistakably as Christmas, but staining them instead shifts the whole thing toward something quieter that sits better with brass candlesticks or a stack of old books. Hot-glue holds the shape once you cut the sticks to staggered lengths; the bond sets fast enough that mixed-age building doesn’t turn into waiting-around building. Rickrack wrapped around the finished tree gives it texture, and the real fun is in the mini ornaments, buttons, or painted wood bobbles pressed into the glue lines. If the craft store feels like too much effort on a Saturday morning, sticks from the yard and kitchen twine work for the structure, with holly berries from the neighbor’s hedge standing in for store-bought trim. The whole thing stays flat, which matters on a shelf already crowded with cards and the good ceramic Santa.

Sufficient Quantities: The package included 12 * Snowman Christmas stocking name tags and 1* 5 meters rope. You can decorate your home with these beautiful name tags for Christmas Stocking presents, widely applied on Christmas mantels, Christmas trees, Christmas stockings, Christmas gift tags, Christmas leave message, bring more Christmas atmosphere

【Package Includes】You will receive 12 pieces Christmas stocking tags(4 x 2 inch),these wooden tags are the perfect addition to your farmhouse-themed Christmas stocking. Includes 12 wooden blank tags, 36 wooden beads, and hemp rope of appropriate length

2 Pack Set: Includes two matching Santa luggage tags for coordinating multiple suitcases or sharing with family members, friends and travel companions.
7. Dried Orange Slice Garland
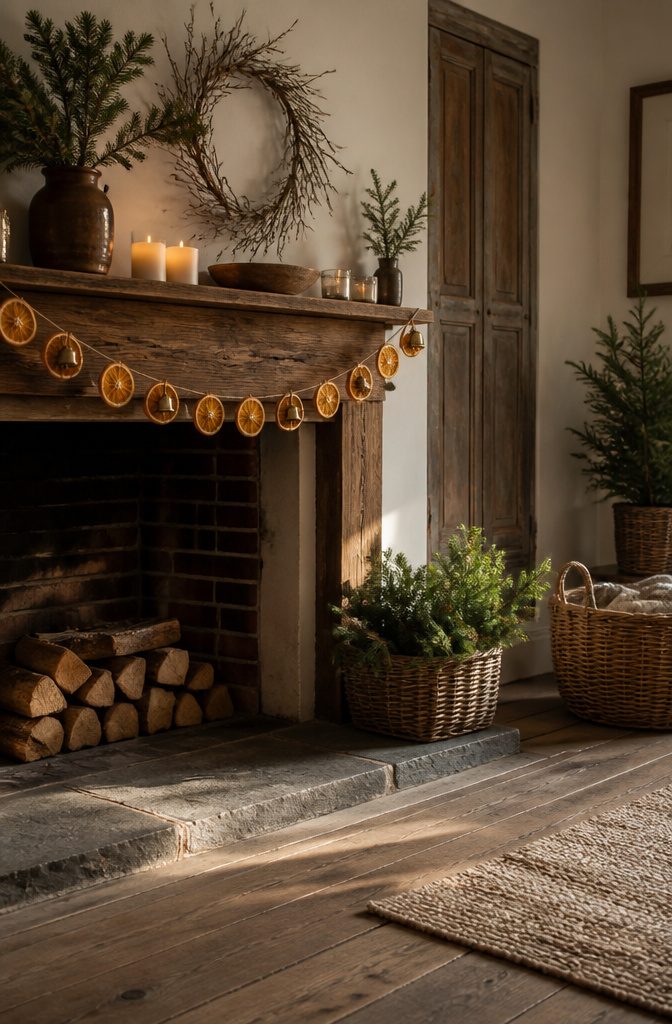
Dried orange slices carry the same warm look from bowl to tree if you string them right. The garland version uses twine for the whole length, not ribbon, which keeps the line thin enough to wind through branches without bending them down. Slice thickness matters more here than in drying alone: too thin and the holes tear while you work; too thick and the twine knots sit proud and snag.
A hot glue gun helps if you want extras. A dab at the back of each slice, pressed against the twine, keeps them from sliding into a clump on one side of the mantel. Work with the slices flat and the glue cool enough; warm glue warps the pith and leaves a dark spot.
Miniature bells read as a winter sound cue without going full jingle. Thread them between every third orange or cluster them at the ends. The twine goes brown and stiff where the orange oils leach in, which I happen to like, but if that grimy line bothers you, switch to a waxed cotton cord the same weight and start fresh each season.
Save the busted slices. A crack that ruins a garland piece still ties fine as a single-window ornament on its own short twine loop.

Classic Design: 12.5 x 12.5 frame is designed for displaying 12 inch record with album cover. Can not fit the vinyl album with a spine.

【Precision Fit】: This 12.5 x 12.5 frame is tailored to hold a standard 12-inch and its jacket securely, preventing corner wear. The interior dimension ensures your album cover stays flat and pristine without bending.

Three Piece Musical Note Wall Decor: this product includes three elegant and rhythmic black metal musical note artworks, ideal complementing modern, minimalist, and musical themes; It's an ideal choice to enhance the artistic atmosphere of your living space
8. Mini Wreath Ornaments
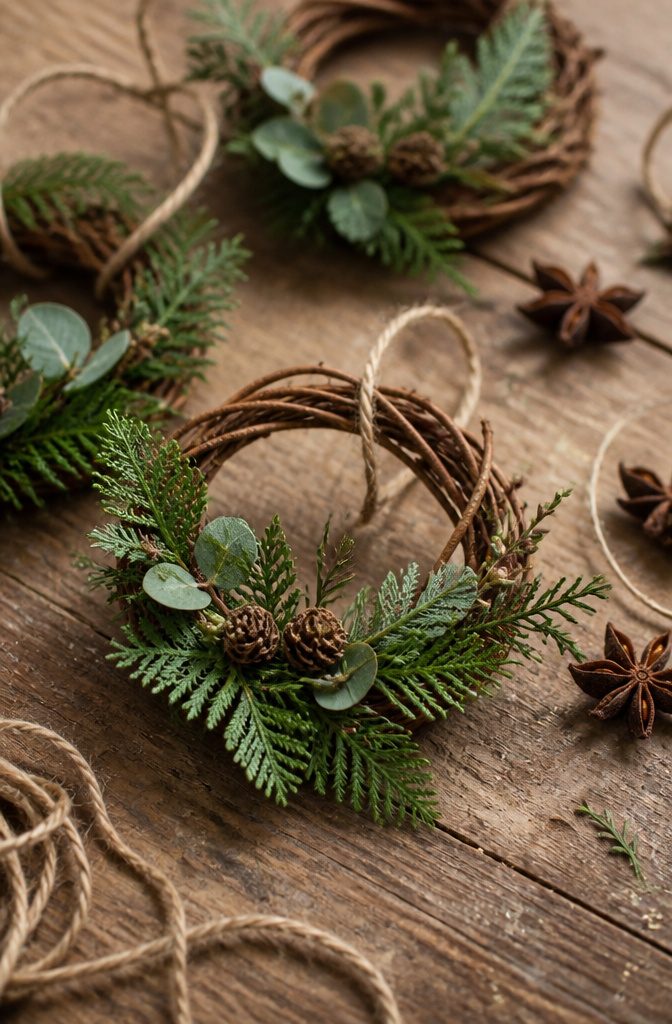
Mini wreath ornaments work because the scale forces you to edit. A 3-inch grapevine form holds maybe three sprigs of foraged pine, cypress, or fir before it looks crowded, and that restraint reads as intention. I wrap twine around the top for hanging before gluing anything in place; once the greenery is set, the knot disappears into the back.
The material matters more at this size. Grapevine has its own texture, so gaps between branches look rustic rather than sloppy. Wire forms demand tighter coverage since every bald spot shows. Hot glue works fine for both, though the bond sets fast enough that placement becomes permanent after a few seconds. Whole star anise pressed into the glue while it is still tacky adds the only color most of these need.
A willow ring or metal wreath form scales down the same way, secured with thin florist wire instead of glue if you want the option to rearrange. The smaller the ring, the less forgiving the proportions: a peacock feather or berry cluster that anchors a door wreath will overwhelm anything under four inches. Stick to one focal element and let the base show.

Material: Brass Metal,High quality materials for durability

The Package Includes: 12 Pcs Christmas theme place card holders come with 12 Pcs name cards, they will offer enough quantity and delicate design to you

Strong Fixation: The bell shaped base and strong clip design are stable and reliable, elegant silver bell place card holders suitable for various papers and cards, ensuring that photos or cards are not easy to slip
9. Paper Candle Ornaments
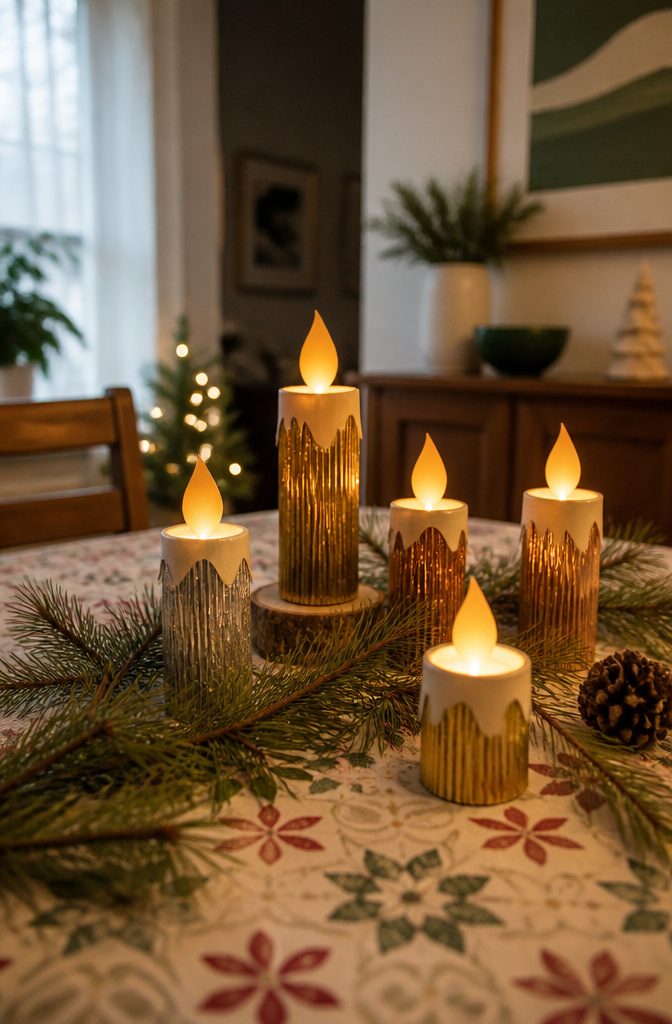
Metallic cupcake liners flatten into convincing candle bases without any fire risk near curtains or dried greenery. I roll a strip of craft paper into a narrow tube, seal it with glue, and cut a small slit at the top with an X-Acto knife. The flattened liner slips into that slit and becomes the flame. Gold and orange metallic paper cut into teardrop shapes layer over each other for the fire itself, with a silver circle punched out and glued on top for a little extra shine. A twine loop taped to the back finishes the ornament.
The whole thing takes maybe ten minutes once the pieces are out, and the materials cost next to nothing if you already have craft paper on hand. Metallic mini cupcake liners are the detail that sells the illusion; plain paper would read as exactly what it is. These work anywhere a real candle would be reckless but the shape still reads as Christmas tradition, which for most renters means that one narrow mantel or the branch above the radiator.

PACKAGE CONTENT: We offer 40pcs Christmas pinecones, whether you are decorating a Christmas tree, making Christmas wreath or other decorations, these hanging mini pinecones will add a special festive touch to your holiday atmosphere.
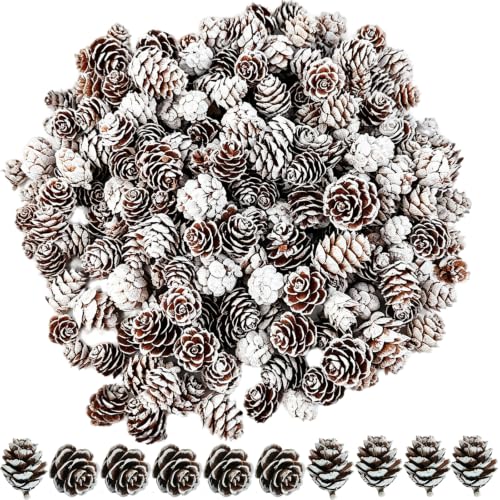
Package include: 160pcs mini Snow Pine cones. Enough quantity can meet your different needs.

Handpicked Natural Mini Pinecone Set: This set contains 30 mini pinecones in three distinct styles, each ranging from 0.8" to 2". Carefully selected and air-dried, these pinecones retain their genuine woodland texture, bringing a cozy, rustic winter feel to your home décor
10. Paper Christmas Trees
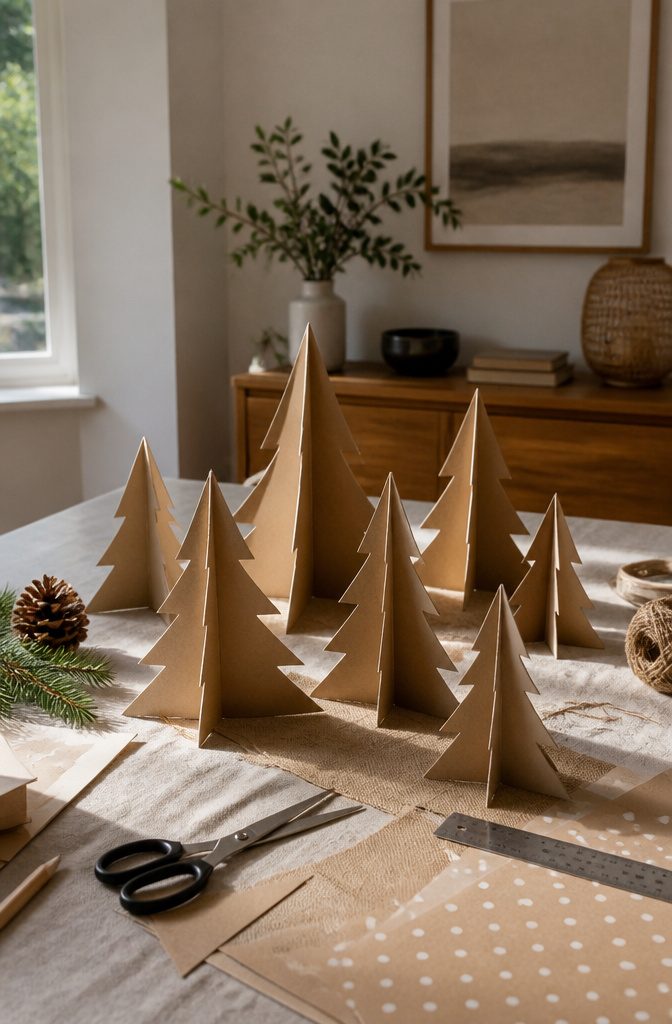
A sheet of kraft paper, a pair of scissors, and a ruler are enough to build a small forest of standing trees. I fold the paper in half lengthwise, mark out a series of triangles along the folded edge, then cut through both layers so each tree opens into a symmetrical silhouette. The base gets a simple perpendicular slot, two inches up from the bottom, so the tree can stand on its own when the slot slides into a matching foot.
Three sizes on the same mantle, grouped tight, read as a grove instead of a craft project. Anything under twelve inches tends to tip on a crowded surface unless the foot is weighted with a penny taped underneath. I have made these from leftover wrapping paper, from brown grocery bags, and once from a misprinted architectural blue print that looked surprisingly formal.
The whole cut takes maybe twenty minutes once the template is right. Store the flat trees in a magazine file after January, and they survive for years without the bulk of anything molded or wired.

The Complete Set Includes: you will receive a christmas velvet garland set, containing 1 red, green, and yellow velvet fireplace wreath, 10 dedicated cable ties, and 10 delicate fixing pins, eliminating the need for additional purchases or matching

4 Pack Battery Operated Fairy String Lights: Made with ultra-bright LED and durable silver wire, the Christmas lights will be an ideal choice for your home décor. Each set includes 4 strands of lights, each 16ft long with 50 LEDs, powered by 3 AA batteries (not included)

Decorative Safety Pins for Clothing Embellishment - These rhinestone safety pins serve as decorative safety pins for clothing, offering a stylish way to accessorize sweaters, shawls, dresses, or jeans with a touch of sparkle.
11. Pinecone Bowl Filler

Pinecones collected from the yard work as bowl filler with almost no effort, which makes this the most honest entry on the list: gathering counts as DIY if you do the labor yourself. The only step between the tree and the display is baking them at 250°F for 30 minutes on a cookie sheet so whatever is living inside does not become a problem on your mantel. After that, they sit in a bowl or a clear vase and look like you planned it.
You can leave them plain or shift them toward winter by dusting them with white paint or craft snow. The same batch carries from fall through Christmas into January without any change in storage. A hurricane vase with fairy lights tucked underneath turns the rough shapes into something that reads intentional rather than accidental. For a project that costs nothing and takes half an hour including the oven time, the return is hard to argue with.
12. Vintage Bells Swag
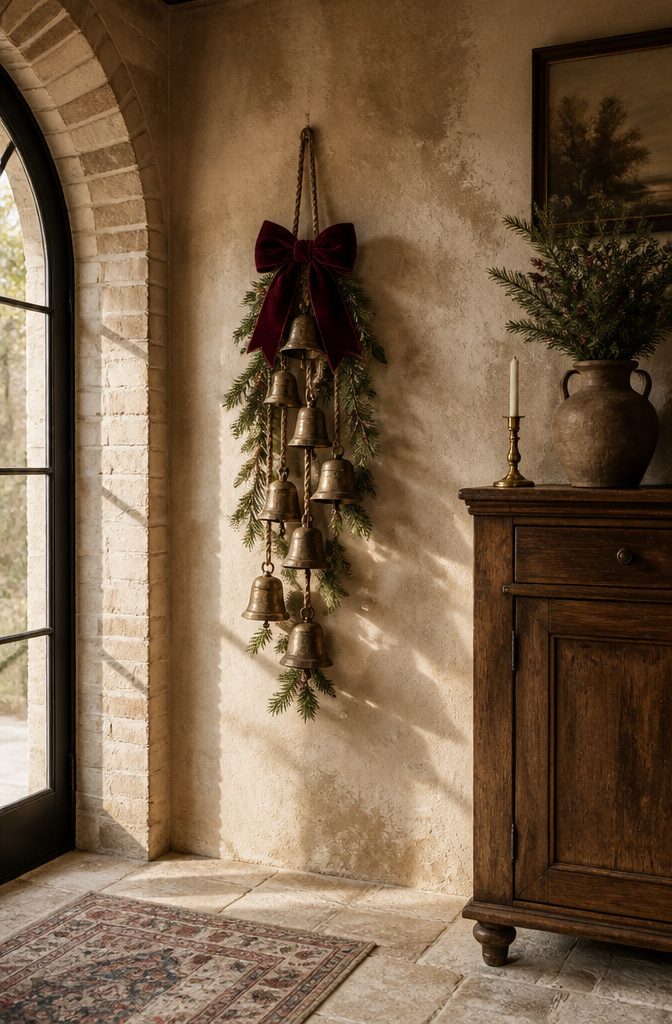
A swag of clustered bells hangs best when the weight sits close to the wall. The original design strings brass or bronze bells on a rough rope, then layers in faux winter green stems and a wide ribbon bow at center. The whole thing takes about ten minutes once the materials are laid out, and the rope lets it drape with a slight curve rather than pulling rigid.
What separates this from single-bell place card holders is the mass: eight to twelve bells grouped every few inches create audible movement, and the rope lets you scale the length to a doorway or a mantel. Faux greens keep it from reading too precious, and the bow hides the knot where twine meets greenery. The vintage quality comes from the patina on the bells themselves, not distressing after the fact.
I would keep the bow simple. A wired ribbon in burgundy or forest holds its shape through January, and the whole piece works past December if you pull the red tones out. Renter-friendly, too: a hook at either end, no holes beyond what a Command strip covers.
13. Sweater Jar Vases
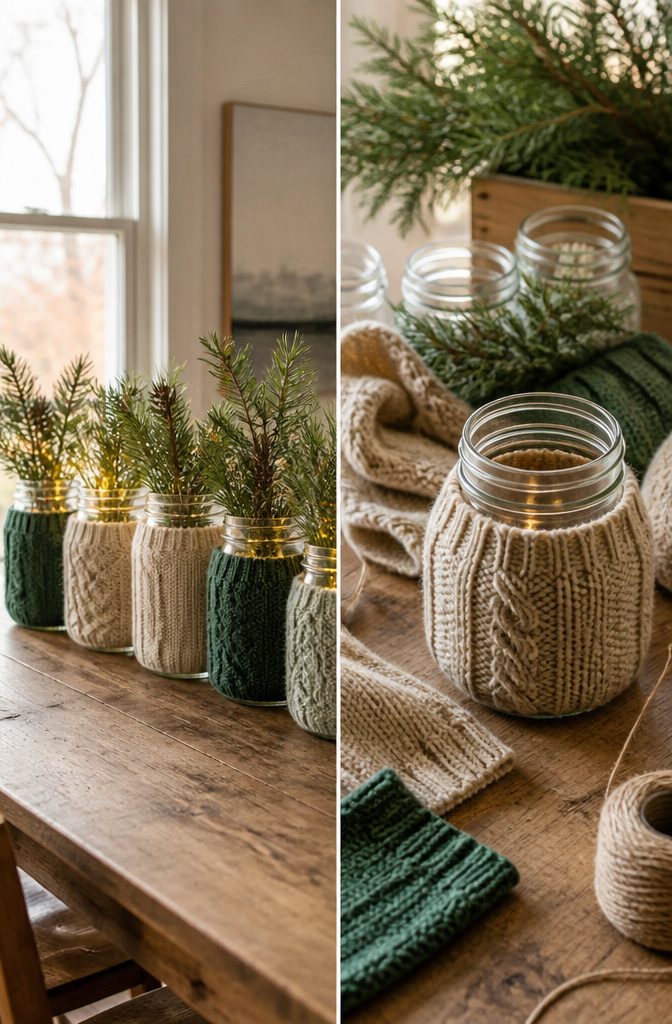
Old knit sleeves make jar sleeves in about twenty minutes, no sewing needed. I tried this with a few orphaned sweater arms from the thrift store, cutting them to fit pint mason jars and sliding them on like stockings. The original project leans winter rather than Christmas, so the color choice does the work: cream and oatmeal read January, but a red knit or a forest green one shifts straight to December.
The tension is built in. A sleeve meant for January walks a line, and that is useful if you want décor that stays up through February. For holiday-specific use, pick the loud colors and plan to swap them out. For something that bridges both, a charcoal or heathered navy does the job without shouting.
Glass shows at the rim and the base unless you fold the knit over or choose a taller sleeve. I left mine plain, which keeps the project to its promised timeline and avoids the fuss of glue. The jars hold greenery, taper candles, or nothing at all, lined up on a mantel where the texture matters more than anything inside.
14. Christmas Village Cake
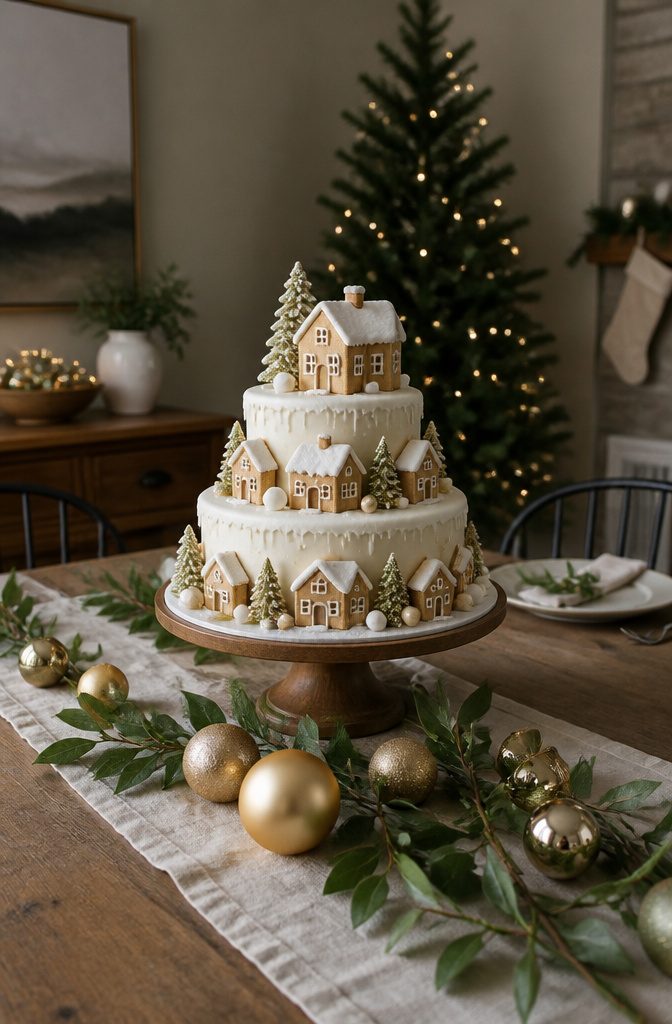
A DIY Christmas village cake works as both centerpiece and dessert, which matters when counter space is tight and you are already short a serving dish. The build starts with round cookie cutters wrapped in rolled icing to form hollow cylinders; those become the chimney stacks and house openings that let you drop in artificial tea lights later. My daughter wanted to decorate every roof with her own pattern, so the icing served as edible canvas too.
The sources that rank for this project made it twice, which tells you the first attempt teaches plenty. Their second run swapped in Christmas tree ornaments for a different mood, so the base structure stays the same even when the look turns. That is the useful part for a weekend timeline: mix the cake, bake, cool, then the village assembly is mostly patience and a steady hand with the icing bag.
Battery fairy lights fit under a glass dome if you want the lit version without building the full cake, but the edible route wins when guests are already expecting dessert. Either way, set the timer before you set the table so you are not crawling underneath after dinner to find the switch.
15. Christmas Signs and Art
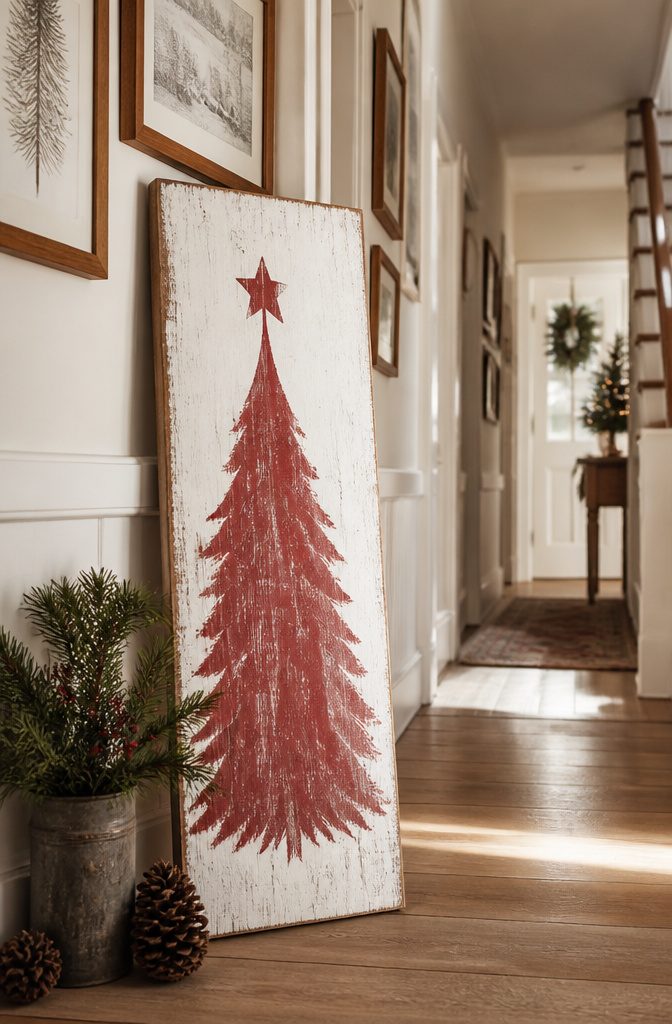
A painted board sign is the Christmas decoration DIY that fills a blank hallway wall for the cost of a half-sheet of plywood and a Saturday afternoon. Pine boards trim the edges, and vinyl letters or stencils keep the lettering cleaner than freehand ever manages. The chippy farmhouse finish everyone wants takes practice, so the first coat is a good place to experiment.
Sheet music from a thrift store, ripped and framed, covers a whole gallery wall for a dollar. Stick to winter scenes instead of Christmas-specific prints, and the same frames stay up until spring. Public domain images work the same way, antique snow cabins and bare trees that read festive in December and quiet in January. The trick is choosing art that earns its wall space past New Year’s, not just the week of the holiday.
16. Evergreen Napkin Rings
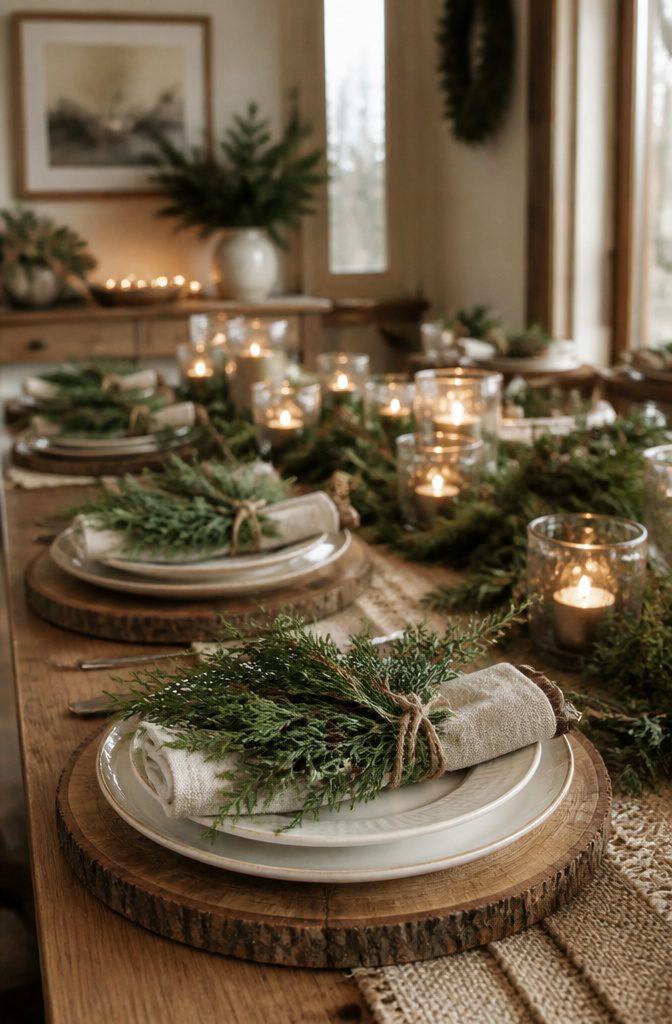
Fresh evergreen napkin rings last exactly as long as they should, which is through the meal and maybe a day or two after. The short lifespan is the point. You gather a few slender stems of cedar, fir, or whatever clipped greenery you have on hand, wrap them into a simple loop, and tie the ends with kitchen twine or thin wire. No glue, no foam, no craft-store runs.
The loop sits flat enough that plates still stack, and the needles release their scent every time someone lifts a napkin. A stem about the thickness of a pencil bends without cracking and holds the shape through handling. Thicker branches split or spring open.
I like making these the morning of the gathering, or at most the night before. The needles start dropping after forty-eight hours, and by day three you’re fishing them out of the gravy. That reality shapes when you build them and how many you bother with. For a dinner of eight, twenty minutes with garden shears covers the table. For a full December of use, dried citrus or plain ribbon rings make more sense.
Cost stays under five dollars if you have access to a hedge. The twine is the only purchase, and a spool outlasts the season.
17. Advent Calendar Village
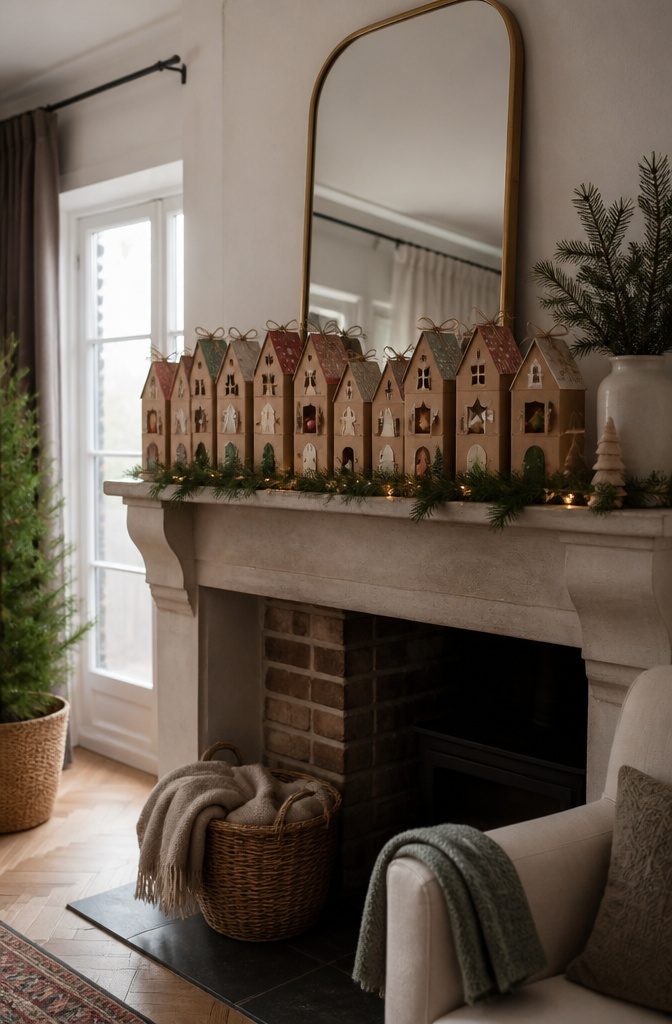
A paper advent calendar village lands somewhere between a craft-night win and a weekend project that gets away from you. The structures fold up from printed templates, scored along the lines, then taped or glued at the edges. Each house needs a dated opening or pocket, which means planning the layout before you cut anything.
Brown paper gives the village its muted, old-village look, and the rooftops tie closed with string so you can refill them next year. Fill the houses before you seal the roofs, because the opening disappears once that last flap goes down. Chocolate works, but so do tiny ornaments or rolled-up fortunes.
The finished houses line a mantel or hang on the tree as three-dimensional ornaments. Compared to a Christmas village cake, this one demands more upfront thinking and steadier hands, but it stores flat afterward and costs little more than paper and time.
18. Fabric Scrap Wreaths
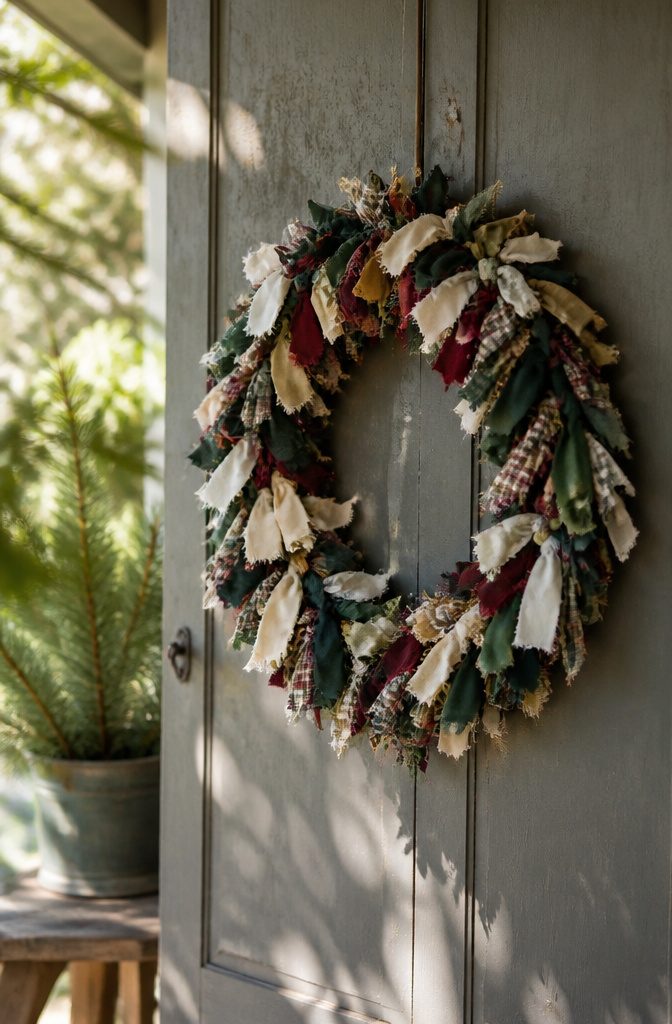
Fabric strips tied to a ring frame make a wreath that fills out fast and costs almost nothing. Cotton, linen, and wool scraps work best because they knot easily and hold the fluffy shape; synthetics fight back and tend to slip. Cut strips to 10 by 2.5 inches, about eighty to a hundred of them for a standard 10- or 12-inch wreath form. Tie each strip around both the outer and inner rings, then bunch them together so the frame disappears underneath. No glue, no sewing, just knots.
A wire frame from a past wreath saves the one purchase you might otherwise need. The finished piece runs fuller than most store-bought options and weighs less on a rental door that may already have fussy hinges. Denser fabrics in darker reads look intentional; thin prints in clashing colors read as exactly what they are, which is fine if that is the look, but know it going in.
19. Hanging Wreath Chandelier
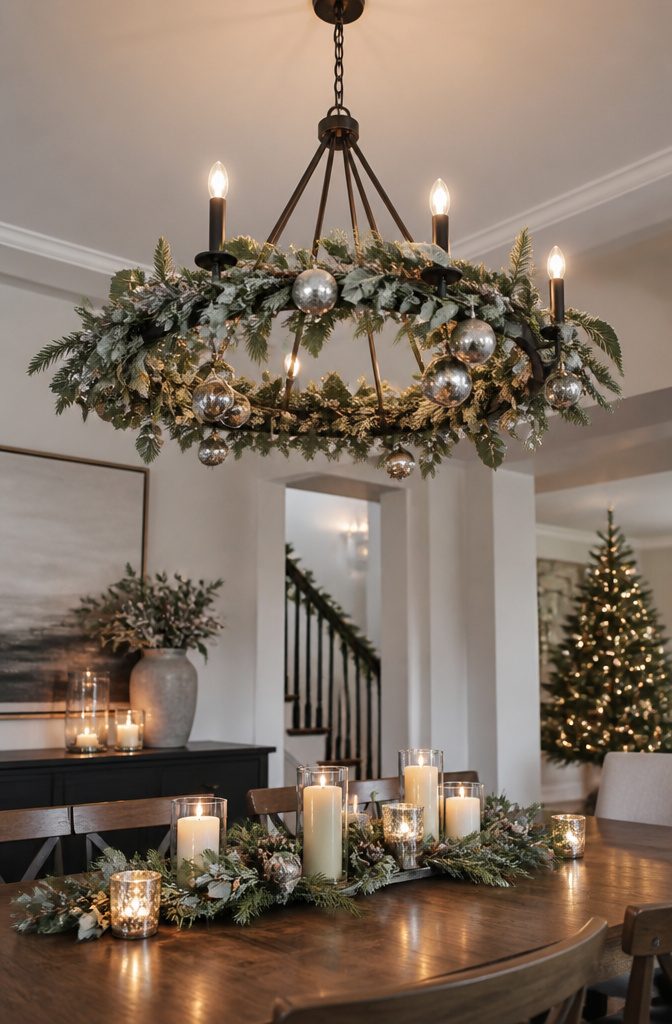
A wreath chandelier sounds fussy until you see one actually hung. I started with a single metal ring, wired a garland to it, and suspended the whole thing from the ceiling with gold ribbon. The ring keeps the shape clean; without it, the wreath sags into an oval by New Year’s.
The real question is what you anchor to. I tried a ceiling hook first, which worked fine in a rental with a hollow-core door frame nearby, but in the next place the plaster laughed at my stud finder. A light fixture turned out to be the sturdier bet, provided you use the existing canopy screws and keep the weight under what a flush-mount already handles. Two wreaths at different heights need two attachment points, or one central ring with ribbon lengths you can adjust after hanging.
For the second wreath I swapped in eucalyptus and willow, sprayed with snow finish, then wired a few baubles underneath so they caught the light. The baubles matter more than you’d think; they add the movement that makes it read as chandelier rather than wreath-on-a-string. Willow rings are cheap and light, which matters when you’re asking a ceiling fitting to hold more than it signed up for.
20. Paper Honeycomb Tree
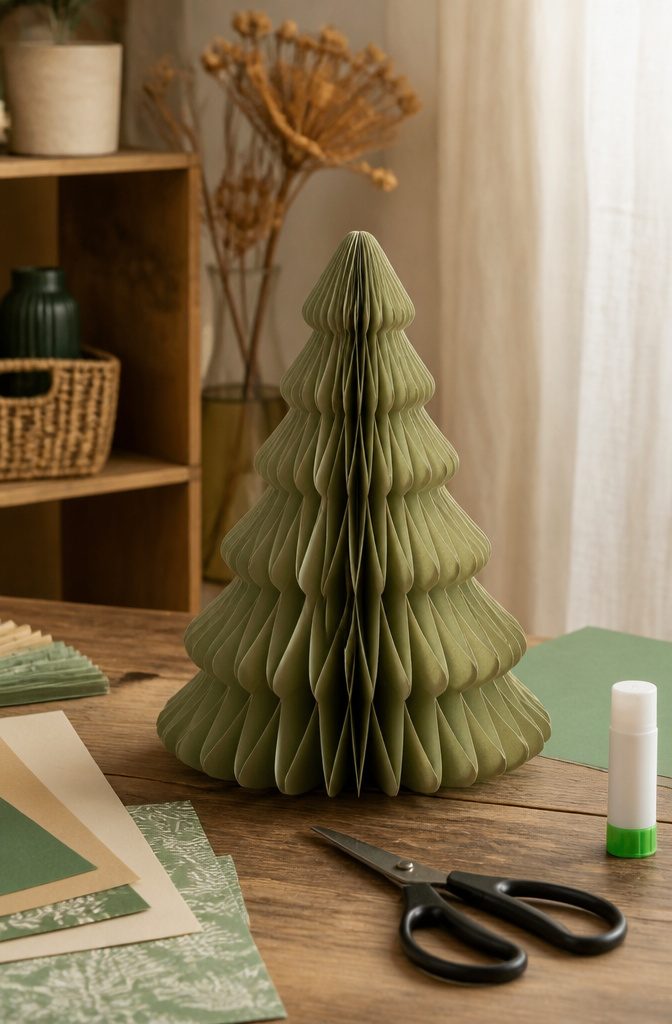
A paper honeycomb Christmas tree lives or dies on the cutting sequence. Score your folded paper at even intervals, cut to the fold line but not through it, then accordion-fold the whole sheet before you glue. The accordion is the structure; the partial cuts let it expand into that rounded profile.
The trick most people miss is gluing only alternating edges. If you glue every seam, the thing opens like a book and stops. Skip every other junction, and the folds push outward into a true 3D cone. I learned that by ruining two sheets of cardstock on the first attempt.
Tissue paper works for a soft glow if you light it from within, but copy-weight paper holds the geometry better. A glue stick sets fast enough that you can build a 10-inch tree in one evening, though white PVA gives a stronger bond if you have the patience to clamp each seam for a minute.
Weight the base with a wrapped brick or a jar of dried beans. These trees look airy but catch drafts like a sail, and watching one glide across the dining table is not the holiday memory you want.
Frequently Asked Questions
How can I decorate for Christmas without spending a lot?
Forage for pinecones and clip greenery from your yard, hit thrift stores for hymnals and old sweaters, and rely on basics like craft paper, twine, and salt dough. Most projects on this list sit under ten dollars if you already have the fruit or the leaves on hand. The pinecone bowl filler costs nothing but oven time, and a single hymnal covers a whole gallery wall for the price of one latte.
What are some easy Christmas crafts for adults?
Every project here clocks in at about thirty minutes or less once materials are out. The luggage-tag stocking labels and metallic cupcake-liner candle ornaments each take roughly ten minutes. Paper standing trees need maybe twenty minutes after the template is right, and fabric-strip wreaths build fast since they use nothing but knots, no glue or sewing.
How do I make DIY Christmas ornaments?
Salt dough mixes from flour, salt, warm water, and cinnamon, then bakes low and slow at 200°F for two to three hours. Dried orange slices go at the same temperature for four to six hours and string into garlands with twine. Paper candle ornaments roll craft paper into tubes, slip flattened metallic cupcake liners into slits for bases, and layer gold and orange teardrops for flames. Mini wreath forms take foraged greenery and hot glue, with whole star anise pressed in while the glue is still tacky.