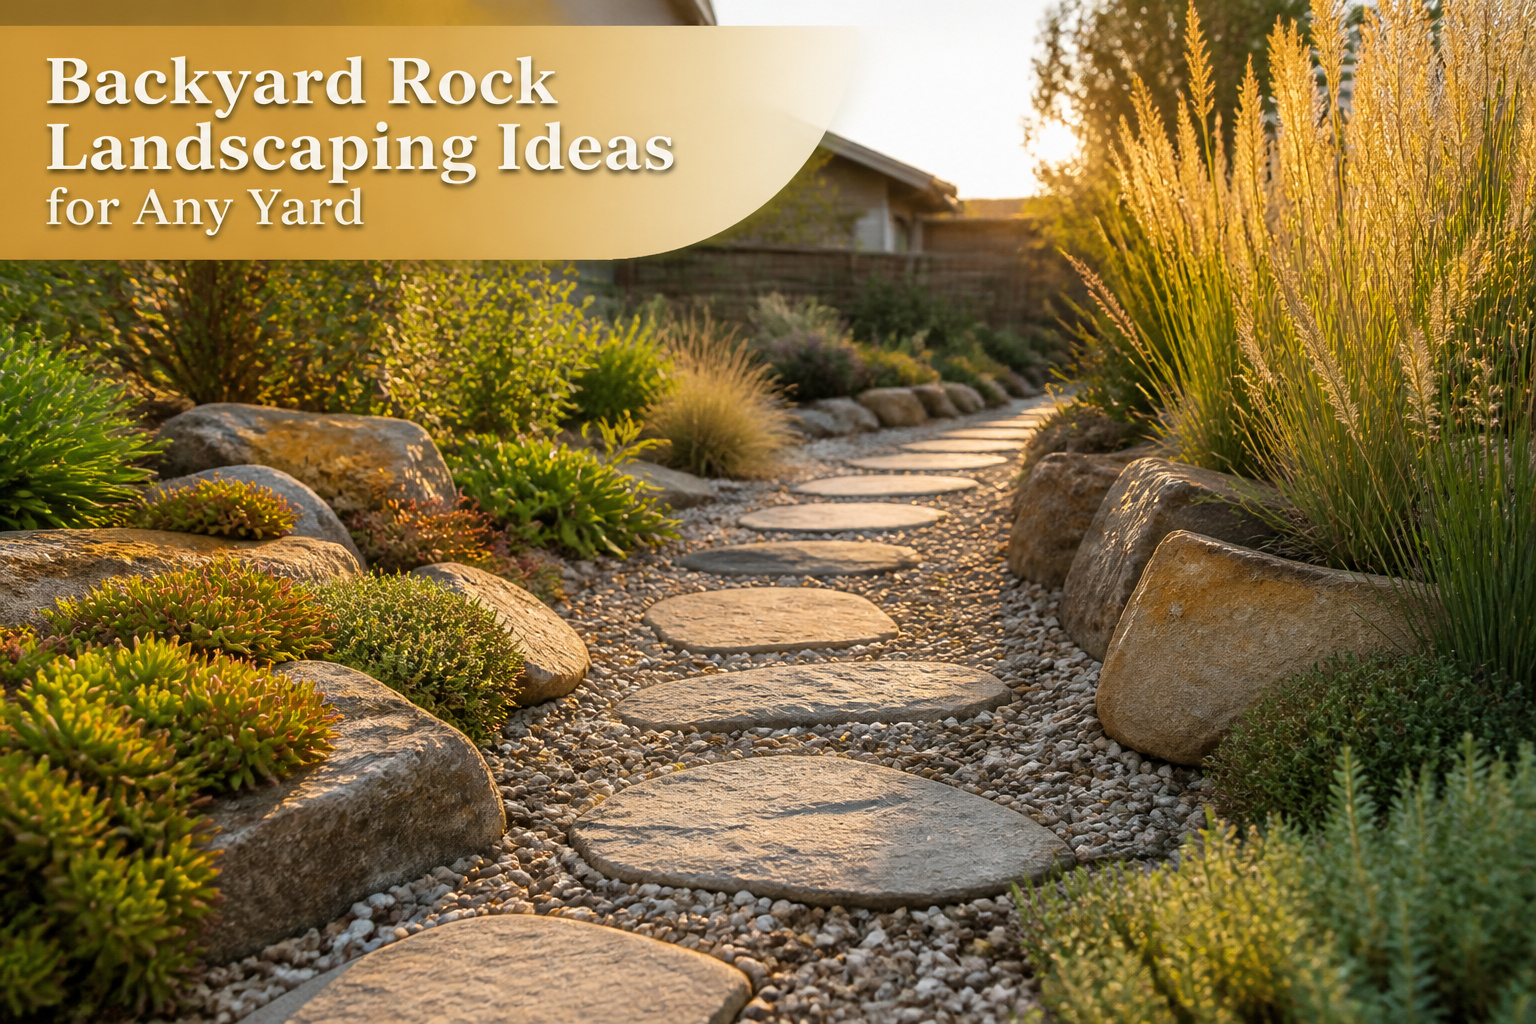
Rock landscaping spans from a $45 gravel ring around a single tree to a full xeriscape that cuts a water bill in half, and the deciding factor is usually drainage, not budget.
Every project in this list failed the first time I tried it because water went somewhere I did not plan for: a buried drainage layer saved the sedum, a gravel bed below frost line kept the retaining wall upright, and a spray of vinegar, salt, and dish soap only worked once I stopped treating it like a permanent fix.
1. Rock Garden
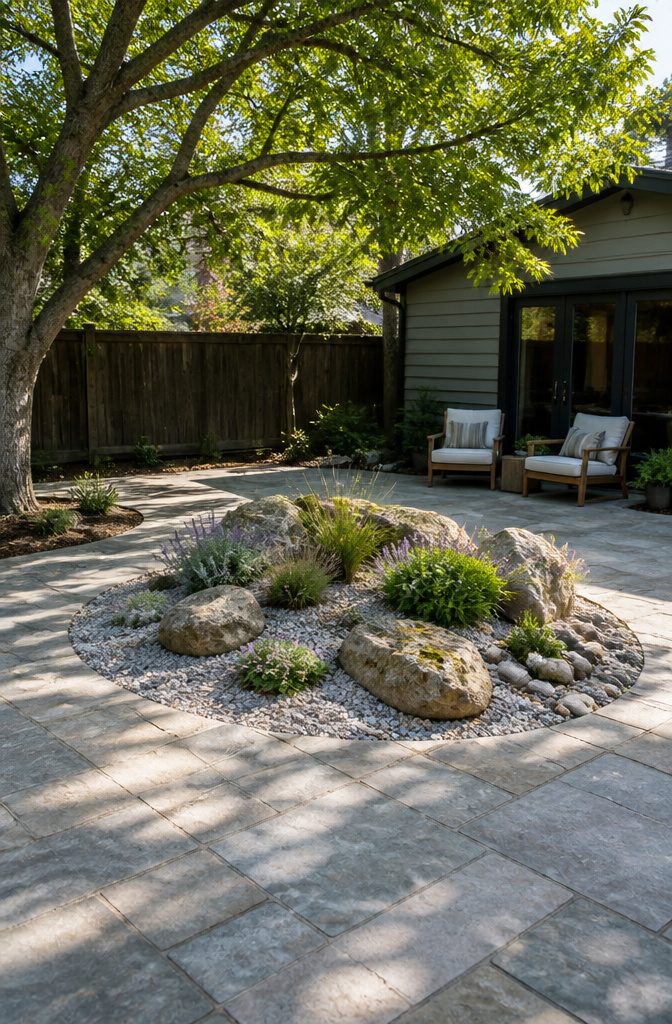
A rock garden built from small boulders and crushed granite checks the low-water box without looking like a concession to drought.
The first time I tried one, the buried drainage failed within a season and half the sedum rotted where water pooled. That drainage layer under everything, not on top, is the move that saves the planting.
Sedum, lavender, and ornamental grasses survived the second attempt; the moss rock and river stones I added for texture against the boulders made more difference than I expected.
For a defined corner roughly 8 by 10 feet, a mix of one-and-a-half tons of crushed granite and six small boulders gave enough material to vary heights and bury each stone one-third deep so it looked settled rather than dropped.
The crushed granite spreads easier than I thought, but it also migrates; a buried edge of larger stone or a strip of steel keeps it from drifting into the lawn over a season of rain.

Product Specifications: MIGHTY109 Granite Gravel 3/4" Size, 40 LBS per Bag

This gravel has a variety of uses including landscape and garden decoration, drainage, and building walkways.

Note: 5-8 mm black lava rock is crushed from larger volcanic rock pieces, so packaging may contain minor residue and dust. Adding it directly to the aquarium will cause water cloudiness, please rinse thoroughly with clean water.
2. River Rock Dry Creek Bed
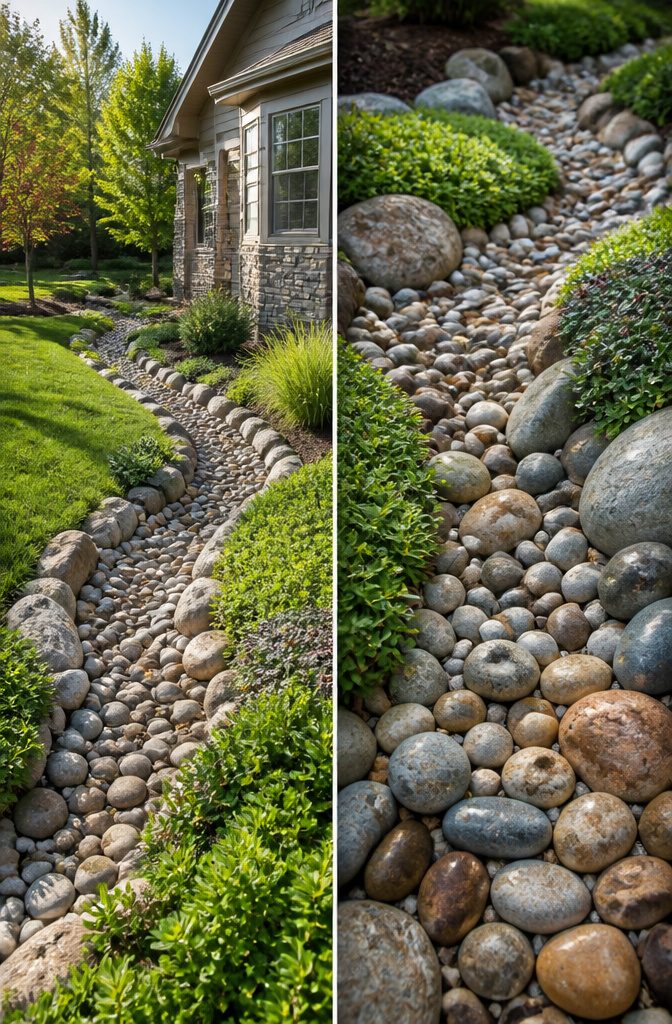
A dry creek bed looks like a natural waterway but handles the real work of moving rainwater away from your foundation.
River rock fills a shallow trench with a slight slope, so runoff has somewhere to go instead of pooling against your house.
Hardy groundcovers or mulch along the edges anchor the space and keep it from looking like a construction zone.
The drainage surprised me. I expected a decorative feature that might help a little in light rain, but during a real downpour the rock channel carries serious volume.
The water moves fast, which is the point, but that means the trench needs to be wide enough and the slope consistent or you get erosion at the edges.
For weed prevention between the stones, a spray of white vinegar, table salt, and a few drops of Dawn dish soap works better than pulling by hand.
The mix kills what is already growing and keeps new seedlings from taking hold in the gaps. Reapply after heavy rain, since the solution washes away with the same water the creek bed is built to move.

EXTRA LARGE 6–12 INCH RIVER ROCK – Natural Pigeon River stones approximately 6–12 inches with rounded and irregular shapes and attractive tan, cream, brown and gray earth tones.

LARGE 2–3 INCH RIVER ROCK – Naturally rounded stones approximately 2–3 inches in size featuring an attractive blend of brown, tan, cream, gray and other natural earth-tone variations.

NATURAL 2–4 INCH RIVER ROCK – Smokey Mountain river stones approximately 2–4 inches with rounded and irregular shapes and warm tan, brown, cream and varied earth tones.
3. Moss Rock Retaining Wall
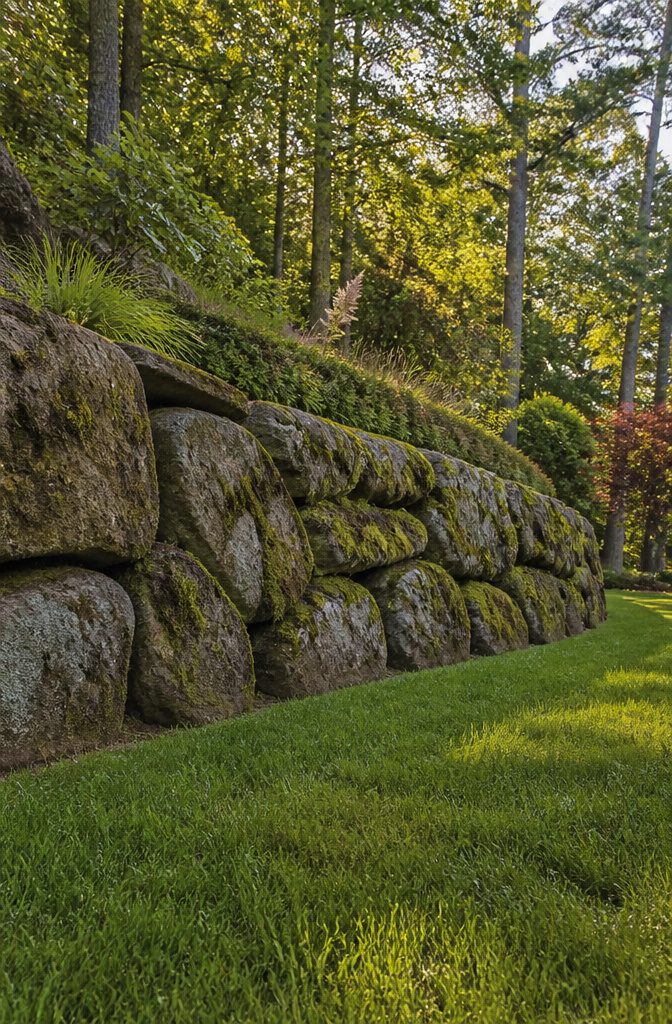
A moss rock retaining wall does two jobs at once: it holds back a slope and disappears into the scenery while doing it.
The weathered surface and natural moss already read like something that grew there, which is why I went with it over the uniform gray of commercial retaining wall blocks.
Cost was the other push.
The moss rock came in at roughly half per square face foot compared to the manufactured blocks I priced at a landscape yard, though that savings shrinks fast if you need to truck it in from outside the region.
I built mine from stone sourced about forty miles out, which kept delivery reasonable.
What I missed was the base. I started at ground level and backfilled behind the first course, thinking the weight would settle itself.
Two seasons later, the wall had shifted enough that a gap opened between the footing and the first rocks. The fix was pulling the first course and digging down eight inches to set a compacted gravel bed below frost line.
Start there, not where I did, and the weathering that softens the stone’s edges over a couple of years will be the only change you notice.
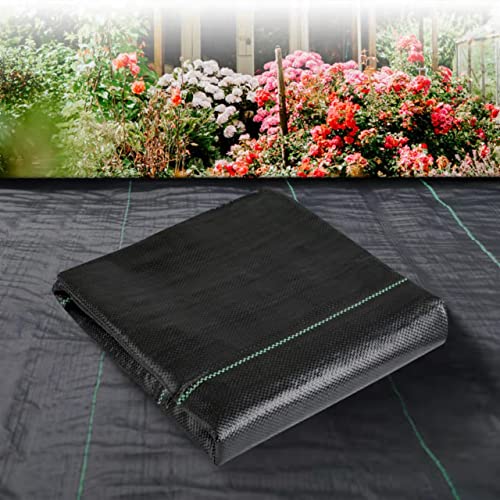
Premium Weed Barrier Fabric:Weed barrier landscape fabric is a type of geotextile fabric that is commonly used in landscaping and construction.With excellent weed control properties, providing a clean and tidy landscape.Very strong and durable,Pro landscape weed barrier will provide you with premium weed protection for a very long time.

WHAT'S IN THE BOX: One 3 ft x 50 ft non-woven roll covering 150 sq ft, plus 20 steel landscape pins

2-PACK, 400 SQ FT TOTAL COVERAGE: Includes two folded 4FT x 50FT landscape fabric pieces for 400 sq ft of total coverage. The two-piece format makes it convenient to cover separate garden beds, vegetable rows, pathways and landscaping areas one section at a time.
4. Rock Mulch Around Trees and Shrubs
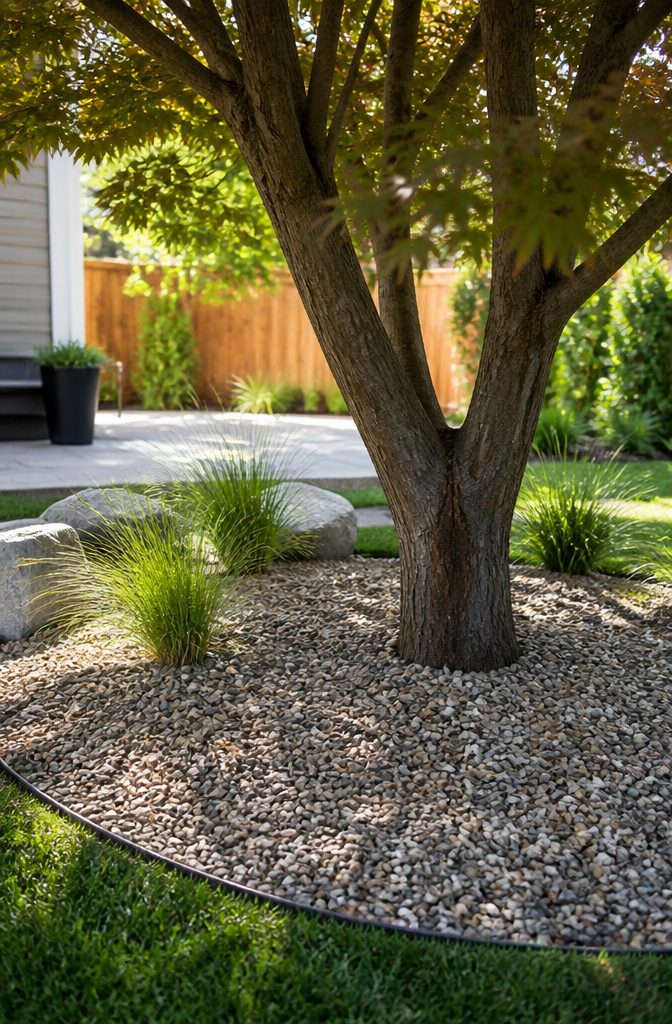
Small gravel around a tree base does the same job wood mulch does, and it does it without the rot, the re-application, or the annual spend.
Two to three inches deep is the layer that actually suppressed the weeds under my maple and kept the soil damp through July last summer.
Any thinner and light reaches the soil; any thicker and you risk the same suffocation problems mulch causes.
I learned that the hard way. The first season I used cedar chips, I piled them against the trunk in a tidy cone, the way I’d seen it done.
The bark stayed wet, and by fall the lower trunk had softened where the wood touched it. Maple roots need air at the collar; cedar holds water like a sponge and invites the fungi that finish the job.
I pulled the chips back to a ring with a six-inch gap around the bark, switched to pea gravel the next spring, and the tree recovered.
The gravel cost more upfront, about $45 for that bed versus $18 for cedar, but it has not moved or shrunk in two years. No bags to haul, no mold, no volcano.

ULTRA-REALISTIC NATURAL STONE TEXTURE – Elevate your outdoor curb appeal with these expertly crafted imitation stone blocks that mimic the rugged beauty of natural slate and granite. Unlike heavy, expensive boulders, our lightweight high-density materials provide the same aesthetic charm at a fraction of the weight and cost. Perfect for homeowners looking to add a touch of professional elegance to their garden, these blocks blend seamlessly with natural surroundings while offering a clean
5. Boulder Accents in Open Lawn
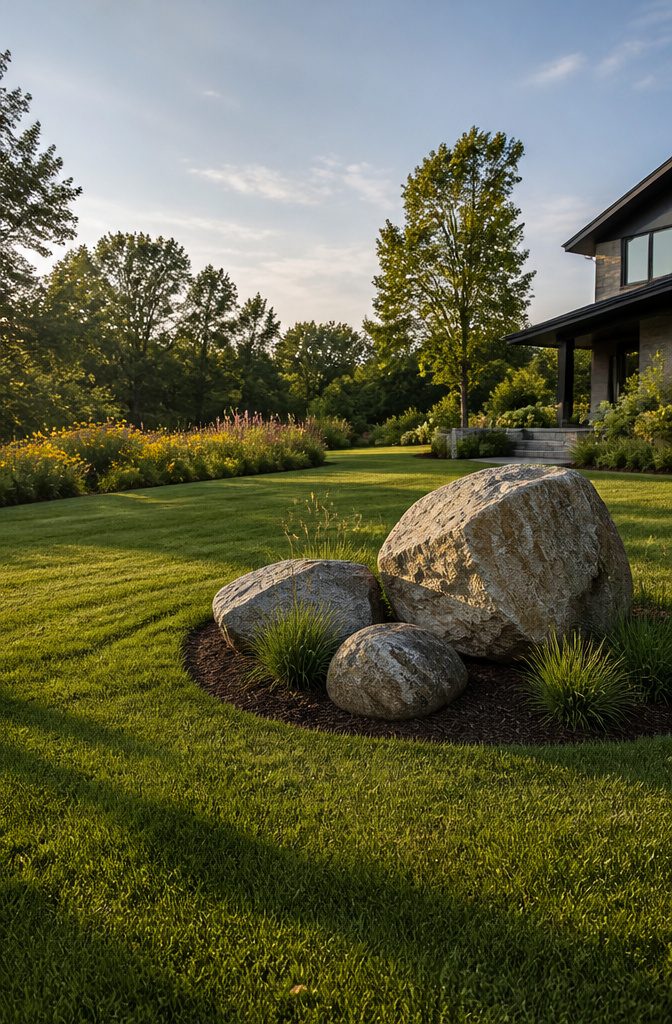
A flat lawn can feel like a blank stage with no walls. Large boulders solve that by becoming the scenery itself, giving the eye something heavy and permanent to rest on.
I learned the weight of that permanence the hard way. The stone I wanted was roughly 400 pounds, far past what two people could wrestle across grass without rutting the yard.
A come-along anchored to a timber A-frame let me drag it six inches at a time, resetting the rigging after each pull.
The whole move took an afternoon, but the alternative was a delivery fee that would have swallowed half the project budget.
Placement mattered more than I expected.
I set the boulder off-center near a corner, then added two smaller companions in a loose group with ornamental grasses at their feet. Up close the cluster looked wrong, crowded and accidental.
Stepping back twenty feet changed everything; the asymmetry settled into something that read as natural, not staged. The grass and mulch ring around the base keeps weeds down and makes the stone read as grounded rather than dropped from above.
Two or three boulders of varying sizes works better than one lonely giant. The grouping reads as a single gesture, and the scale difference keeps it from looking like a monument.
6. Rock Pathways and Stepping Stones
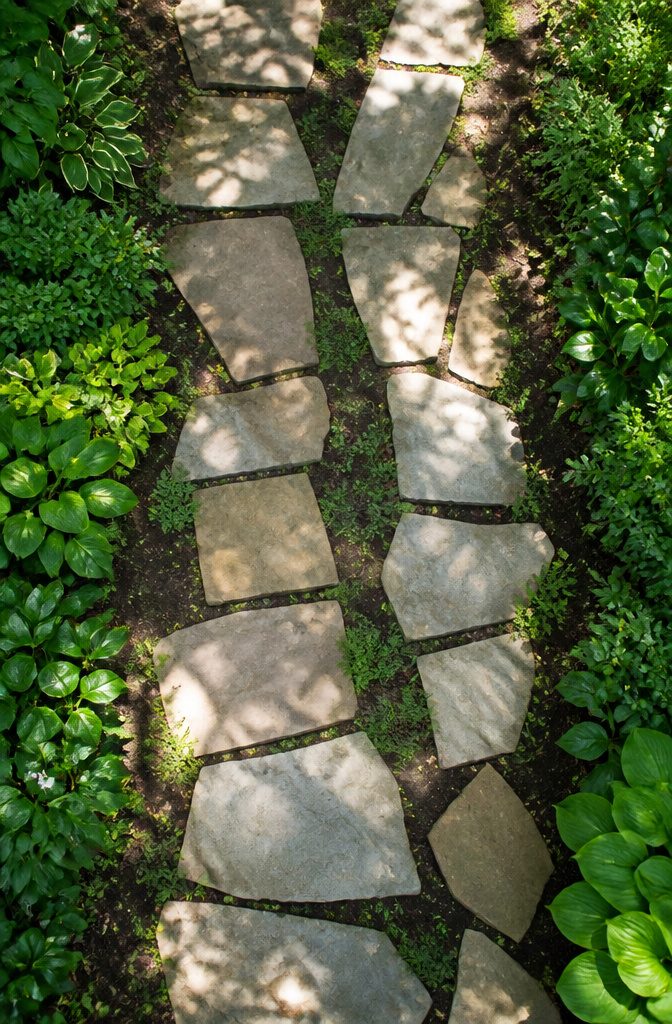
Natural stone paths invite people to move through a garden the way a hallway moves them through a house.
I laid flagstone stepping stones from the back door to a raised bed last spring, and the spacing mattered more than the stone itself. My stride needed about 24 inches center to center; my partner’s shorter legs needed 20.
Splitting the difference at 22 made neither walk comfortable, so I shifted to two paths side by side, hers tighter, mine wider, both routed through the same bed of crushed granite.
Base preparation ate an afternoon but saved the stones from the rocking that ruins so many weekend projects.
I excavated four inches, compacted the soil, added two inches of crushed granite, and ran a plate compactor over it twice before setting the flagstone. The stones have not shifted through two freeze-thaw cycles.
I started with loose gravel between the stones, the way so many backyard rock landscaping ideas show it. By midsummer, the gravel had scattered into the lawn, migrated into the beds, and tracked onto the patio.
Digging it out and letting the gaps stay empty, with just soil pressed level to the stone edges, took an hour and looked cleaner immediately.
Moss or creeping thyme would fill the gaps with texture, as I’ve seen done well, but bare spacing keeps the maintenance to a yearly level-check and nothing more.
7. Gravel Patio or Seating Area
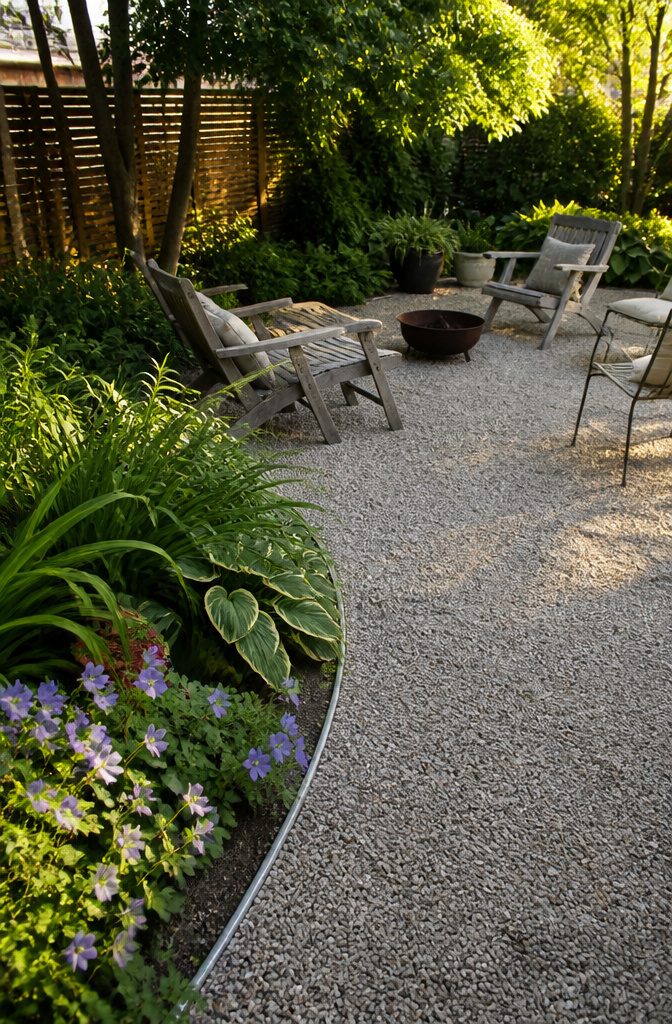
A gravel patio starts with grading the spot flat, then boxing it in with edging that actually survives freeze-thaw.
I used aluminum strip edging on one side and skipped it on another to see what happened; the bordered edge held its line through winter, while the open side washed out enough to need raking back into shape by March.
Depth is where I miscalculated. The guidance calls for roughly four inches of stone over compacted base, and my first attempt stopped at two, thinking the existing soil would do the rest.
Within a month the gravel had churned into soft spots where chairs settled and feet dragged. I pulled it back, added the full four inches, and the surface has stayed level since.
Landscape fabric is the other split decision.
Under the seating area it has kept the stone from sinking into the clay beneath, but I ran it under a corner that sees leaf fall and now have a layer of decomposed matter sitting on top of the fabric that will not wash through.
In spots where you will not disturb the surface often, fabric buys time; anywhere you rake or where organic matter collects, it becomes a future problem.
Pea gravel works for barefoot traffic, though crushed stone locks tighter if you are placing furniture that gets dragged around.
8. Water Features with Natural Stones
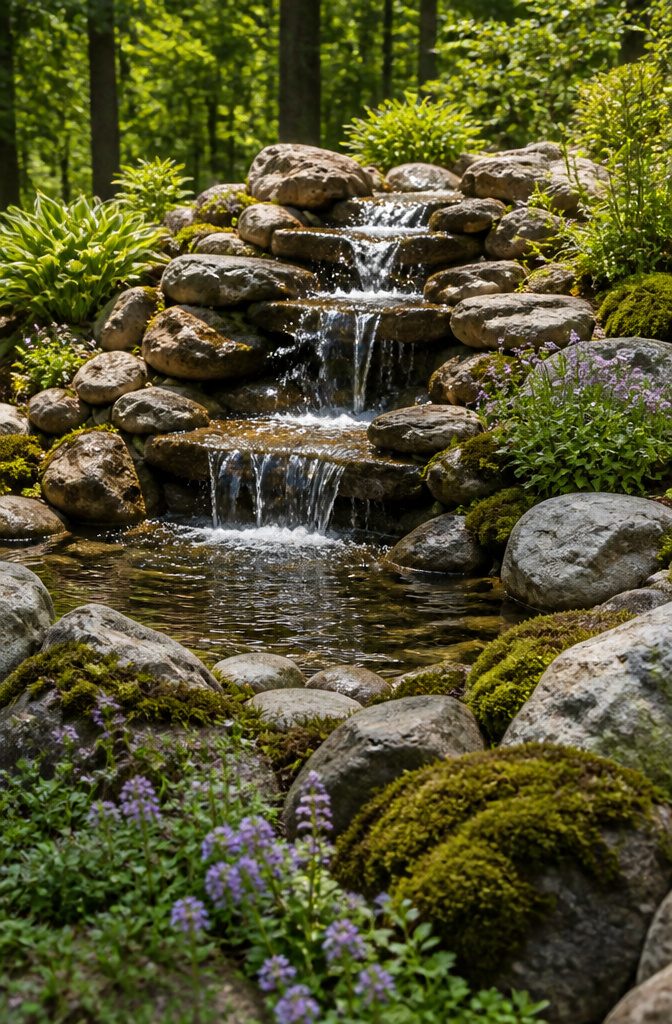
A small fountain with natural stones stacked around it looks like it has always belonged in the yard, but getting there took me two tries.
The first attempt used a solar pump that quit every time a cloud passed, and the preformed plastic basin I buried cracked the first winter when the ground shifted. That version cost about $90 and went straight to the curb.
The working setup sits in a $220 reservoir basin built for frost, with a low-voltage pump on a timer and fieldstone mortared loosely enough that water weeps between the gaps instead of shooting out in a jet.
The sound is quieter, which neighbors appreciate, and the stone hides the plumbing completely.
Renters can build the same thing in a half whiskey barrel or stock tank and take it along, though the weight of even a small stack of stone means planning the move before you fill it.
I spent roughly $340 total on the version that lasted, against the $90 lesson that taught me what to skip. The difference was not the stone, which was free from a friend’s field clearing, but paying for hardware that handles actual weather.
9. Japanese Rock Garden Elements
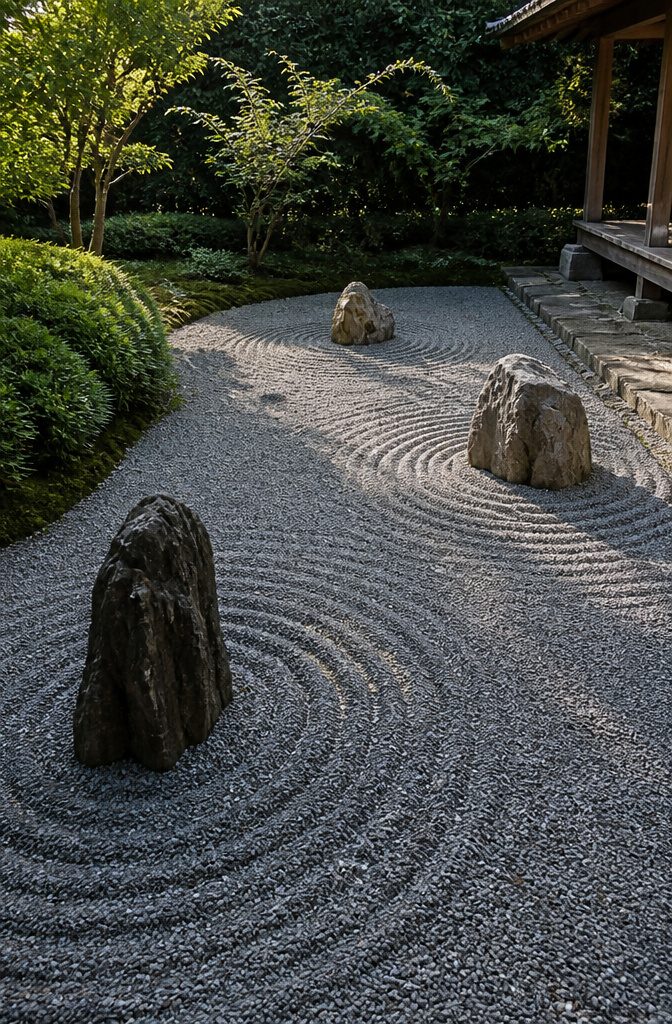
A Japanese rock garden asks for restraint in a way most backyard rock landscaping ideas do not.
The raked gravel and placed stones are meant to read as islands in open water, and that metaphor falls apart fast when you add too much.
I tried two stone groupings at first, one near a small maple and another closer to the fence line. The second group competed for attention instead of letting the eye rest, so I removed it after a weekend of second-guessing.
Three stones in a single asymmetric arrangement turned out to be enough for the space I had, roughly 12 by 16 feet.
The maintenance surprised me. General rock gardens stay tidy with occasional weeding; this style needs the gravel raked into wave patterns that hold meaning only if you keep them up.
I maintained a simple parallel pattern for three weeks before the novelty wore thin, then let it loosen into something I could refresh every two weeks instead of daily.
That rhythm still gives the garden its calm presence without making me feel like I am tending a museum display.
Water is absent by design, which keeps the cost and the mosquito count low. The trade is visual silence: there is no movement to distract from the stones, so their placement carries all the weight.
10. Xeriscaping with Stones
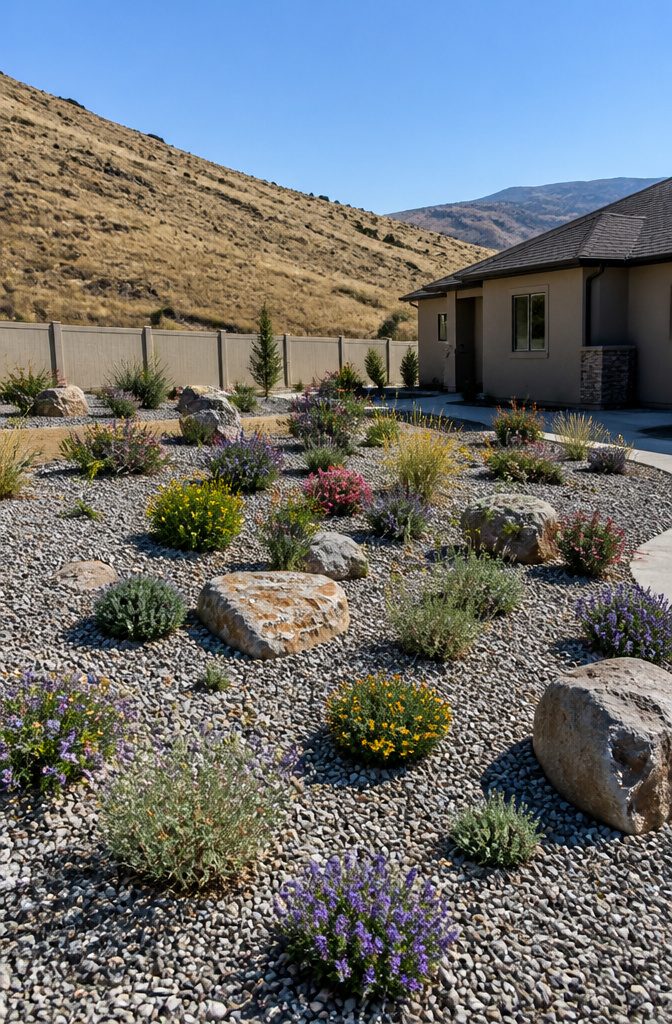
Xeriscaping with stones is the method that finally made my backyard look intentional instead of abandoned. The principle is simple: replace thirsty lawn with gravel, mulch, boulders, and native plants bred to survive your actual climate.
I learned fast that the ratio of rock to planted area matters more than the plants you pick. Too much gravel and the yard reads as parking lot; too many plants and you are watering on Tuesday anyway.
For my own plot, roughly two-thirds rock to one-third planted space looked balanced once the plants filled in.
That was the surprise. The first year it read as sparse, but by August of year two the natives had rooted deep enough to stay green through the driest month while my neighbor’s sod crisped to straw.
The water bill was where the argument closed.
Tracking month over month, the drop was sharp enough to notice on the statement without squinting. No precise percentage to promise, because every municipality prices differently, but the savings were real and they were immediate, not some future payoff.
The maintenance drop came too. Less mowing, almost no fertilizing, and the weeds that did appear pulled easily from the loose gravel.
11. Rock Borders for Garden Beds
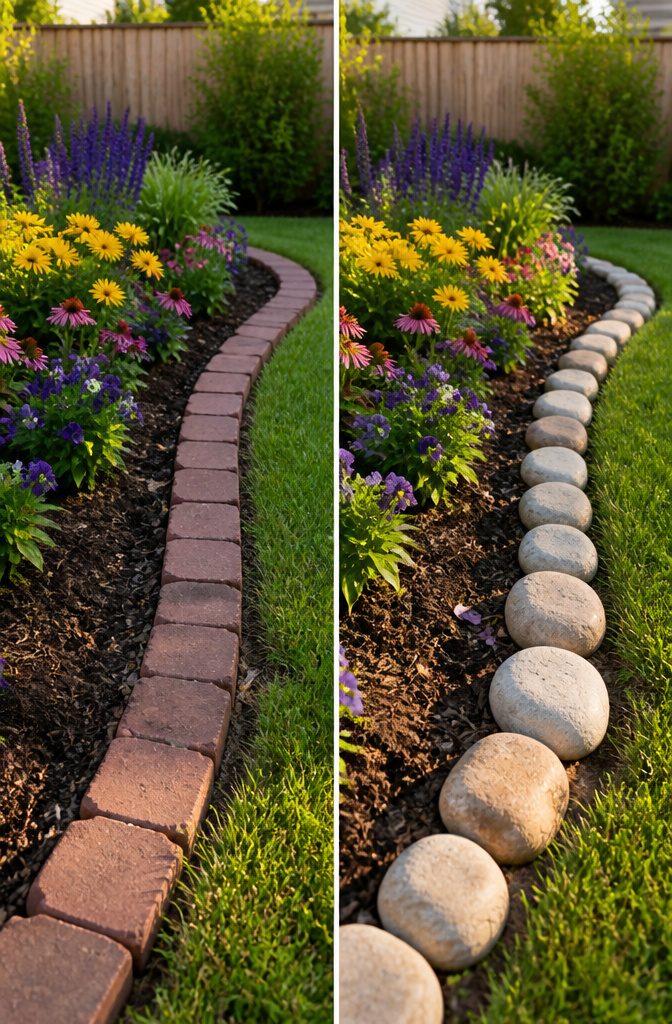
Medium-sized stones edged the flower beds in my last rental, and they stayed put because each one weighed enough to sit firm in the soil rather than roll underfoot or wash out in rain.
Anything smaller than a softball kept migrating into the grass, especially along the curves where the mower line wandered. Straight beds were simpler: a shallow trench, stones set shoulder to shoulder, done in about an hour per six feet.
Curved beds took twice that because each stone needed to be rotated and settled individually to follow the arc without gaps.
I had used plastic edging in a previous yard, and while it went in faster, the rock border held mulch better and never warped out of the ground after a hot summer.
The tradeoff was the upfront labor, but the finished line looked intentional rather than installed, and that distinction mattered from the sidewalk.
12. Front Yard Rock Display
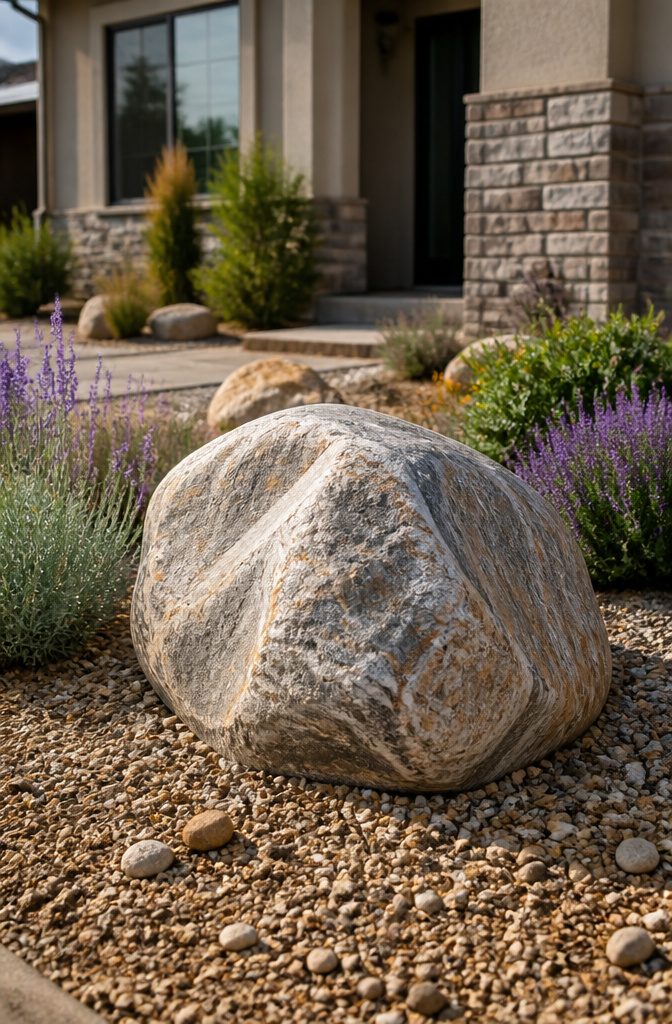
A bold rock centerpiece at the entryway can do more for curb appeal than most front-yard planting schemes, which is exactly why I almost skipped it for a backyard-focused article.
The brief is "backyard rock landscaping ideas," and a front display felt like a category error.
But the neighbor’s reaction changed my mind. After helping a friend install a central boulder surrounded by gravel and drought-tolerant perennials at her rental, the landlord stopped mid-driveway to ask what landscape company she’d hired.
The mix of textures, a smooth central stone against rougher gravel, reads as intentional design even on a tight budget.
Water usage drops sharply once perennials establish, and the whole setup survives a weekend with two people and a rented dolly.
For renters, the gravel base lifts out in sections if you need to restore the yard later, which matters when your deposit is on the line.
Warm Earth Tones
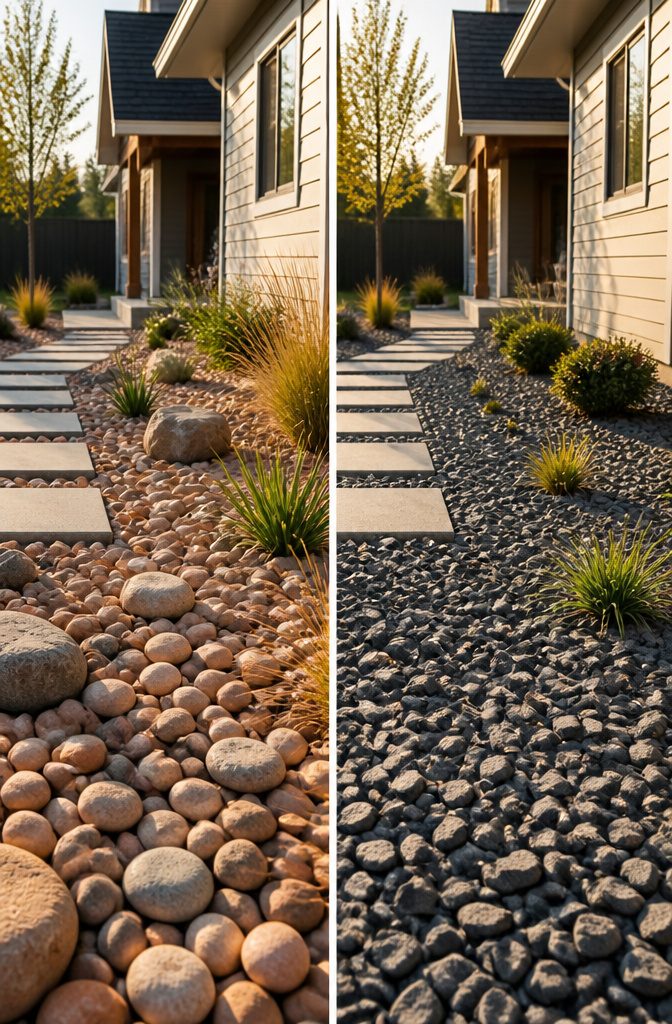
Gray river rock still dominates most supplier lots, but the stock is shifting.
Two local yards I checked this spring now carry "greige" blends and terracotta-tinted stones alongside the standard blue-gray, and one had sandy tan pebbles in bulk bins for the first time.
The rust and tan tones carried roughly a fifteen percent premium per ton over standard gray at both places, which adds up fast on a whole-bed project.
Morning light reads these warmer stones closer to their true color, soft and sun-drenched against wood siding or cream trim.
By evening they flatten toward brown, losing some of that glow. I would not pick tan or terracotta for a spot that only gets late-day sun; the color investment disappears just when you’re outside to see it.
Bioswales and Drainage
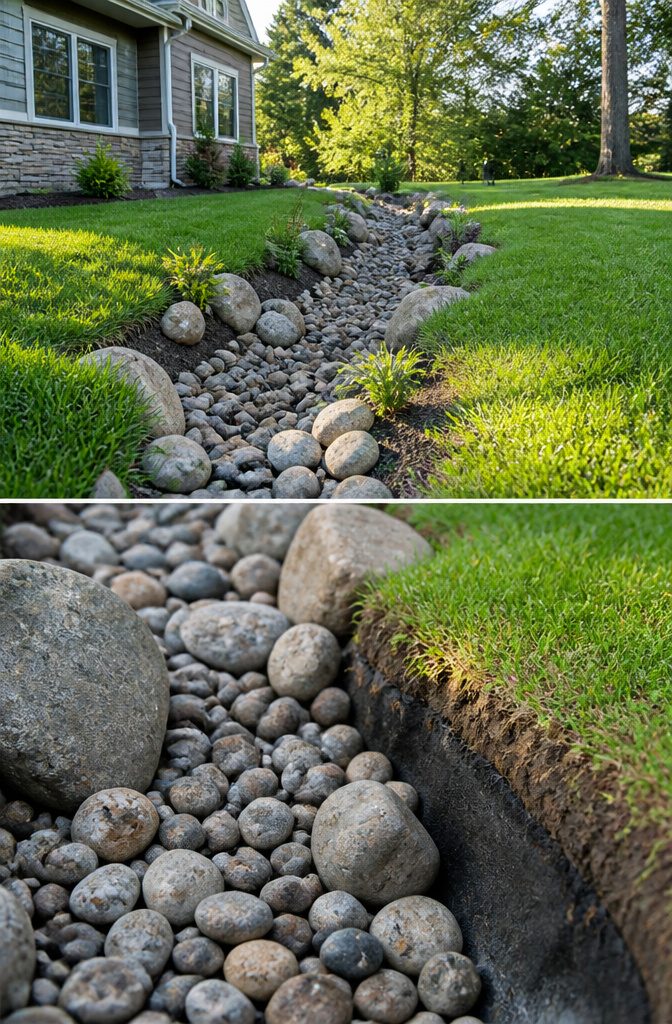
A backyard with a 4 percent slope sounds gentle until the first heavy spring rain sends water pooling against the foundation.
That slope was enough to create a problem at my place, and it was enough to justify something beyond the usual dry creek bed.
County extension guidance called for a 6-inch depth of river rock in the swale itself, layered over compacted soil with a filter fabric underneath.
The rock size matters less than the void space between stones, which is what actually slows and filters the runoff.
I used a mix of 2-to-4-inch river rock and a few larger boulders to break the flow and keep the channel from looking like a drainage ditch wearing a costume.
The water that used to pool by the back corner of the garage now diverts toward a rain garden planted with sedges and rushes in the lowest part of the yard.
The swale carries it there gradually instead of letting it sheet across the lawn and pick up soil. Two seasons in, the grass above the buried portion of the line is greener, not drowned, and the garage wall stays dry.
Weed Prevention and Maintenance
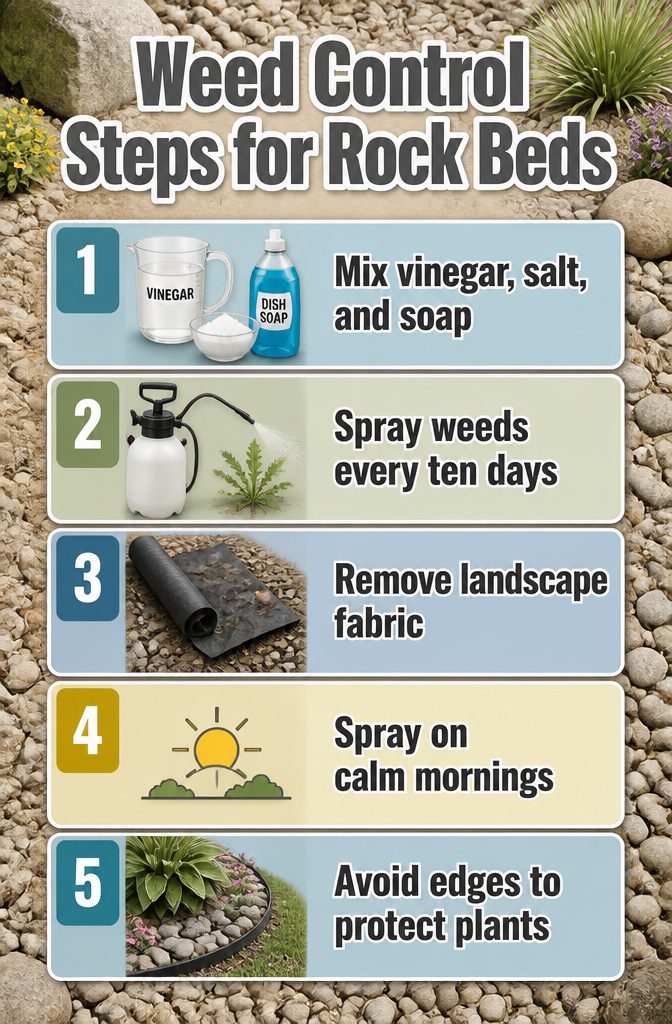
A vinegar, salt, and dish soap spray handles most of the weed control in my rock beds now.
The vinegar burns the leaves on contact, the salt dries the roots from the surface down, and the soap keeps the mixture stuck where you sprayed it.
I mix it in a pump sprayer and hit anything green about every ten days through the growing season, more often after rain.
I pulled up all the landscape fabric I had installed under the rocks three years earlier.
Water pooled on top of it during heavy storms, the decomposed granite between the rocks turned to mud that never dried, and weeds rooted in that layer anyway, growing on top of the fabric where they were harder to pull.
Fabric works better under mulch than under rock; under rock, it creates more problems than it solves.
The salt in that spray taught me the last lesson. Runoff from a treated strip killed a hosta planted two feet downslope the following spring.
Salt does not stay where you put it. Now I spot-spray only on calm mornings, and I keep the mixture away from bed edges where water carries it to plants I want to keep.
Frequently Asked Questions
How do I keep weeds from growing through river rock?
A spray of white vinegar, table salt, and a few drops of Dawn dish soap kills existing weeds and stops new seedlings from sprouting in the gaps.
Reapply after heavy rain, since the solution washes away with the water the creek bed is built to move. Keep the mixture away from bed edges where runoff can carry salt to plants you want to keep.
Does river rock increase home value?
River rock boosts curb appeal, which in turn can lift home value.
A bold rock centerpiece at the entryway reads as intentional design even on a tight budget, and the water savings from established drought-tolerant plantings add practical appeal for buyers.