

A garage workshop works only when the layout matches how you actually move through a project, not how the tools look on a wall. The difference between a bench you use and one you fight is usually six inches of depth, which the author learned after building a 30-inch surface from a salvaged door and finding the back corner unreachable.
1. Central Workbench
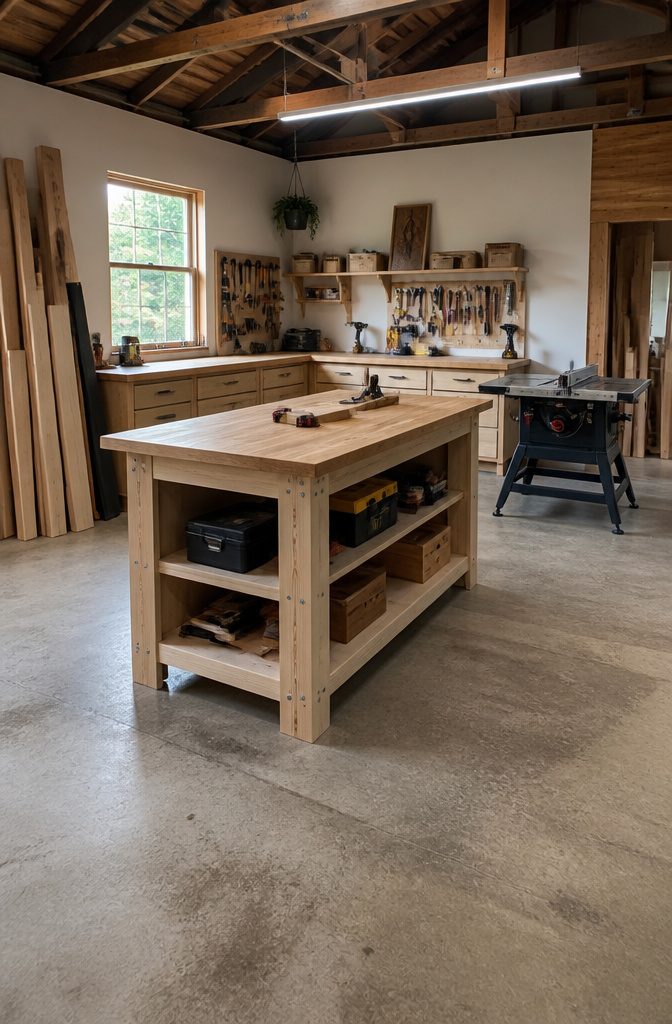
A workbench in the center of the garage changes how the whole space moves. Mine sits slightly off-center, near the table saw, so the workflow runs from rough cuts to assembly without crossing the entire floor. Height matters more than width: 34 inches puts most projects at comfortable hand level for assembly and finishing, though taller builders often prefer 36. I built mine from 2x4s and a salvaged solid-core door for under $200, which sounds like a bargain until you try reaching the back corner. The door gave me 30 inches of depth, and that extra six inches past a standard counter became the mistake I notice every time I clamp something near the wall. Two feet would have kept every inch usable. Underneath, I added a single shelf for the tools that see daily use; the rest went on wheels so I could roll them where the project actually sat, not where the bench forced them to be.

Instant Workspace Anywhere: Ready to work in just 30 seconds with no assembly required, this lightweight worktable is perfect for DIY projects, home improvements, and job sites.
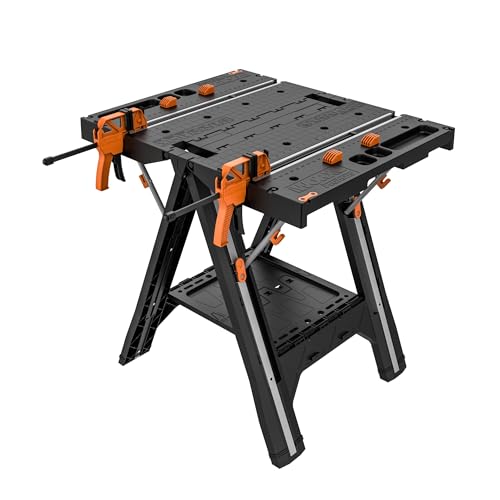
FOLD AND GO: More than just a workbench for garage use, the Pegasus goes anywhere you need extra support . It’s easy to pop open for set up, it folds down compact to save on storage space, and fits under your arm for comfortable carrying

FOLDING DESIGN: Offers compact storage and easy mobility to take from work site to work site
2. Table Saw Placement
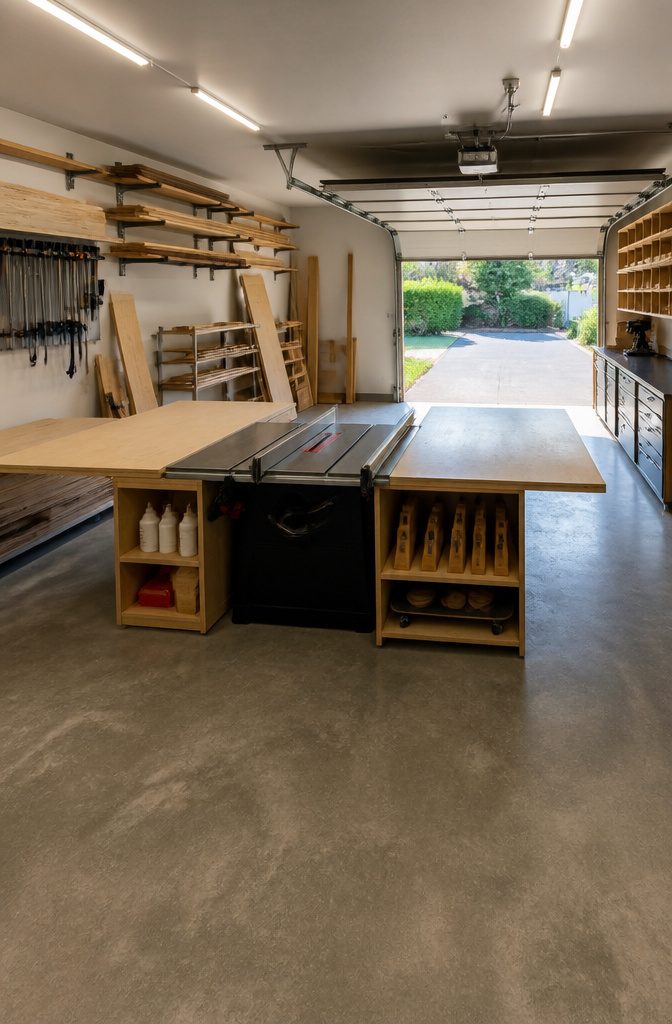
The table saw sets the rhythm of the whole shop, and I learned that the hard way after three moves. My first placement had the blade two feet from a sidewall with the garage door behind me. Ripping a full sheet of plywood meant I could barely open the door to walk around the sheet, let alone support it. Eight feet of clear infeed and outfeed space is the minimum for handling sheet goods without fighting the material, and that only works if the saw faces the garage door so a long board can run straight out into the driveway.
My outfeed table sits flush with the saw height and doubles as my assembly bench, which saves roughly four square feet of dedicated floor space in a garage that never has enough. Shelves underneath hold push sticks, glue, and the hardware I reach for ten times a session. The real mistake was routing extension cords across the path behind the saw so I could keep the vacuum closer. Stepping over a cord while backing away from a blade that is still spinning is not a lesson you want to repeat. Now the power runs overhead, and the floor stays clear from saw to door.
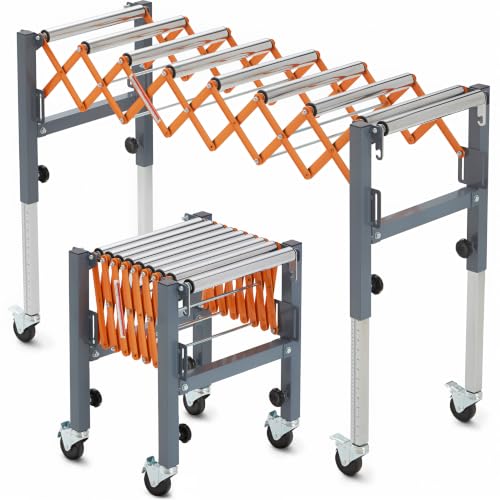
Expandable Roller Conveyor: This expandable roller conveyor features portable conveyor rollers that extend from 14 to 50 inches long with an adjustable height from 23 to 36 inches, making it a perfect table saw stand and outfeed roller for any workshop setup.
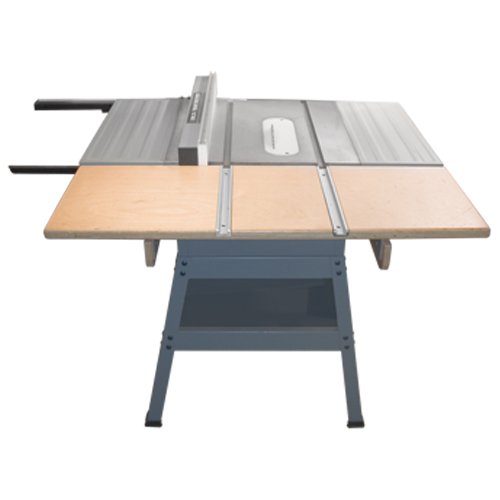
WOOD PLATFORM AND SAW ARE NOT INCLUDED: The kit includes the following parts;

Maximize Your Space: A removable outfeed table with folding legs for compact storage when the table isn't needed—perfect for making the most of space in small workshops; this extension table for table saw gives you a large work surface when needed and lets you easily tuck it away when not in use
3. Outfeed Table
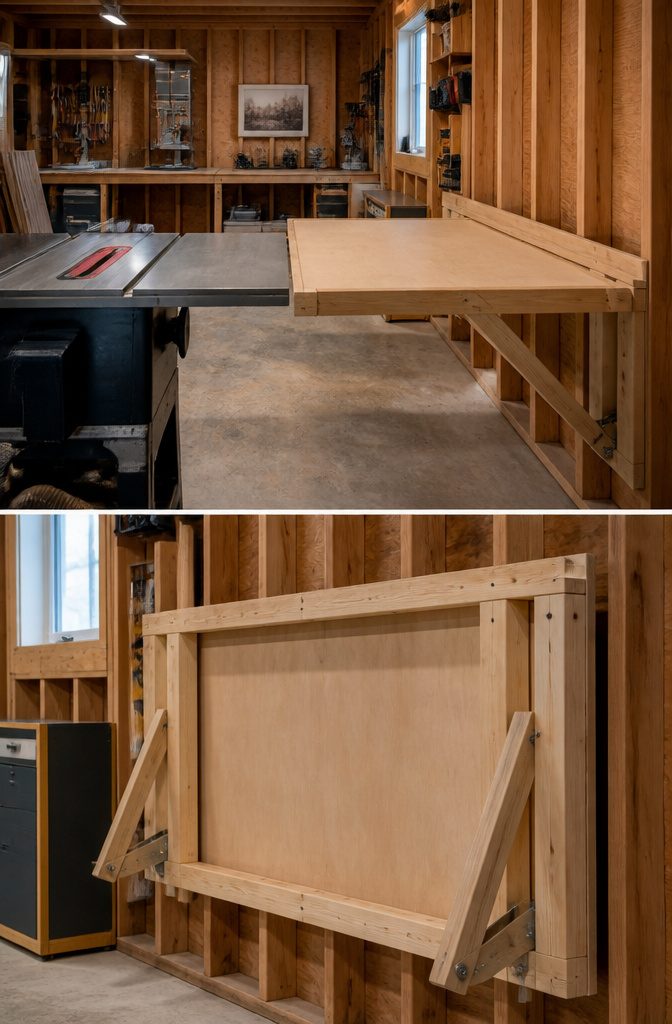
The first time a eight-foot board tipped off the back of my saw and cracked the drywall, I started hunting for a better answer than a chair. An outfeed table that folds flat against the wall turned out to be the fix I actually used, not the rolling stand I almost bought.
Mine is a simple plywood top on a 2×4 frame, hinged at the wall so it drops down when the car needs the bay. Getting the height right mattered more than I expected; I shimmed it until the surface sat dead level with my saw table, which took three tries because garage floors slope. Without that exact match, boards still catch and kick.
The near-miss came a month in. A board warped mid-cut, lifted at the trailing edge, and caught me in the ribs before it hit the floor. A two-inch back rail, just a scrap of oak screwed to the rear edge, stopped that from happening again. It costs nothing in clearance and saves the occasional surprise when stock twists.

Tabletop Thickness: 3/4'' to 1-1/2'', depending on saw - Tabletop Width: 30'' to 36'' - Tabletop Length: 40'' to 52'' - Leg Length Range: 22-5/8'' to 37-5/8'' in 1'' increments

Rock-Solid Construction: This roller stand is made from chrome-plated steel, ensuring exceptional durability and strength. With a maximum load capacity of 440 lbs, it is designed to effortlessly support the cutting of heavy materials. Let’s experience smooth and secure cutting!

660 LBS CAPACITY & DOUBLE-ROW ROLLER SUPPORT: Supports up to 660 LBS with two parallel roller tracks that create a broad material support surface for boards, panels and long workpieces, helping guide stock during table saw outfeed, panel cutting and assembly tasks.
4. Vertical Storage Solutions
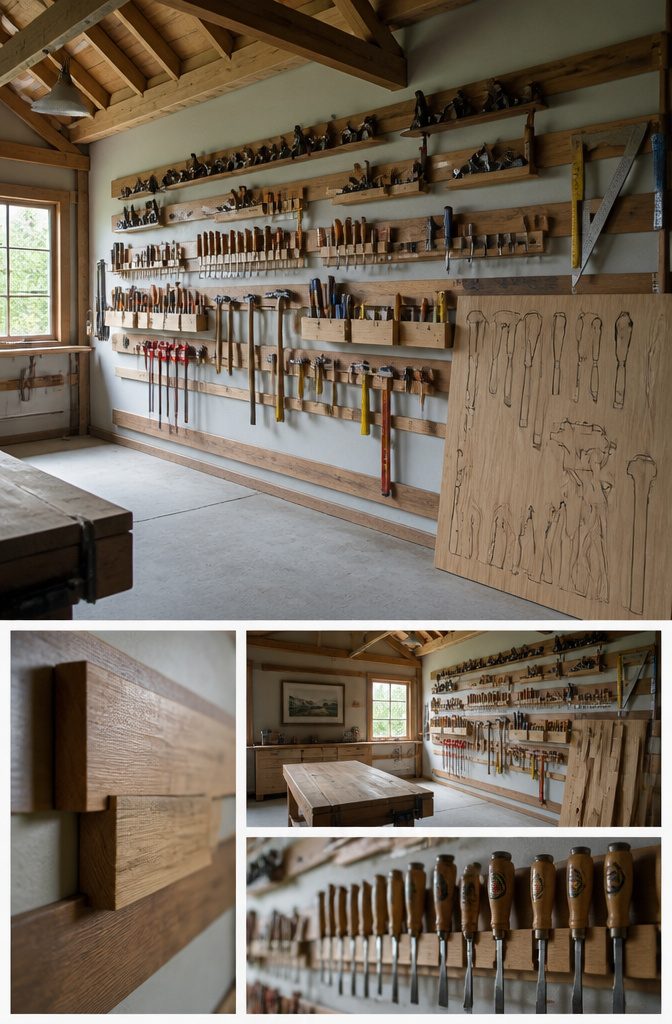
Pegboard has its place, but the 1/8-inch stuff warps the first time you lean on a wrench, and even 1/4-inch pegboard locks you into whatever hook spacing the manufacturer decided. French cleats solve both problems at once. The system is just two strips of wood cut at a 45-degree angle: one screwed to the wall, the other to the back of a custom holder. Lift the holder off, move it anywhere, done. A full wall of French cleats cost me about a third of what metal cabinets would have, and the modularity means I can build a holder for my drill charger today and a clamp rack next weekend without drilling new holes.
The project that sold me was hanging a full sheet of 3/4-inch plywood as a tool board. I traced every hand tool onto it, cut the outlines with a jigsaw, and backed the whole sheet with a French cleat top and bottom. It hangs like a painting, lifts off in one piece if I ever need the wall back, and the 3/4-inch thickness keeps the pegs from punching through when I slam a chisel home. The real payoff was floor space. Vertical storage moved twenty-odd tools off my workbench and onto a wall I wasn’t using, which gave me back roughly six square feet of benchtop and enough clearance to actually roll my shop stool around without kicking something over.

[Adjustable Height Design]-- The rolling mechanic tool cart features an adjustable height function. You can easily adjust its height within the range of 35 to 45 inches. This height - adjustable table is highly adaptable to various work scenarios, especially when you're performing different vehicle repair tasks, allowing you to work at a comfortable height

Versatile Use Across Multiple Projects: This adjustable workbench is ideal for a wide range of tasks. Whether you're using it as a workbench for garage projects, a kitchen workspace, or a welding table, it offers ample room and flexibility for all your needs

Adjustable Non-slip Foot Pad: Each leg of the work bench is equipped with an adjustable rubber non-slip foot pad, so when the ground is uneven, you can freely adjust it properly to keep desktop horizontal.
5. Mobile Tool Bases
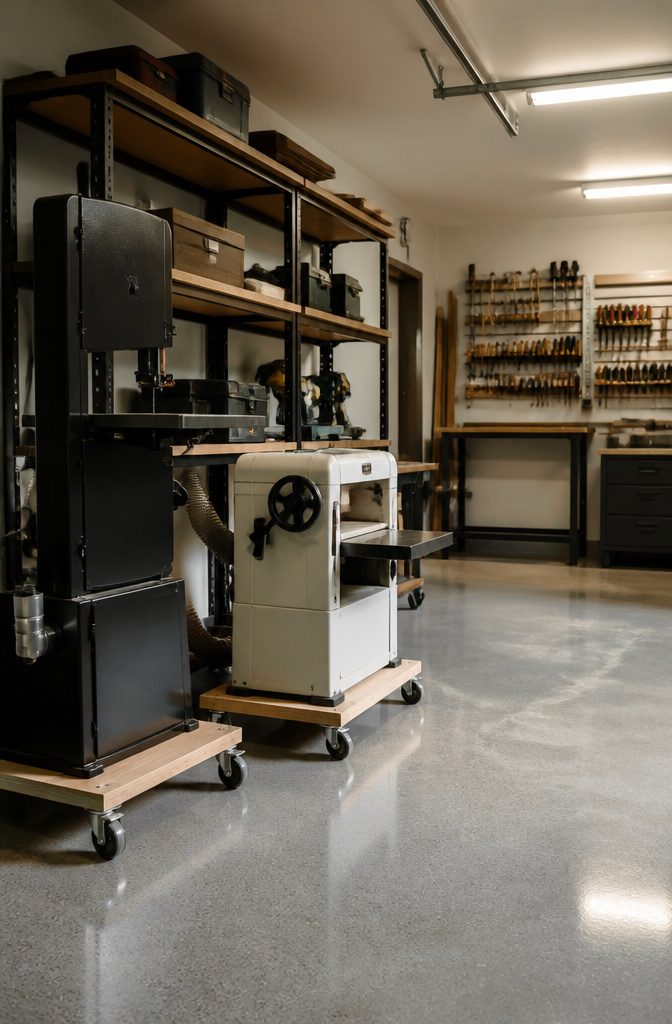
A shared garage forces every square foot to work twice, and mobility is the only way a woodworking corner survives when the car still needs its spot. My planer and band saw live on mobile bases that roll them to the center when I am working and tuck them against the wall when I am done. The first casters I bought were three-inch hardware-store wheels rated for light furniture, not a 300-pound machine. One collapsed under the planer mid-pass, and the base tipped hard enough to scar the concrete and nearly take my ankle with it. Now I run five-inch casters with individual ratings that add up to at least double the tool’s actual weight, because the rated load assumes perfect distribution and garage floors are never perfect. The band saw, lighter but tall, gets the same treatment; a top-heavy machine on a weak caster steers like a shopping cart with a wobbly wheel and stops like one too. For anything that usually stays put, like an outfeed table, side-mounted removable casters make more sense than permanent wheels. The cabinet sits flat on the floor until you slide the brackets in and pop it up to move it.

Unmatched Strength for Demanding Workspaces: Engineered with 100% reinforced cold-rolled steel and a robust 500lb capacity, this heavy-duty rolling tool cabinet is built to withstand a lifetime of professional use. The premium electrostatic powder coat finish offers superior defense against scratches, rust, moisture, and chemicals, ensuring reliable performance in any garage, basement, or warehouse. Constructed from eco-friendly, zero-formaldehyde materials, it provides a safe and durable foundation for all your home workshop storage needs.

Stay Organized & Save Time: This tool cart offers dedicated storage spaces for various tools like wrenches, screws, nuts, and drill bits. No more searching—everything has its place, maximizing your efficiency on any project

Removable middle shelf and manual tool rack: The middle layer is equipped with universal wheels and sturdy pull ropes, making it easy to remove and allowing smooth dragging on various surfaces. Additionally, it is equipped with 2 manual tool racks. This is highly suitable for transporting tools to remote work areas without the need for carrying, saving your time and effort.
6. Proper Lighting
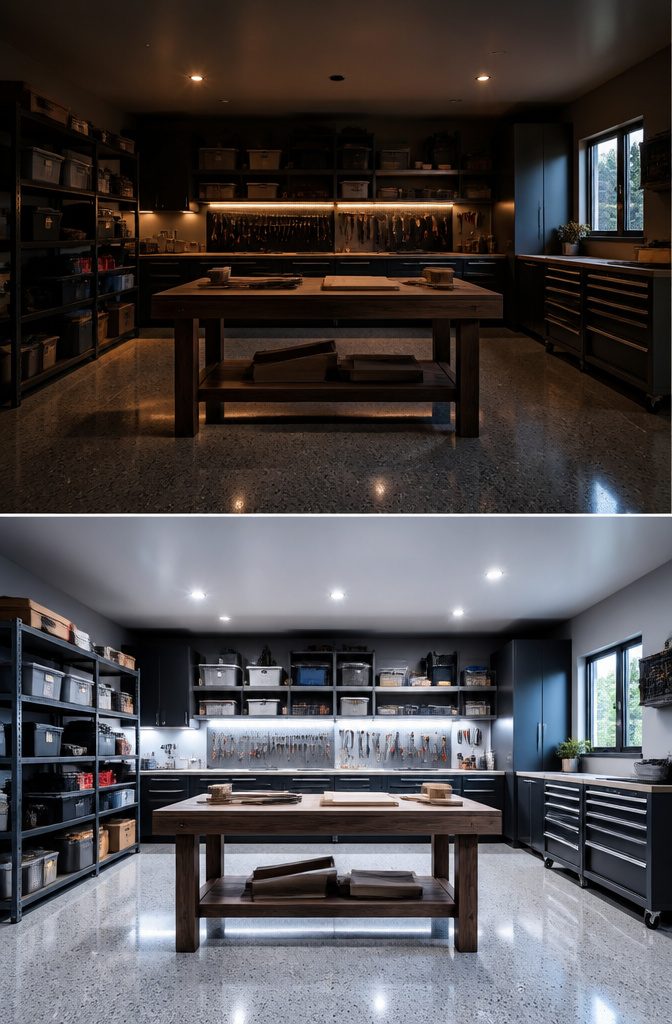
The old fluorescent tubes in my garage put out about 20 foot-candles at bench height, which sounds adequate until you are trying to read a pencil line on dark walnut or thread a fine machine screw. Swapping them for LED shop lights in the 4000K–5000K range changed the usable light in the same spots to roughly 50 foot-candles, and the difference is less about brightness than about what your eyes can actually resolve. Cooler color temperatures in that band keep project details sharp without the yellow cast that warmer LEDs add to wood tones and finishes.
I started with the fixtures spaced evenly across the ceiling, which left a hard shadow from my own body whenever I leaned over the bench. Moving one fixture forward eighteen inches, directly over the front edge of the work surface, split that shadow enough that I stopped shifting the workpiece to find light. The fix took twenty minutes and a scrap of plywood as a mounting block. Task lamps over the miter saw and drill press handle the rest; the ceiling job is ambient light, not surgery.

2-in-1 Worktable: Portable work table is easy to switch between the sawhorse and the workbench, which can adapt to a variety of work scenarios, making your work more convenient

INCLUDES: (1) Portable Bench Tool Stand with Bamboo Table Top, and (4) Bench Dogs

LIGHTWEIGHT & STURDY: Weighing in at just 13 lbs., the Worx portable workbench is designed for portability without sacrificing durability. It's tough enough to withstand the rigors of any workshop, yet light enough to be taken from job to job with ease.
7. Dust Collection Systems
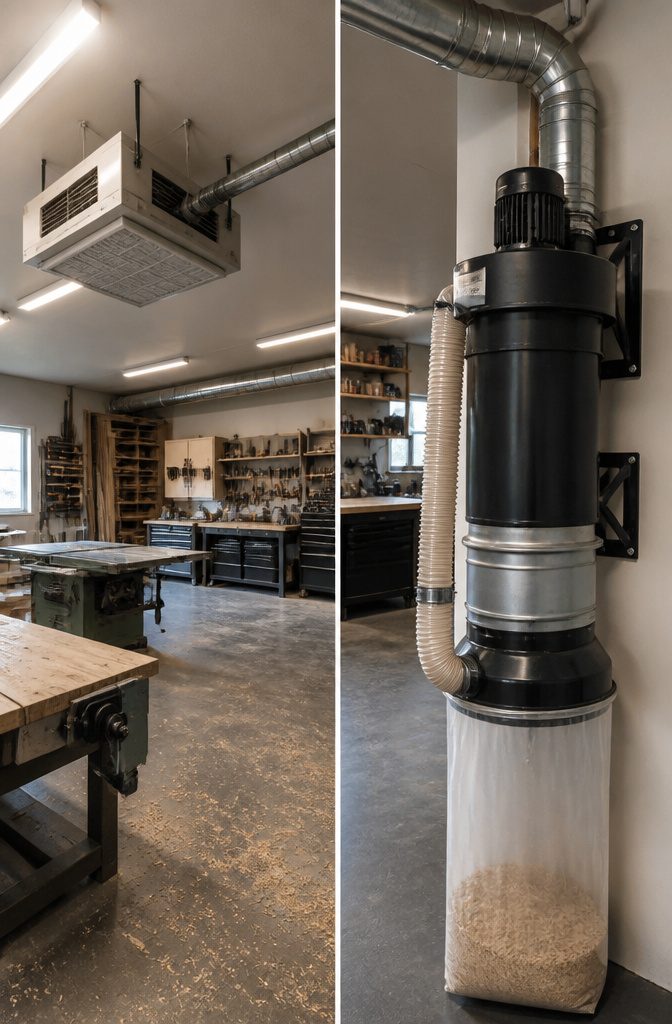
The Harbor Freight 2 HP collector got me through two years of weekend projects before the filter bags started clogging every third use. At $199, it was the right first move for a one-car garage where floor space mattered more than perfection. Dust still hung in the air long enough to film the windshield of my parked car, though, and a sinus infection that turned into a month of antibiotics convinced me breathing the stuff was not a sustainable tradeoff.
I upgraded to a 1.5-horsepower wall-mounted unit with a 30-micron bag for about $450. The difference was immediate: chips pulled straight off the table saw instead of drifting toward the open garage door. The real fix came with a ceiling-mounted air filter cycling the shop air five times an hour. That second purchase ran another $280, and together they cut visible dust to almost nothing.
The ducting mistake was routing a 4-inch flex hose through a 90-degree elbow directly off the blower inlet. Static pressure dropped so hard the collector could barely lift a planer shaving. Reworking that run with two 45-degree fittings and a straight section cost two weekends I had planned for actual woodworking. Rigid pipe costs more upfront, but flex hose bent sharp is just a clog waiting to happen.


Heavy-Duty Load Capacity: 250 lbs per chrome-plated steel roller stand, easily handling bulky lumber, plywood, and sheet materials for cutting, sanding, or assembly

SPECS - ARF-48 | 48 Inch Table Saw Fence | 3-1/2" Tall | Built In T-Track Slots | 12" Material Support | 3 Sliding Clamping Blocks | Fence & Clamping Block Thickness Measure Exactly 2" | Made in USA
8. Climate Control
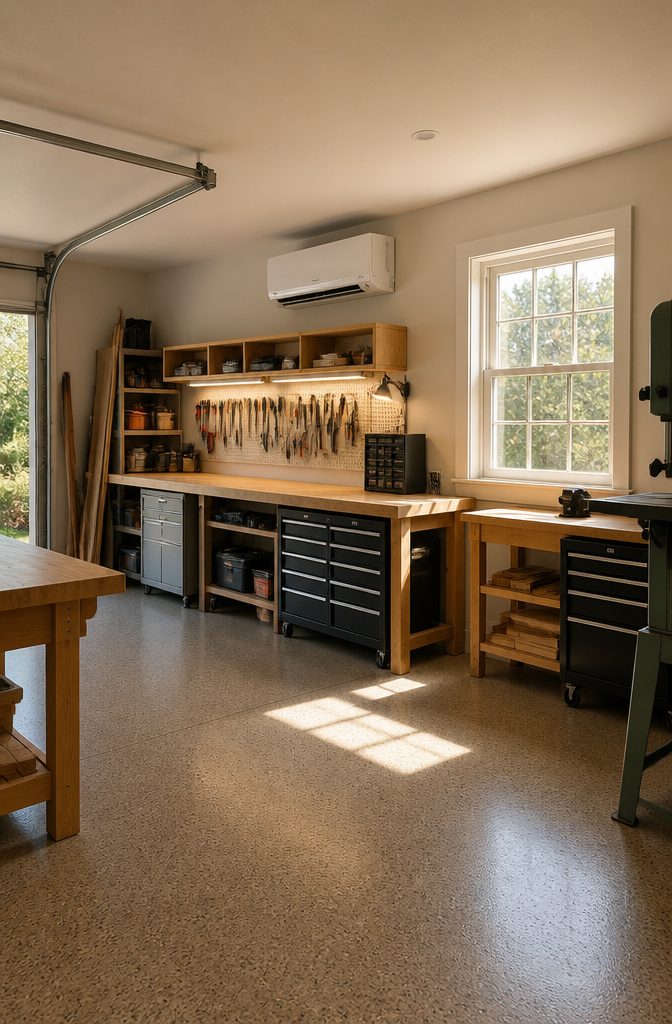
Two winters of starting projects in a 38-degree garage convinced me that numb fingers were the real bottleneck, not lack of skill. The 12,000 BTU mini-split heat pump I settled on covers my 400-square-foot space without the dry blast of a propane heater or the spinning meter of electric resistance models. At around $1,200 for the unit and self-install, it runs year-round: cooling in July, heating in January, and dehumidifying the shoulder seasons when finishes won’t cure. Garage heaters top out at one season and still need ventilation for fumes. The mini-split moves air and filters it, which matters when sawdust hangs in a closed space. 12,000 BTU for 400 square feet is the sizing that worked; smaller units cycle too hard in single-digit weather. The install took a Saturday and a Sunday, drilling the line set through the rim joist and mounting the air handler above the bench where the airflow clears the work zone without blowing directly on projects.

Powder coated steel construction
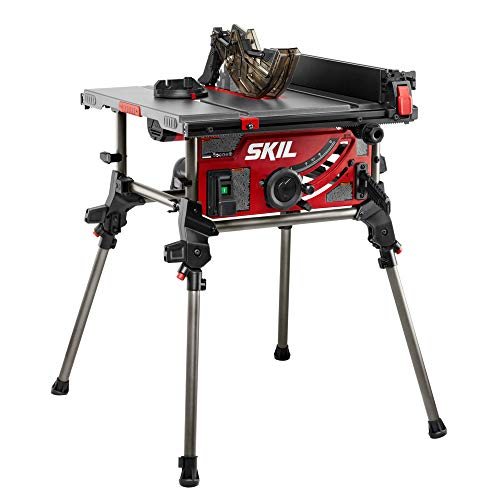
RACK AND PINION FENCE RAILS - Ensures fence stays parallel to blade for fast smooth, and accurate cuts

Rock-Solid Construction: This roller stand is made from chrome-plated steel, ensuring exceptional durability and strength. With a maximum load capacity of 300 lbs, it is designed to effortlessly support the cutting of heavy materials. Let’s experience smooth and secure cutting!
9. Organization Systems
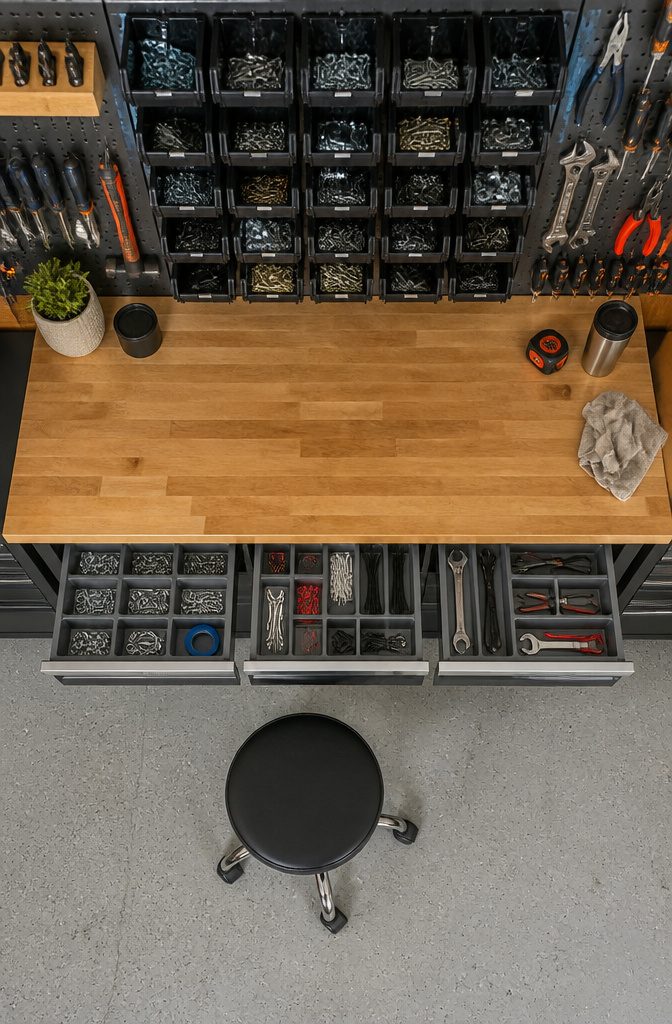
Labeled bins only work if the label faces you, which means the bin has to face you. I learned that after buying a wall of Akro-Mils bins and mounting them with the open side up, the way most photos show. Great for Instagram, useless when you need a 3/4-inch washer and every bin above eye level might as well be empty.
The ones that stayed are the Akro-Mils 30230 and 30250, the shallow and medium sizes. I mounted them on a 1/4-inch pegboard backing but cut the backing into vertical strips, so each column of bins tilts out about fifteen degrees. Now I read the labels from the floor.
For fasteners, I built a bank of nine shallow drawers from half-inch Baltic birch, nothing fancy, just butt joints and glue. Each drawer is two inches deep and labeled on the front edge with a label maker: deck screws #8, deck screws #10, machine screws by thread. The weekend I spent sorting hardware into those drawers pays back about twenty minutes per project. Used to spend that long just finding the right coffee can.
Pegboard still holds the tools you grab constantly: the tape measure, the marking knife, the one Phillips driver I use eighty percent of the time. Everything else went into drawers or bins. Pegboard looks organized until you own more than one version of anything, and then it becomes a wall of identical silhouettes you have to squint at.

Super Strong 2000 lbs Load: This sturdy workbench supports up to 2000 lbs (900 kg). Its 61 x 20-inch surface provides ample space for tools and heavy tasks like carving, cutting, drilling, and welding. It can also hold heavy items securely without tipping

HIGH WEIGHT CAPACITY: Engineered for strength, this worktable supports up to 1,200 lbs.., ideal for demanding projects, providing reliable support for tools and materials in any professional workshop or garage setting

Premium Materials: This workbench has a 0.8-inch solid rubberwood tabletop with a wear-resistant finish that resists cracking and cleans easily. Its alloy steel legs offer exceptional load capacity and rust resistance for long-lasting durability
Flooring That Actually Holds Up
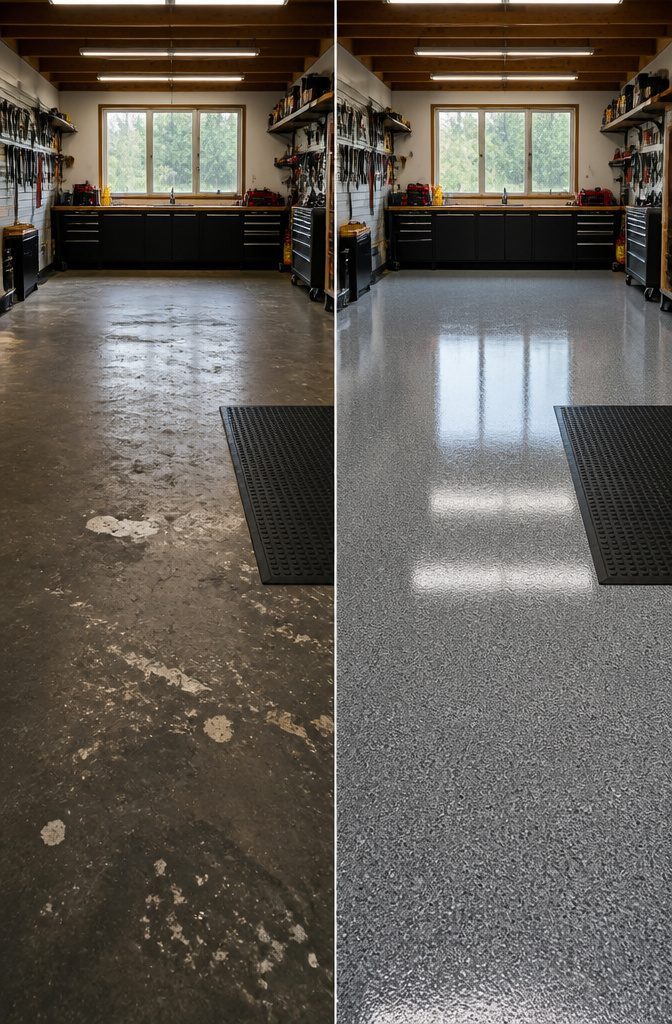
Bare concrete can take abuse, but it returns the favor by dusting itself into every project you start. Sealed concrete stops the dusting and resists stains, though spills still sit on top until you wipe them. Epoxy goes further: the coating bonds to the concrete and creates a surface chemicals and oil wipe off without a trace.
I went with Rust-Oleum’s two-part epoxy kit for my own floor, mostly because it sat on the shelf at my local hardware store and the price was about $80 for a two-car garage space. The prep took a full Saturday, acid-etching the concrete and rinsing until the water ran clear, then waiting overnight for it to dry bone-hard before rolling the coating the next morning. The kit included decorative chips to scatter across the wet surface, but I skipped them; the flakes look sharp in showroom photos, yet sawdust and metal shavings collect in the texture and a shop vac never fully cleans them out. A solid color hides dirt better and reads as workshop, not auto-dealership.
For the spot in front of my bench where I stand for hours, a padded anti-fatigue mat works better than making the whole floor soft. Rubber tiles cushion well but shift under rolling cabinets and catch on jacks. Epoxy stays put once it cures, and the mop cleans it in minutes.

【Rolling Garage Storage Cabinet】Keep your garage, workshop, basement or utility room organized with this rolling metal storage cabinet. Measuring 26" W × 14" D × 31.88" H (including casters), it offers ample storage while fitting comfortably into compact spaces. Four smooth-rolling 2.36-inch swivel casters and an ergonomic push handle allow effortless mobility, keeping tools and supplies organized and within easy reach.

🔧 Unique Lift-Up Wooden Top: This tool cart features an innovative hinged wooden top that lifts to reveal a secure, lockable storage compartment, providing both a durable work surface and a hidden space for your valuables.

All-in-One Garage Cabinet System: This garage cabinet set with workbench is engineered for the serious DIYer and suburban homeowner, offering a complete garage organization system solution. Our ensemble provides immediate, massive storage capacity to conquer tool chaos and hide away seasonal items, delivering that magazine-worthy garage makeover you've been envisioning. The system arrives ready to organize, designed to maximize every inch of your space efficiently and stylishly
Outdoor Storage for the Overflow
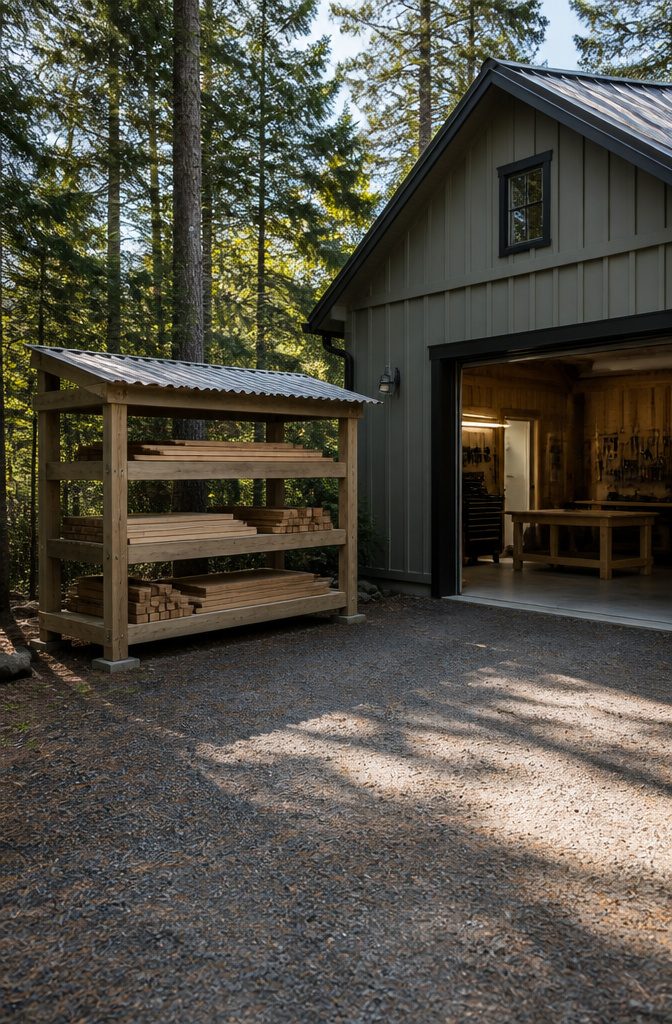
A covered lumber rack outside the garage bought back about twelve square feet of floor space I did not have to spare. The frame is pressure-treated 4x4s set in concrete, with a roof of corrugated metal scraps left over from a neighbor’s shed build. Water runs off fine, and the slight overhang keeps the top boards dry enough that they do not warp between projects.
What should not be stored outside is anything that rusts fast or swells: hand planes, chisels, and the good plywood you plan to use indoors. The rack holds the rough construction lumber, the 2×4 studs, and the long trim pieces that used to lean against my table saw and block the outfeed every time I ripped a sheet.
Wall-mounted lumber racks inside are useful, as most builds show, but they compete for the same perimeter wall space that small shops need for tool cabinets and cleat systems. Moving the long stuff outside keeps the interior layout focused on workflow rather than storage. The metal roofing was free, but even bought new, corrugated panels run cheap compared to the square footage they reclaim.
Custom Storage When Nothing Fits
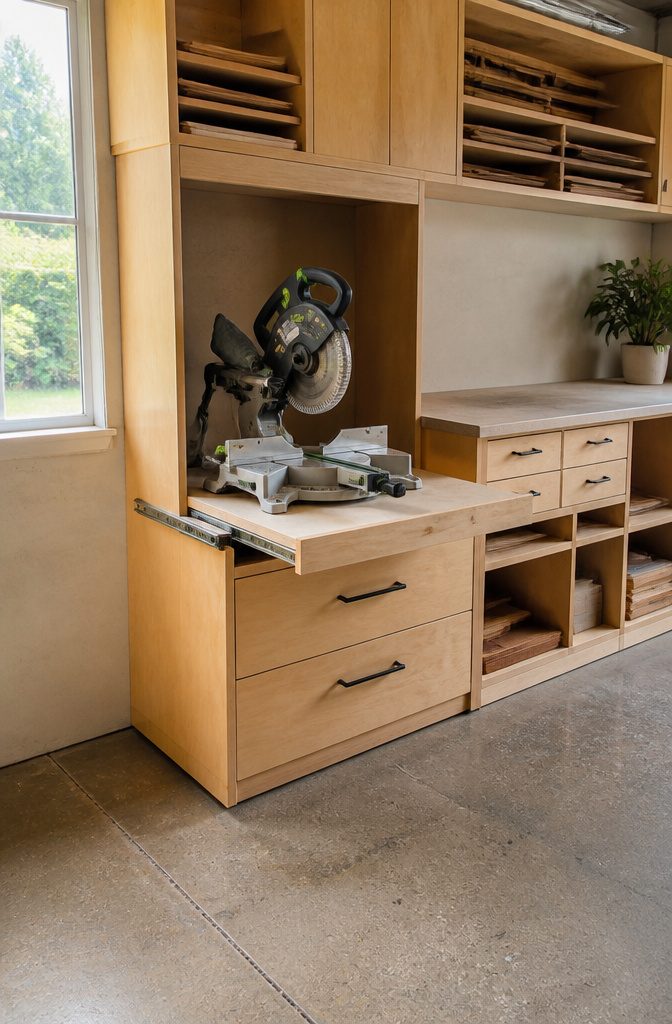
Every tool in a garage workshop wants its own footprint, and the miter saw is one of the worst offenders. A dedicated station along a wall solves the problem only if the saw sits at exactly the right height and the supports on either side stay dead flat. I learned that the space underneath is where the real advantage hides. A cabinet built to the exact clearance beneath the saw, with a pull-out shelf that brings the tool forward when you need it and tucks it back when you don’t, turns what would be a dust-collecting void into usable storage.
The trick is measuring twice in cardboard before cutting plywood once. A template built from appliance boxes costs nothing and shows you where your knees hit, where the dust hose needs to run, and whether the shelf slides clear of the table legs. The sources describe stations with drawers for hand tools and shop vacs parked below, but the detail they skip is how tight those clearances actually are in a real garage with an uneven slab and a door that opens inward. My preference runs to the pull-out approach over fixed cabinets, because a miter saw used once a month does not deserve permanent counter space.
Layout Mistakes and Workflow Fixes
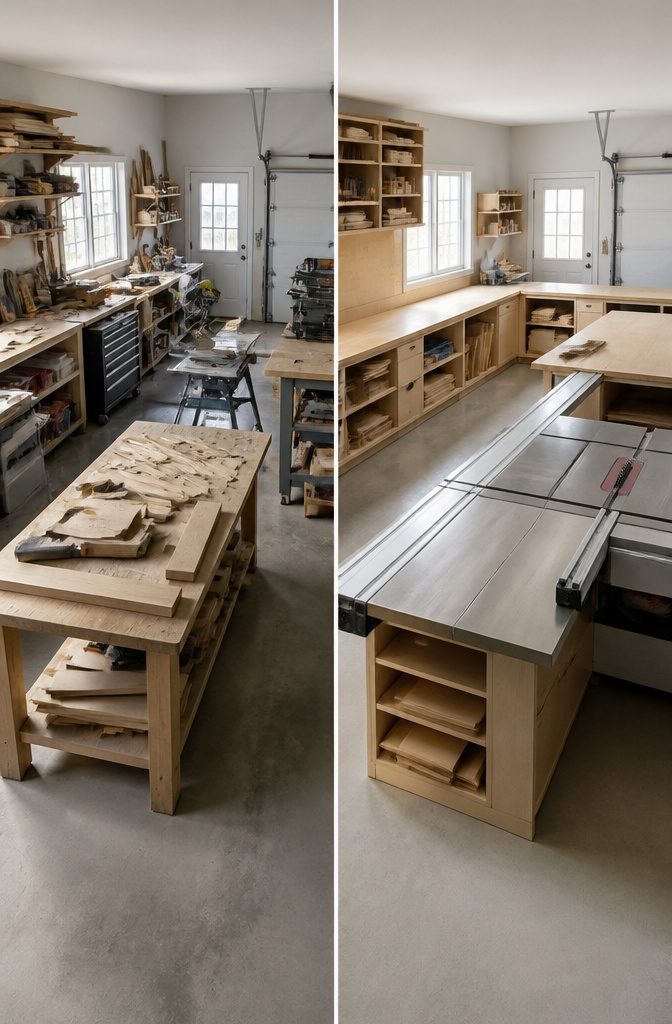
My first garage layout looked tidy enough. Every tool had its place along the walls, lined up like soldiers waiting for inspection. The problem was that the center of the floor became a dead zone I had to walk around, not through. Each trip from the workbench to the table saw meant tracing the walls, adding steps that added time and killed momentum.
The fix came from treating the space more like a kitchen, with zones that flow together instead of sitting apart. I pulled the table saw, outfeed table, and bench into a U-shaped island that left me inside the work, not outside it. Steps per project dropped by half. Circulation needs at least 36 inches between zones; anything less and you are shuffling instead of moving.
Outlet placement is the detail I still botch. I cluster them where the first tool landed, then find the next project needs power six feet away and I am running cords across the floor. Now I plan for outlets every four to six feet at bench height, not knee height, and on every wall that holds a machine. The cord is always too short right when the glue is going off.
Safety I Learned After the Fact

A router bit throwing orange sparks against a dark garage wall is the kind of image that stays with you. That evening, I added the fire extinguisher mount I should have installed months earlier, positioned at the entry door where I can reach it without crossing the work area. Dry chemical extinguishers rated for Class B and C fires cover the solvents and electrical equipment most garages hold, and the wall bracket keeps the gauge visible.
Ventilation came next. A contractor would place vents near the saw bench and any paint station, where dust and fumes concentrate. The rule of thumb is 6–12 air changes per hour for a workshop space, which means measuring your garage volume and matching fan CFM accordingly. I ran the numbers after the fact, not before.
The battery charging station lives on a separate shelving unit now, across the garage from any solvent storage or finishing area. Lithium batteries vent heat and occasional gas during charge cycles, and pairing that with volatile fumes is a risk no layout should invite.
Frequently Asked Questions
How do I organize my garage workshop?
Use vertical storage like French cleats to keep hand tools accessible and free up bench space. Mount bins at a slight tilt so labels face you from the floor, and sort fasteners into shallow labeled drawers so you grab what you need without hunting. Pegboard works for the few tools you reach for constantly; everything else belongs in drawers or bins to avoid a wall of identical silhouettes.
What is the best lighting for a garage workshop?
LED shop lights in the 4000K–5000K range deliver roughly 50 foot-candles at bench height, which your eyes can actually use for fine work like threading small screws or reading pencil lines on dark wood. Position one fixture directly over the front edge of your work surface to split the shadow your body casts; task lamps over individual machines handle the rest.
How can I improve ventilation in my garage workshop?
Pair a wall-mounted dust collector with a ceiling-mounted air filter cycling the shop air five times an hour; together they cut visible dust to almost nothing. For fumes and general air quality, aim for 6–12 air changes per hour, which means matching fan CFM to your garage volume. Keep battery charging stations across the room from any solvent storage.
What should I consider when planning my garage workshop layout?
Treat the space like a kitchen with flowing zones rather than tools lined along walls. A U-shaped island of table saw, outfeed table, and bench puts you inside the work instead of walking around it. Allow at least 36 inches between zones for actual movement, and place outlets every four to six feet at bench height on every wall that holds a machine.
What are the best flooring options for a garage workshop?
Epoxy bonds to concrete and creates a surface that chemicals and oil wipe off without a trace; a two-car kit runs about $80 plus a full day of acid-etch prep. Sealed concrete stops dusting and resists stains for less effort. Skip decorative chips in a working shop, since sawdust and metal shavings collect in the texture; a solid color hides dirt and reads as workshop, not showroom. Add a padded anti-fatigue mat only where you stand for hours, rather than making the whole floor soft.