
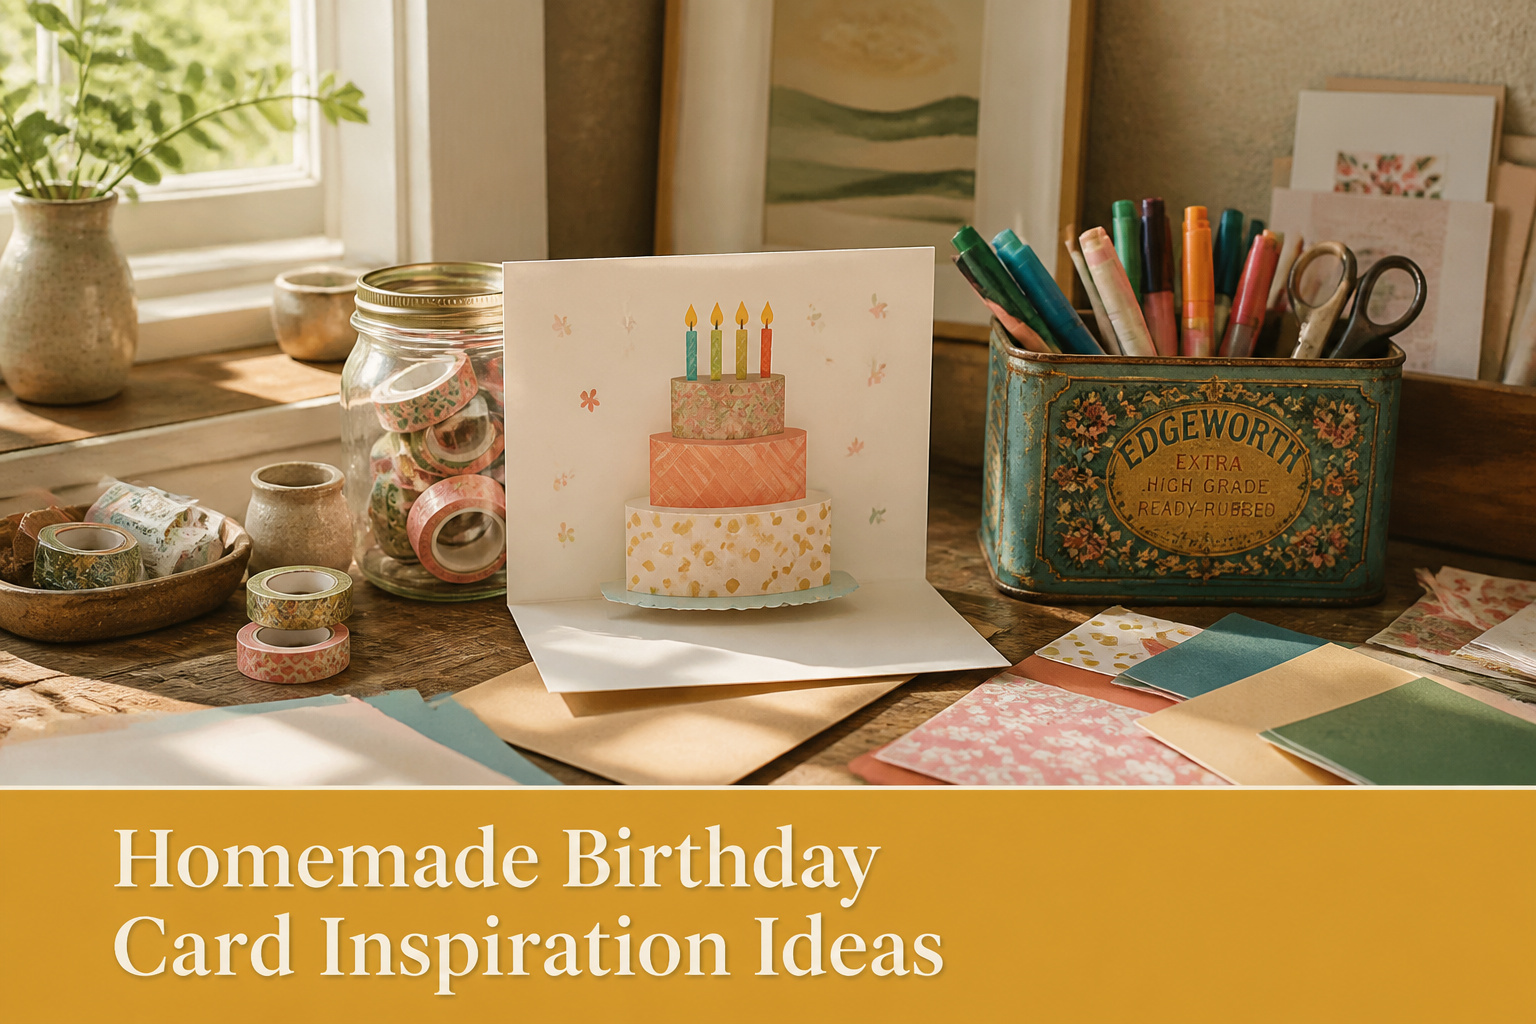
The difference between a card that gets kept and one that gets recycled is usually one material choice you made in the first ten minutes.
Pop-up mechanisms need 80–110 lb cover stock or the cake leans; alcohol ink needs Yupo paper or the gold turns to mud before you can guide it.
The nine ideas below range from ten-minute washi tape cakes to weekend accordion rainbows, and the right one depends on whether you are mailing it, handing it to a child, or trying to impress someone who already owns a glue gun.
1. Pop Up Birthday Cake Card
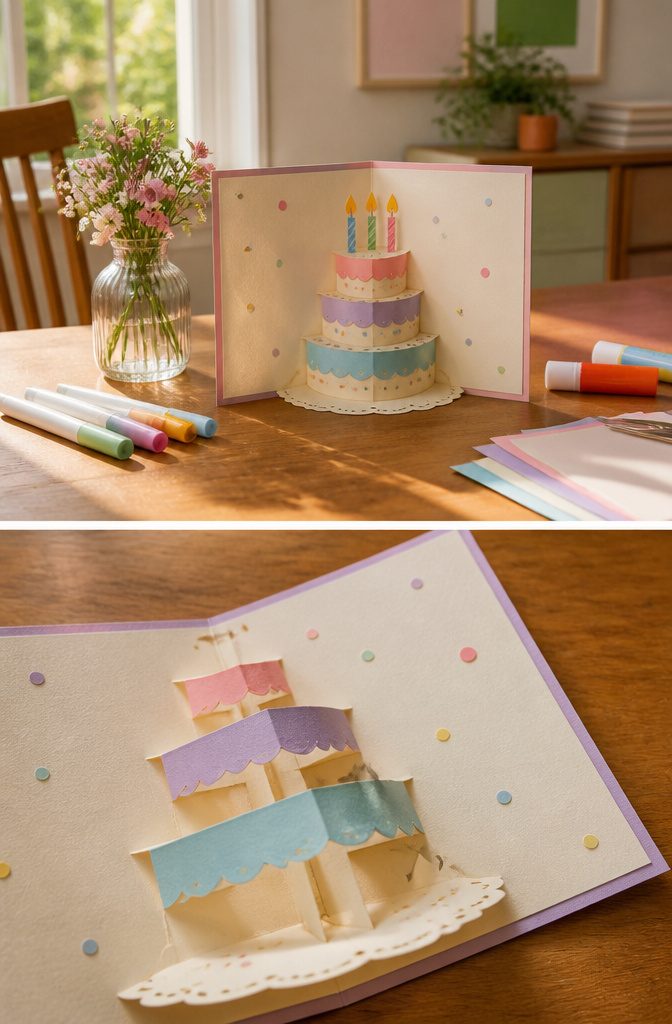
A pop-up cake card looks complicated until you see the mechanism: two parallel cuts in the card’s center fold create a platform that springs forward when opened.
The cuts should sit about an inch apart, and the strip between them gets pushed inward to form the base.
The fold line must bisect that strip exactly in the middle; offset it even slightly and the cake leans like a badly set layer. I learned that from watching a dozen tutorials where the same lopsided result showed up.
Cardstock weight matters more than decoration here. Standard 65 lb paper will crease and sag under glue and marker; 80–110 lb cover stock holds the pop-up tension without tearing at the stress points.
Three independent roundups mark this as a top choice for homemade birthday card inspiration, and I understand why: the mechanism takes twenty minutes to master, but the reaction reads as hours of effort.

Package Includes - You will get 12 rolls of birthday theme washi tape with different styles, sufficient for your crafts and decoration

【Happy Birthday Design】You will receive a set of 12 rolls of birthday-themed washi tape designed by Nikomie. There are colorful banners, birthday cakes, cupcakes, gifts, balloons, digital candles, and other layers of elements on it. These tapes are cute and classic, perfect for adding to the birthday atmosphere.

PVC matte material ; transparent partial board , portable tape boards can be sample boards or daily boards put in notebooks.
2. Washi Tape Birthday Card
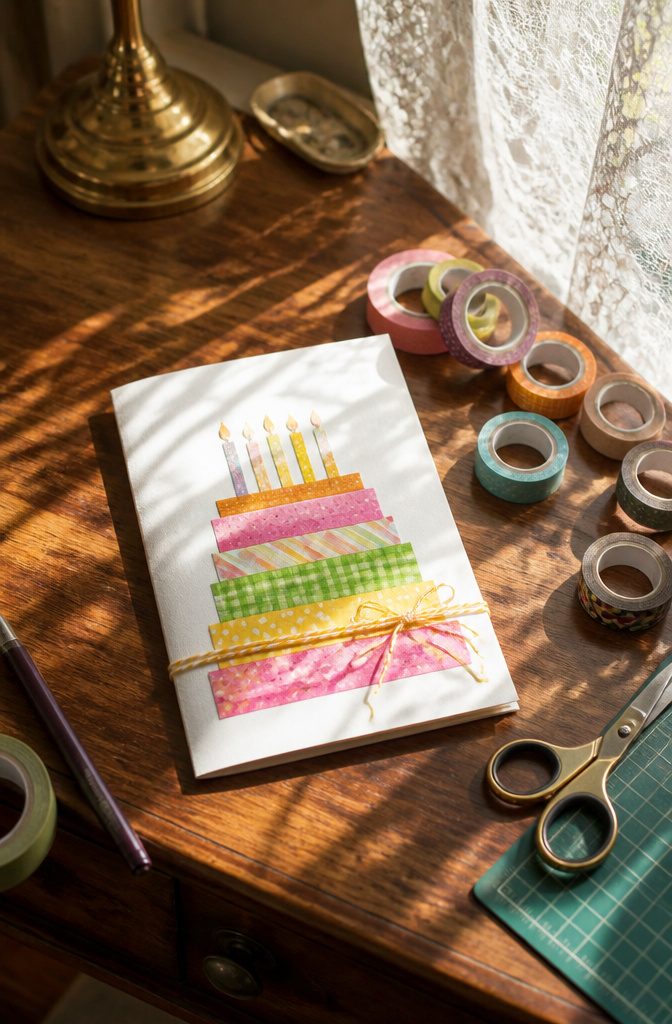
Washi tape builds a birthday cake or a string of candles without any drawing skill, which is why I keep a few rolls around for last-minute cards.
The paper tape tears by hand, and the low-tack adhesive lets you lift and reposition a strip three or four times before it finally grips.
That forgiveness matters when you are laying out candles freehand and the spacing looks off on the first try.
A cake shape takes three horizontal strips for layers, with a triangle on top and thin vertical pieces for candles.
The Momtastic design works the same way: colored tape for the cake body, a washi flame on each candle, and the recipient gets something they can actually blow at.
American Crafts and Jen Hadfield both make patterned rolls that read as frosting or sprinkles without extra work.
For a cleaner graphic, run a single piece of twine across the card and fold small tape flags over it, snipping the bottom edge into triangles.
Tape the twine ends to the back. Either approach fills up in about ten minutes, and the tape costs a fraction of printed embellishments.

Wish your friend or family member a happy birthday with an elegant birthday card they're sure to appreciate.
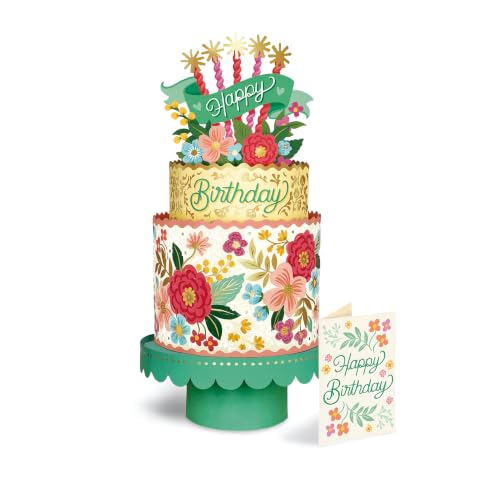
DAZZLING FROM EVERY ANGLE: A shimmering, gold-foiled two-tiered cake unfolds in elegant floral detail. Popped open, this design spans 12" x 7", making a dramatic statement on any table, desk, or shelf.

Wish someone a wish come true kind of birthday with a special birthday card they're sure to appreciate.
3. Bunting Birthday Card
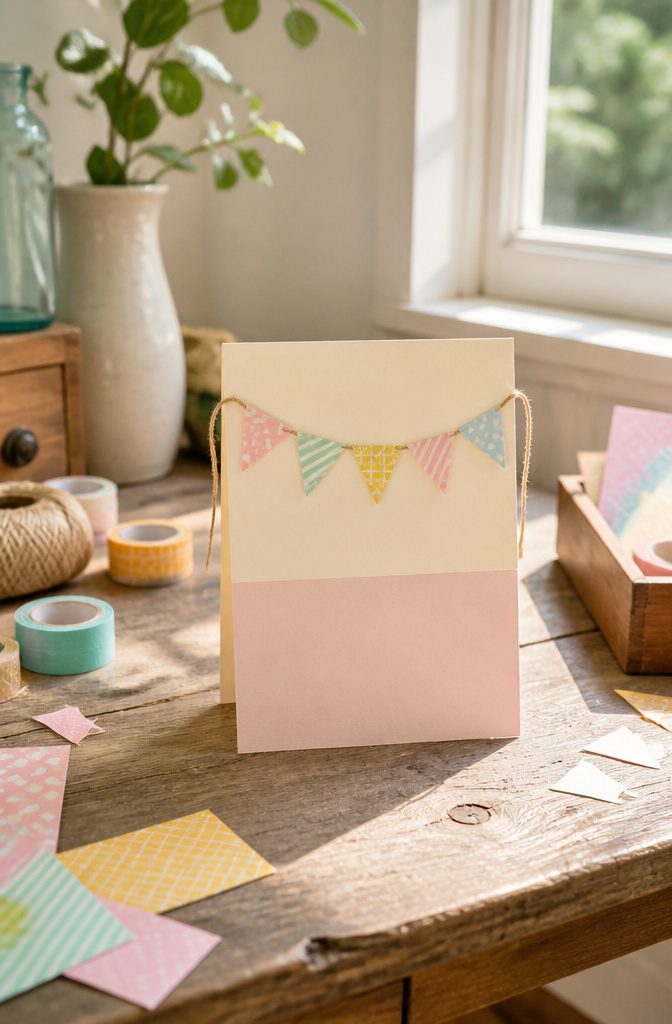
Washi tape bunting turns a blank card into something that looks planned rather than last-minute. The trick is spacing the flags evenly, which the string-and-fold method handles without a ruler.
Lay a strip of twine or thread across the card where you want the bunting to hang, then fold small pieces of washi tape over the twine at intervals, sticky sides together, so each flag grips the line and stays put.
Trim the bottom edge of each taped section into a triangle with scissors, and you have a row of neat pennants. Tape the ends of the twine to the back of the card so nothing shows from the front.
For the hanging line itself, dental floss beats thread because it is thinner, stronger, and less likely to sag under the weight of the tape.
Embroidery thread looks prettier in the supply drawer but can twist or droop once the card stands upright. Plain waxed dental floss, the unflavored kind, disappears behind bright tape and holds its line straight across the fold.
Decorative paper scraps work in place of washi tape if that is what you have. Cut small rectangles, fold them over the twine or floss, and glue the halves together with a glue stick.
The result is stiffer than tape but gives the same cheerful effect, and it is a useful way to clear leftover bits from other projects.

PREMIUM COLOR COPY COVER PAPER – Hammermill 8.5” x 11” 80lb Premium Color Cardstock Paper provides a durable, cover weight sheet that’s specifically designed to produce consistently reliable results for color copiers and color laser printers.

HEAVYWEIGHT CARDSTOCK: 110 lb. index cardstock meets USPS 7 pt. minimum requirement for business reply cards

NEENAH INDEX WHITE CARDSTOCK: The smooth texture and crisp white color of our 90 lb cardstock produces high resolution images and prints for attention-getting and professional documents
4. Printable Pom Pom Card
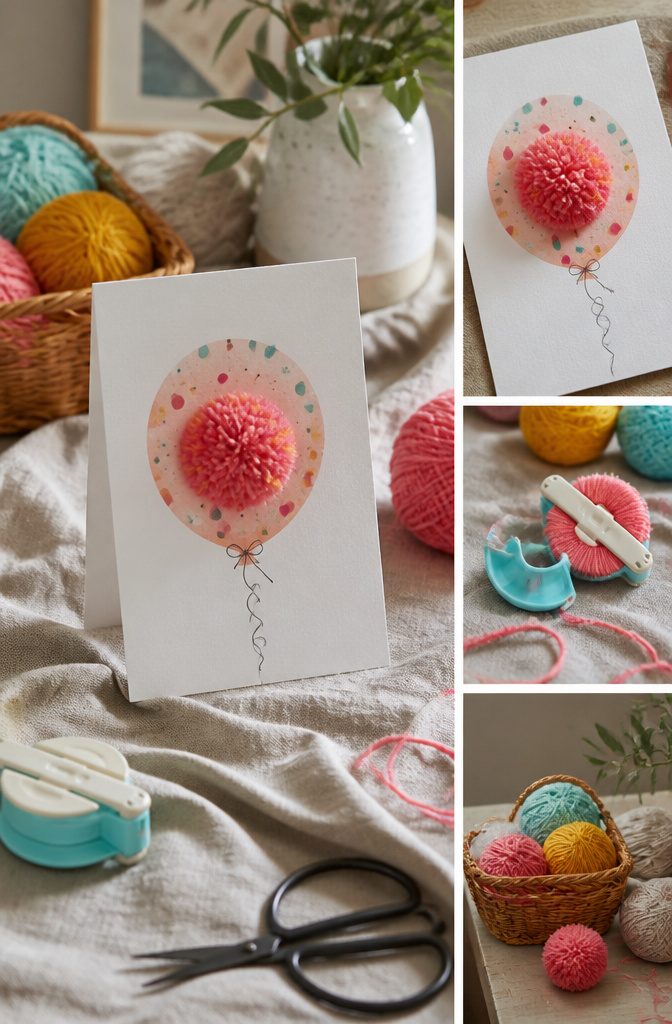
A printable pom pom card works best when the template comes from a source that actually thinks about card stock.
White House Crafts offers a free printable base for this design, and the download is sized so the pom pom sits where an ice cream cone graphic prints, which keeps the layout from feeling like an afterthought.
The paper matters more than the printer.
Sizzix Textured Cardstock at A4 weight holds the yarn tension without the pom pom pulling through the holes, which is the failure point on lighter paper. Standard copy paper will let the wraps sag within a day.
For the pom pom itself, a small pom pom maker keeps the diameter under control. The goal is a pom pom full enough to read as texture, not so thick that the card springs open when you close it.
The source uses Paintbox Yarns Simply DK, which wraps to a dense ball without the bulk of heavier yarn.
My own preference, reading through the instructions, is to stop wrapping at the point where the maker still closes easily; forcing extra loops creates the bulk that ruins the fold.

THE PACKAGE INCLUDES: 12 rolls of birthday theme washi tape in different designs, packed in a box, they will offer enough quantity and rich styles to you for crafts and wrapping

Package Included: 20 rolls for independence day decorations tape set, each roll scrapbook tape size is 0.6inch*16.4ft /1.5cm*5m. Enough quantity to meet your daily use replacement and DIY crafts decoration needs. A variety of styles, you can mix to different combinations to get a cute design

Happy birthday foil washi tape,Each 15mm wide x 10m long (5/8" x 392 inches)
5. Alcohol Ink Rose Card
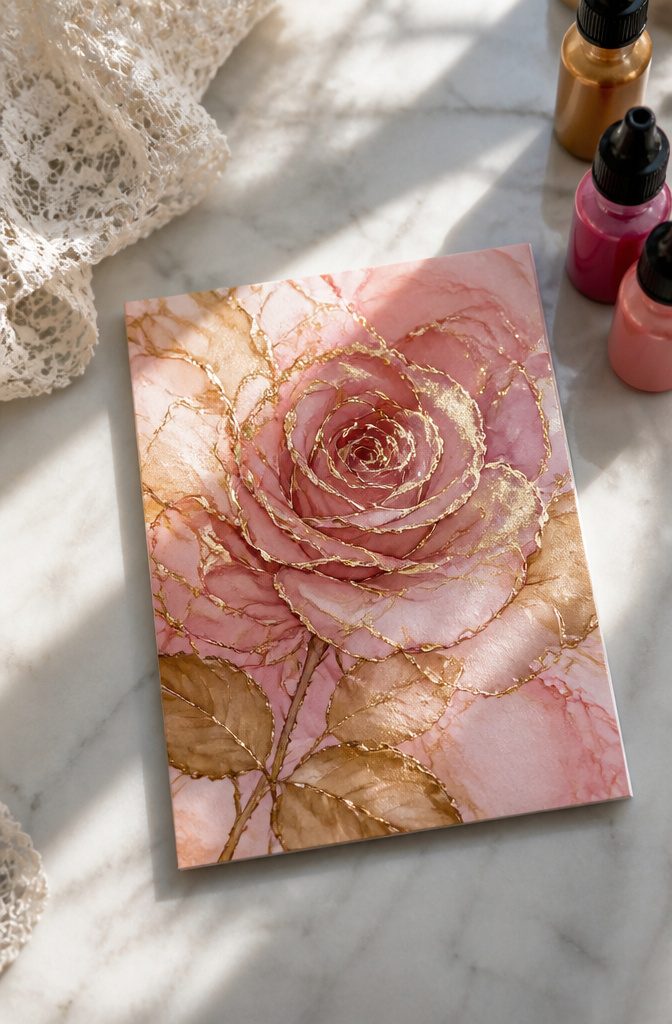
The rose design on this card comes alive with Pinata Brass, a gold alcohol ink from Jacquard that carries a muted, almost antique glow rather than the yellow punch of typical golds.
Alcohol ink needs a non-absorbent surface to do its work; Yupo paper or a coated cardstock lets the pigment sit on top and flow into soft, organic shapes instead of bleeding into fibers.
Working on regular paper kills the effect entirely, the color sinking in before you can guide it.
The mistake comes with the second or third drop. Pinata Brass turns muddy and thick when you layer it heavy, pooling into brownish streaks rather than the gilded wash you wanted.
A lighter touch builds the metallic highlight around the rose edges without drowning the pink beneath. I keep skewers nearby to nudge the ink while it is still wet, though a plastic sheet underneath saves the table regardless.
A printable rose image keeps the project weekend-fast; print, ink, and the gold accents dry within an hour. Lace trim along the fold dresses it up without adding a second day of work.

EXQUISITE DESIGN – This 3D Happy Birthday Rainbow pop up card birthday by Paper Love features an exciting unique 3D design, A "Happy Birthday" spelled out in colorful letters, accompanied by a rainbow, colorful balloons, and gifts.

Wish someone a birthday full of the very best things with a pop up birthday card they're sure to appreciate.

PACKAGE: The package includes birthday pop up card with an envelope. The card measures in 5.9 Inch x 7.9 Inch when folded flat
6. Fingerprint Monster Card
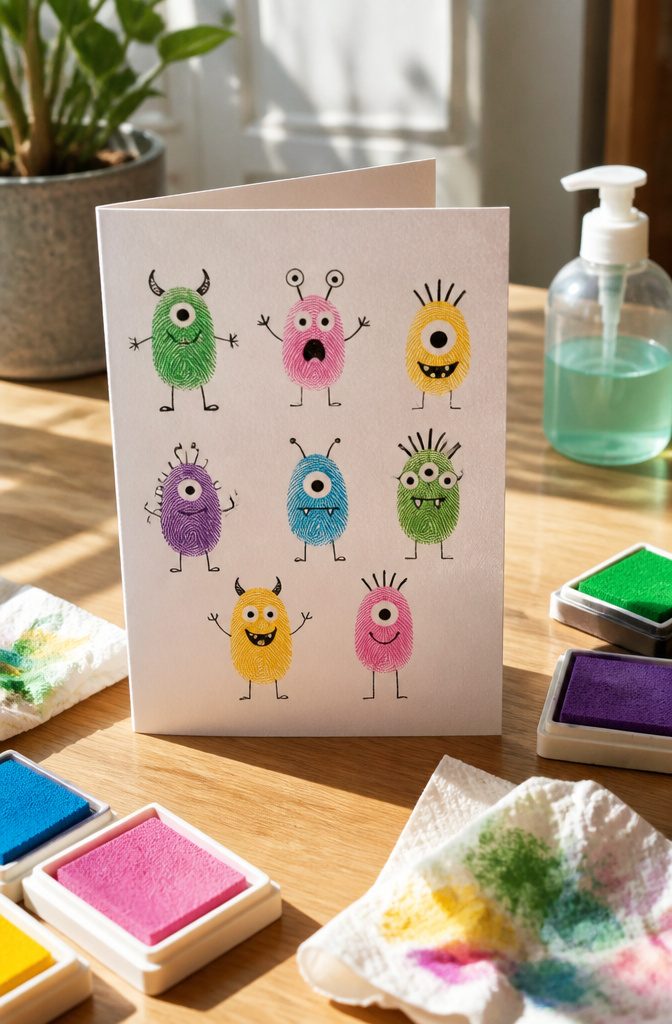
Fingerprint monsters are the project I hand to kids when I need twenty minutes of focused quiet and a card that still feels like theirs.
A washable ink pad keeps the cleanup reasonable; the pigment-based ones rinse off with regular soap and water, which matters more than the color range since a black Sharpie covers most of the design work anyway.
The real trick is the dry time. I learned that one the hard way after a gorgeous purple blob turned into a Rorschach test across the inside of the card.
Now I set the open card under a ceiling fan or a sunny window for about ten minutes before anyone picks up a marker.
The ink only needs to be touch-dry, not cured; the paper fibers will hold it enough for Sharpie work without sealing the surface.
The black marker is what makes the concept forgiving. A smudged oval becomes a lopsided mouth with jagged teeth drawn across the edge.
Two parallel smears turn into antennae with a line connecting them. The kids do not need to place anything perfectly, which means I do not need to hover.
I buy the fine-point Sharpies, not the ultrafine; the line weight reads better from a distance and covers small mistakes without looking like correction marks.

Birthday Themed Pattern Design: Contains 12 rolls of washi tape with different exclusive birthday patterns, including birthday cakes, colorful candles, cute balloons, party banners, number elements, "Happy Birthday" text prints and party hat designs. The bright, vivid color matching creates a cheerful and lively festive atmosphere, perfect for adding a fun celebratory touch to kids birthday parties, adult birthday gatherings, theme party decoration or daily craft creation. Each roll is designed in universal width, suitable for decorating items of different sizes, making your creation process more convenient.

Smart Organization: Each washi tape board includes 60 sleek washi tape cards—measuring exactly 15 × 5 cm (5.9" × 1.96")—designed with micro-translucent matte white surfaces to elegantly hold and showcase your colorful washi tape rolls

Mr. Pen washi tapes set includes 21 beautifully patterned rolls from the nostalgic theme collection, perfect for adding a retro-inspired touch to your journaling and craft projects.
7. Animal Pop-Up Cards
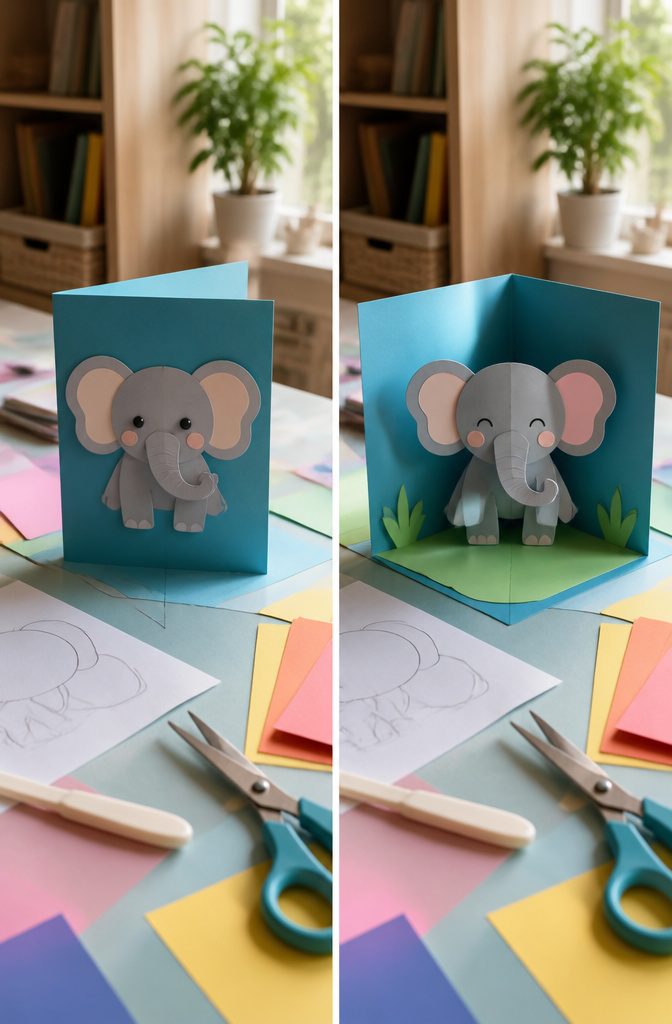
Animal pop-up cards rely on a simpler V-fold than the layered platforms a birthday cake needs, which makes them forgiving for a first attempt.
The trick is picking an animal whose shape cooperates with the fold. An elephant trunk, for instance, extends straight from the center fold and stays upright without extra support.
Rabbit ears, by contrast, want to splay or collapse unless you add small paper struts behind them, turning a one-hour project into an afternoon of fiddling.
I learned this the hard way with a giraffe I attempted last spring. The neck looked elegant in the flat template, but once folded it drooped like a sad sock puppet.
Quadrupeds with thick torsos, bears or lions or hippos, fare better because their bulk hides the fold line and their legs ground the shape.
Birds work too if you keep the wings tucked close to the body rather than spread wide.
Start with the elephant. The trunk bisects the V naturally, the ears frame it, and even slightly crooked cuts still read as elephant to the person opening the card.
Once that mechanism feels reliable, a penguin or owl takes the same fold with only the silhouette changing.

2026 Brand New 3 In 1 Music Pop Up Pink Penoy Bouquet Birthday Cards: Absolutely fabulous combination of beautiful peony bouquet in an elegant white vase, joyful music, colorful lights dance in syn with music. Penoy represent sunshine, passion and love, making you smile. Bring joy to your loved ones on their special day and create an unforgettable magical experience. A wonderful birthday gifts for wife, women, girl, daughter, mom, grandmom, sister, girlfriends etc.

Birthday Magic in One Card: Make their birthday memorable with a music-and-lights pop-up card that turns an ordinary greeting into an interactive moment. The cheerful confetti cake design is a thoughtful birthday surprise for anyone ready to mark another year.

Card message: You're not that old!; You just need a bigger cake!
8. Simple Handmade Card with Stickers
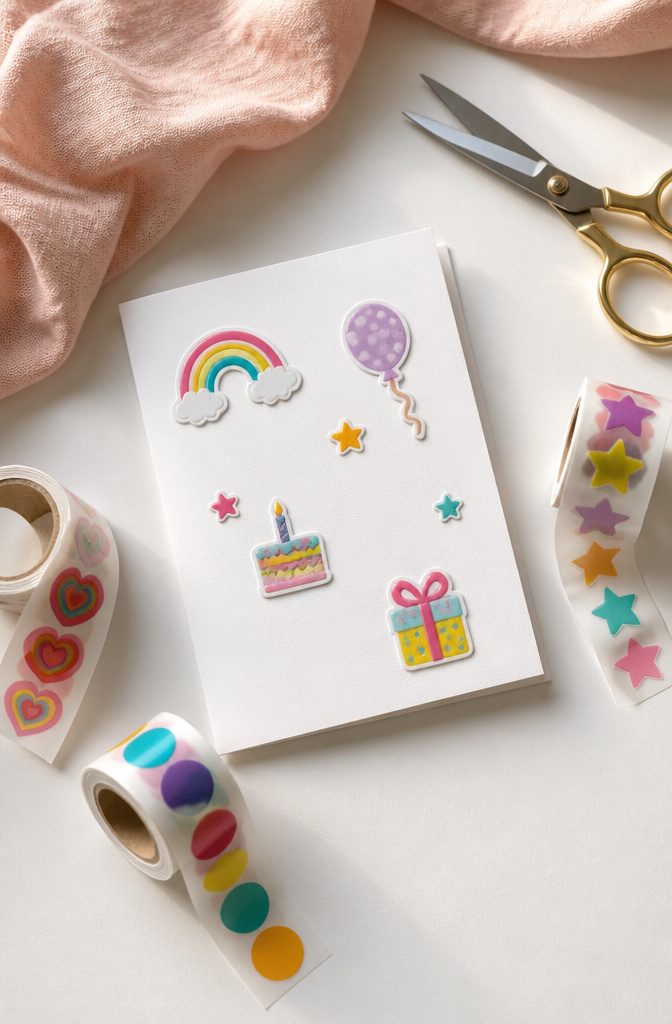
A sheet of white cardstock and a handful of stickers can look either playful or sloppy depending on one ratio: about two-thirds paper still showing.
Less than that, and the stickers fight each other; more, and the card looks like you forgot to finish it.
I lay the stickers out dry first, stepping back to check that the empty space carries the same visual weight as the stickers themselves.
Puffy stickers with that soft vinyl dome used to be my shortcut for a card that felt dimensional without bulk.
After three cards arrived with cracked domes where the envelope had compressed them, I stopped buying that style entirely. Flat vinyl stickers or thin enamel ones survive the mail and the bend of being pulled from a bag.
The paper matters less than you would think.
A 65 lb cardstock from any craft store holds up fine; the sticker adhesive does the work of adding interest. Spend the money on the sticker sheet itself, not the substrate, and the whole card stays under two dollars.
Heavyweight Cardstock Printer Paper White– Premium 110lb Index weight(199gsm) cardstock delivers a thick, sturdy feel, ideal for professional-quality printing, business cards, and creative projects.

Premium Medium Weight Smooth Cardstock, White, 80lb, 176gsm, 8.5” x 11” – Ideal for Invitations, Menus, Business Cards - Printer Paper

PREMIUM CARDSTOCK MADE IN USA — Professional cream cardstock at 8.5" x 11", 80lb cover (216 GSM), with a smooth finish on both sides. Made in the USA from acid-free paper for archival-quality printing and crafting projects
9. Accordion Paper Rainbow Card
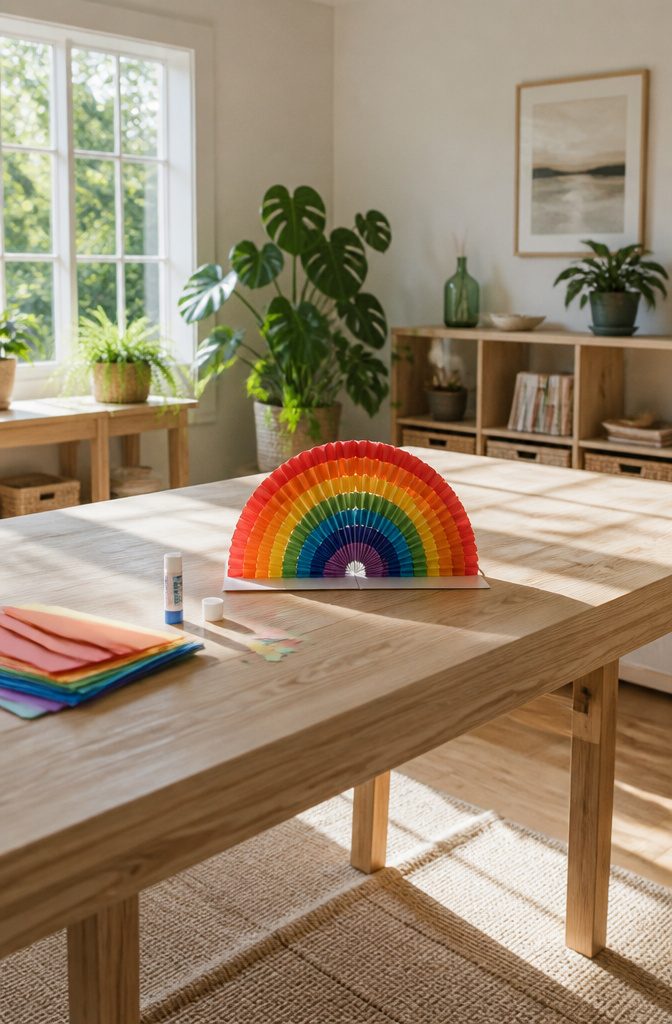
An accordion fold rainbow needs breathing room on both sides.
A strip between 1.5 and 2 inches wide gives the arc enough space to curve without the ends jamming against your card edges. Anything narrower looks cramped; anything wider starts to fight the fold lines.
Glue placement is what keeps the shape alive six months later. A single dot at each fold peak, pressed to the card base, locks the accordion in its expanded shape.
Skip the peaks and the whole thing slowly exhales into a flat line inside the envelope. I learned that watching a friend’s card flatten between her couch cushions before the party even started.
Plain copy paper works fine for testing the fold spacing.
Once the rhythm feels right, swap in color strips in rainbow order. The accordion itself is the decoration; no extra layering needed unless you want it.

【Patriotic Design】You will receive 12 rolls of colorful Independence Day elements. Made of red, blue, and white washi tape, the American flag, rainbow, Statue of Liberty, and eagle design elements create a strong patriotic atmosphere for you!

CUTE PINK DESIGN: This birthday party-themed decorative tape uses patterns such as balloons, stars, hearts, strawberries, crowns, bows, and flowers. The hot silver stamped is used to create a joyous and sweet atmosphere. It is very suitable as a small area decoration such as birthday gifts.
Package: Our 20 rolls of Independence Day tape come in a variety of creative designs, so you can personalize your decor by tailoring them to your interests and style
Materials I Actually Use
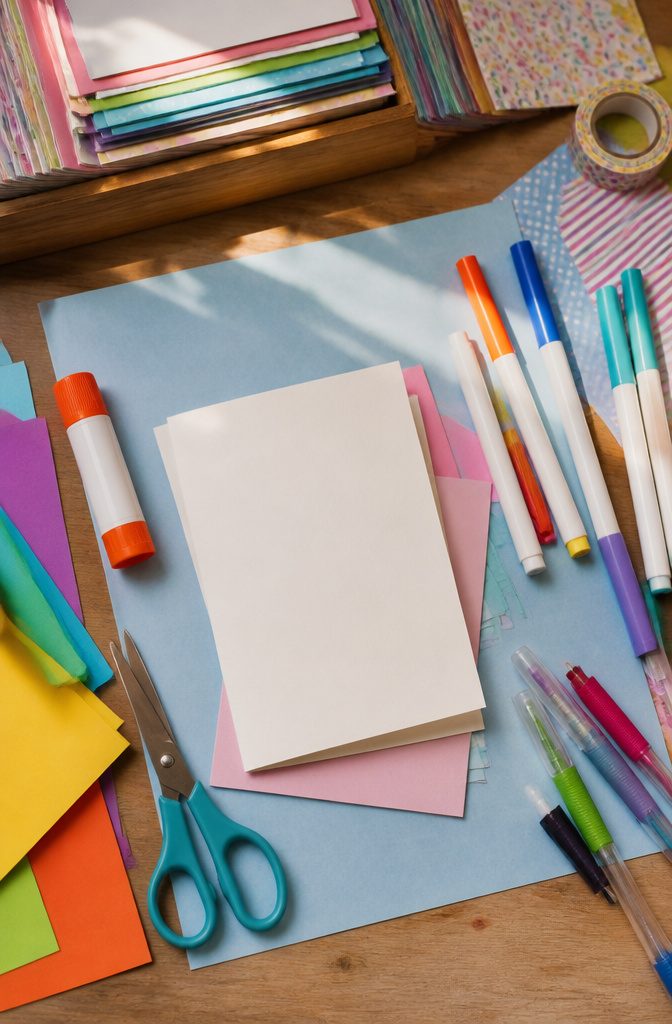
The same six items show up in every card I make: light card or cardstock, colored paper or scrap paper or construction paper, scissors, a glue stick, and whatever drawing tool is closest, usually markers or pens, sometimes pencils or crayons.
Three of those are already in most homes. The colored paper and glue stick are the ones that run out, and replacing either costs under $10.
Washi tape and watercolors are where I tend to add more than I planned. They are not required for any of the nine designs, but the temptation is there once the base card is down.
Scrap paper works in place of washi tape if the goal is just color and pattern without another trip to the store.
A glue stick beats liquid glue for cards because the paper stays flat.
Liquid glue warps light cardstock if the layer underneath is thin. That is the limit: anything heavier than a glue stick and you are in a different project with a different timeline.

OPEN AND CLOSE IT TO PLAY HAPPY BIRTHDAY - Pull the folds apart and push them back together, and this funny musical accordion birthday card sounds the tune in time with your hands. Keep pumping to reach the last note.

ENVELOPE AND NOTE CARD SET: Each single pack contains one 3D pop-up card measuring 7.87 in by 5.91 in;one foil stamped note card measuring 5.12 in by 3.35 in;and one pearlescent envelope;folded dimensions comply with standard mail postage classes

Whimsical Unicorn Fantasy World: Open the card to reveal a magical 3D scene filled with unicorns, rainbows, clouds, and a multi-tiered birthday cake. The pastel color palette and intricate details create a fairytale-like atmosphere, making it an enchanting gift for unicorn lovers, kids, and anyone who loves a touch of magic
How I Personalize Without Overworking It
A card lands better when it looks like something the person already cares about, not like a generic craft project with their name swapped in.
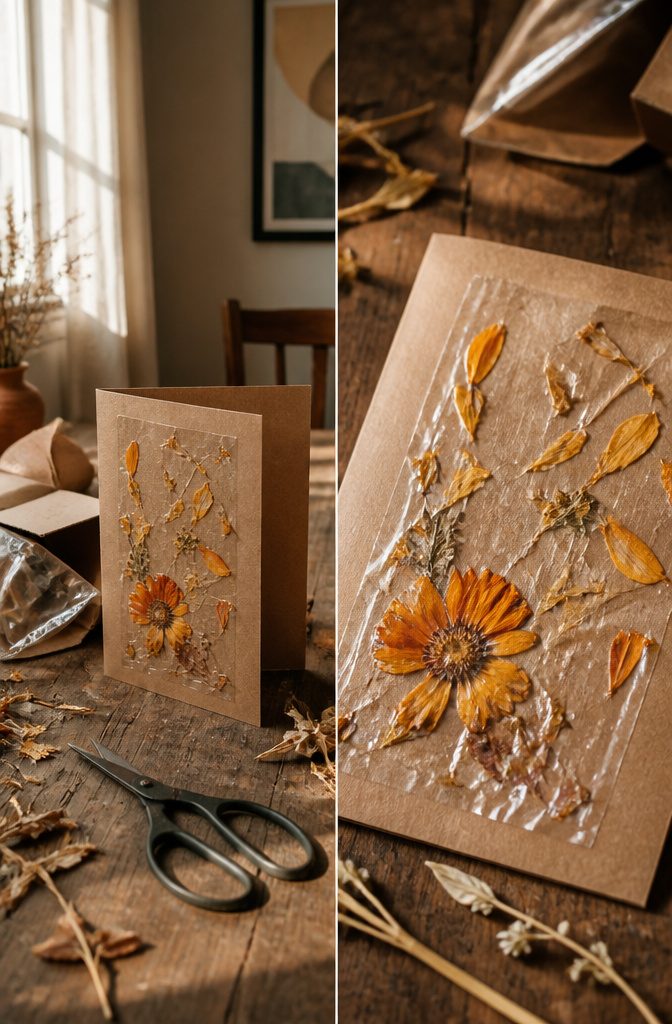
For my sister, who spends most weekends in her garden, I used kraft paper as the base and pressed a few dried calendula petals between two layers of clear packing tape to make a window.
The tape gives it a slightly wrinkled, greenhouse-glass look, and she recognized the flower variety before she even read the message.
My nephew’s card went the opposite direction: one T-rex silhouette cut from a cereal box, glued so the head breaks the card edge, nothing else on the front. The rule is one visual reference they already have an opinion about.
The inside is where I usually overwork it. Last spring I wrote out a full paragraph for a friend’s fortieth, three sentences about the year she’d had, and the card felt like a homework essay.
Took three drafts to get it down to one line: "You make forty look like you planned it."
The shorter message left room for her to read what she wanted into it, which is the point of handwriting in the first place.
Printable Templates I Have Open
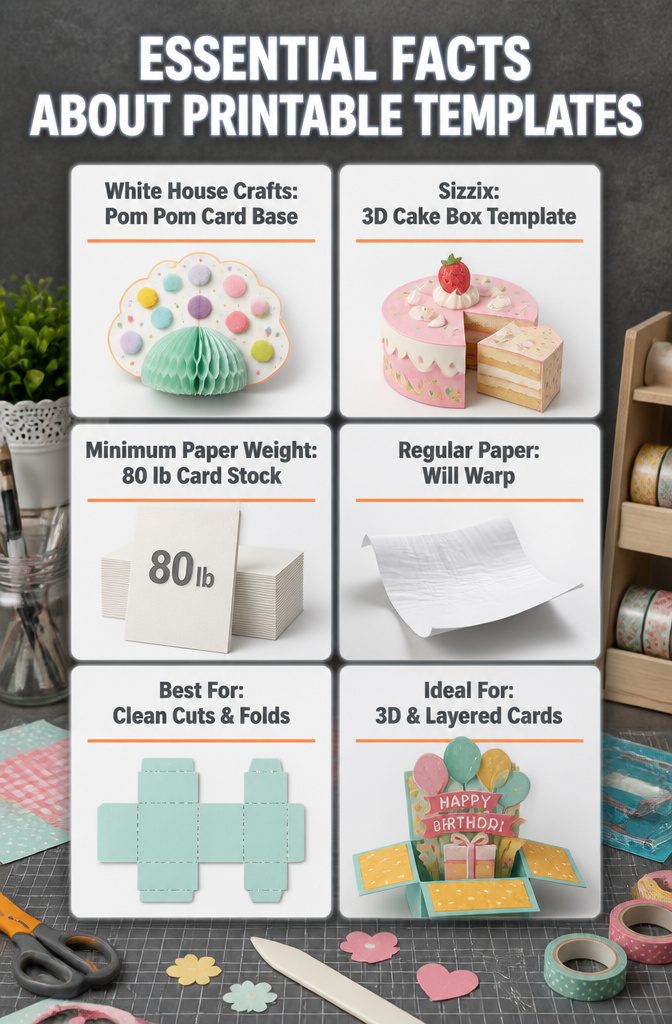
Printable templates spare a lot of freehand cutting, and two sites have earned their spot in my bookmarks.
White House Crafts publishes the pom pom card base I keep returning to; the ice cream cone outline prints clean and the fold lines land where they should.
For anything with stacked layers or a hidden box, Sizzix step-by-step files include the cutting guides that keep a 3D cake box card from collapsing sideways.
The one template I printed on regular 20 lb paper and regretted was a Sizzix card base that warped before I even got the glue out.
Card stock, at least the 80 lb textured sheets, is the minimum here; the 60 lb neutrals work for flat inserts but not for anything standing up.
Frequently Asked Questions
What materials do I need to make homemade birthday cards?
You need light card or cardstock, colored or scrap paper, scissors, a glue stick, and markers, pens, or crayons.
Three of those are probably already in your home. The colored paper and glue stick are the only items that regularly run out, and replacing either costs under $10.
How can I personalize my homemade birthday card?
Build the card around one visual reference the recipient already cares about, like a flower variety for a gardener or a dinosaur silhouette for a nephew.
Keep the inside message short, one or two lines at most, so the handwriting leaves room for the person to read their own meaning into it.
Are there any printable templates for birthday cards?
White House Crafts publishes a free pom pom card base that prints clean fold lines, and Sizzix offers step-by-step files with cutting guides for stacked or 3D designs.
Print any template on at least 80 lb textured card stock; regular 20 lb paper will warp before you finish assembling.