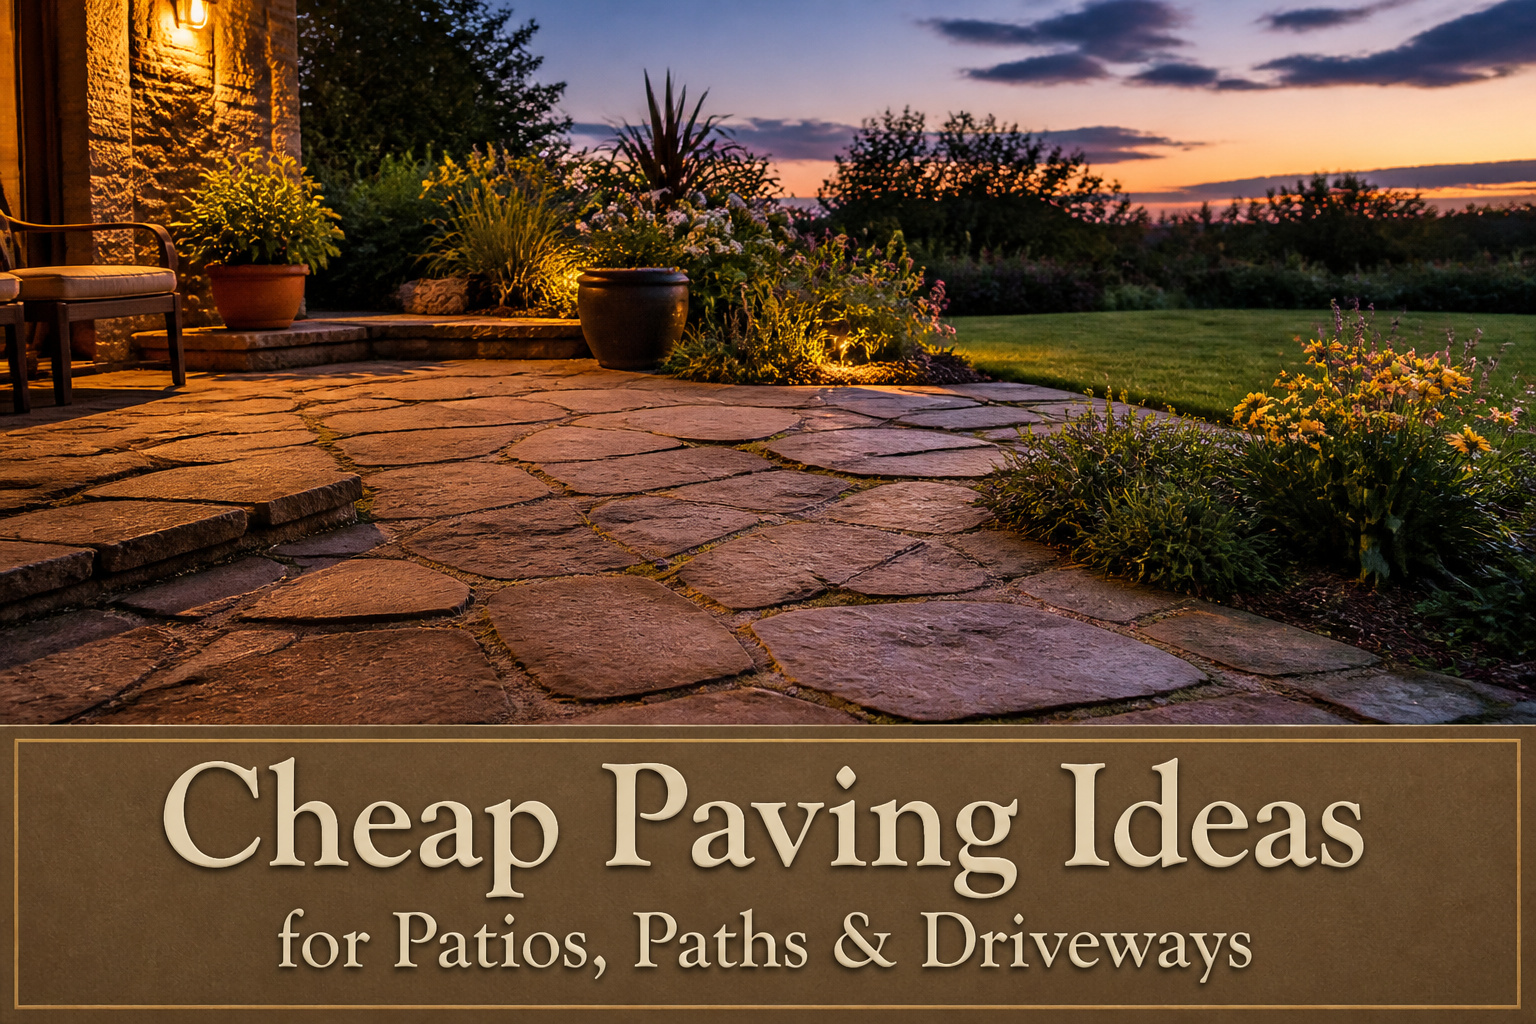
Cheap paving ideas span from painted concrete at fifty cents a square foot to porcelain that pays back over fifteen years of skipped sealing. What picks one from the list is how much weekend you actually have and whether the surface needs to carry groceries or just guide a garden stroll. The terrazzo refresh upstairs took three days because primer and dry time do not negotiate; the neighbor’s broken-concrete stepping stones took one afternoon because she left the gaps for grass to fill and stopped when the level read true.
1. Budget-Friendly Stepping Stone Paving
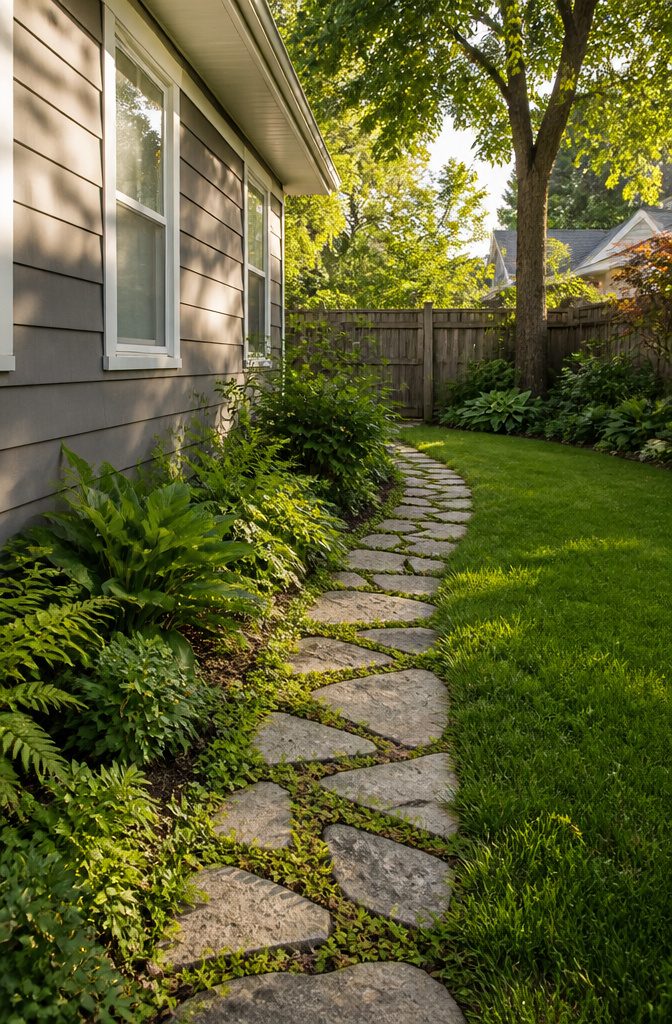
Stepping stones sit somewhere between a full patio and a bare dirt path, and that middle ground is where the money stays in your pocket. Last spring I watched a neighbor lay a dozen broken concrete pieces from a local teardown across her side yard in an afternoon. No mortar, no rented compactor, just a flat shovel and a bag of sand to level the high spots.
Ground prep for this method is almost too simple to call prep. Turf gets stripped with the shovel blade, roots raked out, and any obvious hump knocked down. The stone or paver settles on native soil with maybe a two-inch sand bed if the clay underneath holds water. Spacing is the part that takes thought. Eighteen inches center-to-center works for a casual garden path; fourteen feels better if you are carrying groceries to a back door in the rain. The gap lets grass or low ground cover fill in, which means less material to buy and less surface area to weed later.
Concrete pavers from a home center run cheaper than wet-cast stone and hold up fine for foot traffic. If you have access to broken concrete, the cost drops to the fuel for pickup and the sand. Either way, the whole job finishes inside a Saturday, with Sunday reserved for the soreness and for noticing which stone wobbles so you can tap it level. The wobble is the usual mistake: one rushed placement, and you will feel it underfoot for months. Check each piece with a long level laid across the top before you move on; fixing it later means lifting the stone and starting the sand over.

RUBBER STEPPING STONES: Elevate your outdoor space with these lightweight simulated flagstone rubber pavers that offer the timeless beauty of real stone without the heavy lifting.

Stop Worrying About Missing Parts: Unlike many kits that only provide a single-use mold and no decorations, our set includes 5.5 Lb cement mix, a mold, 7oz of vibrant mosaic tiles, 3 carving tools, letter & number stamps, a waterproof mat, and a pairs of glove
2. Paint Old Paving for a Cheap Makeover
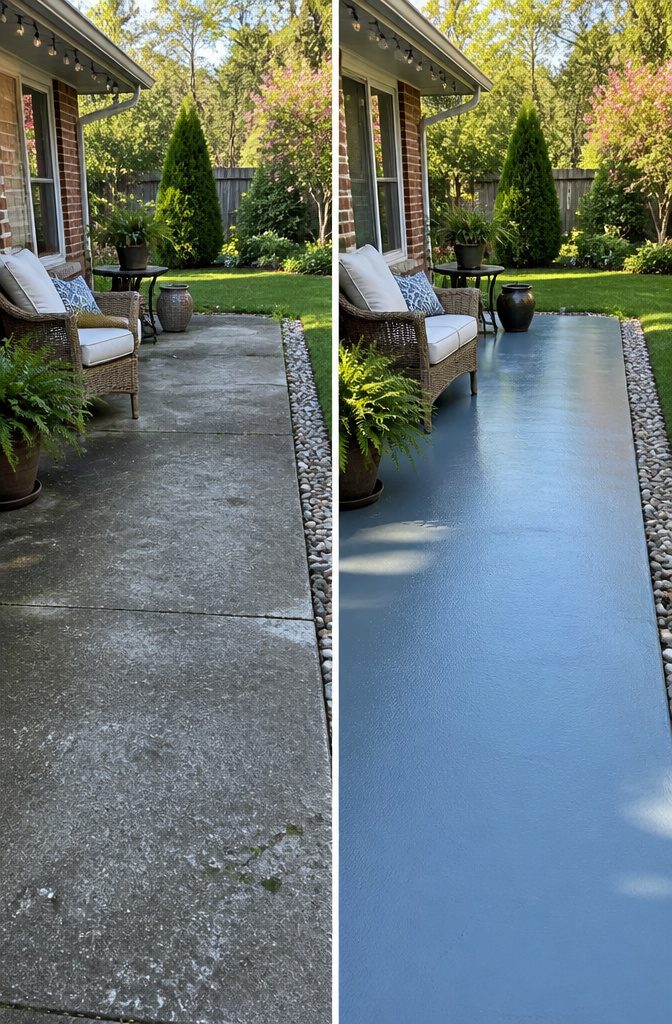
A painted patio refresh runs about $0.50 to $2 per square foot against the $8 to $15 you’d spend tearing out and relaying new concrete or brick. The catch is the prep, not the color. Moss, dust, and weeds left on the surface will lift the paint inside six months, so a full day of pressure washing and pulling growth is non-negotiable. A primer coat matters here more than on walls: paving takes foot traffic, UV, and pooled rain, so the bond between slab and topcoat is where the job lives or dies.
I like a roller on an extension handle for speed, though edges and joints need a brush. Two coats of exterior masonry or concrete paint, not standard latex, is the standard that lasts. Emily Smith’s terrazzo-style project took three days: one to clean, one for the white base, one for the pattern. That timeline feels honest for a small patio. What goes wrong is almost always peeling from trapped moisture or skipped primer, and once it starts, you are stripping and starting over. Paint this when you have three dry days ahead, and the surface stays usable for years.

Cleans driveways, walkways, patios and masonry
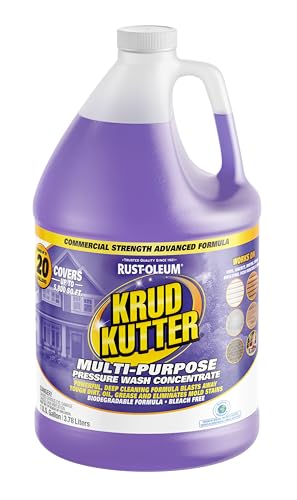
COMMERCIAL STRENGTH ADVANCED FORMULA: Penetrates and removes tough dirt, oil, grease, bird droppings, tree sap, and more
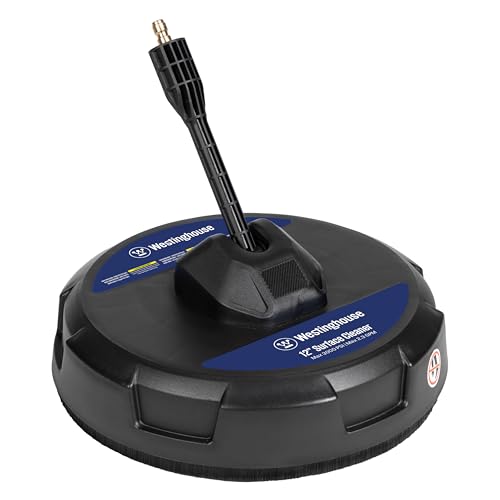
STREAK FREE CLEANING: Max 3000 PSI and max 2.3 GPM; This 12 inch surface cleaner delivers powerful, professional results on flat surfaces like decks, patios, driveways, sidewalks, walls and garage floors. Dual rotating jets spray evenly for a uniform blast in every pass of the wide cleaning deck
3. Cross-Sawn Logs as Walkway Pavers
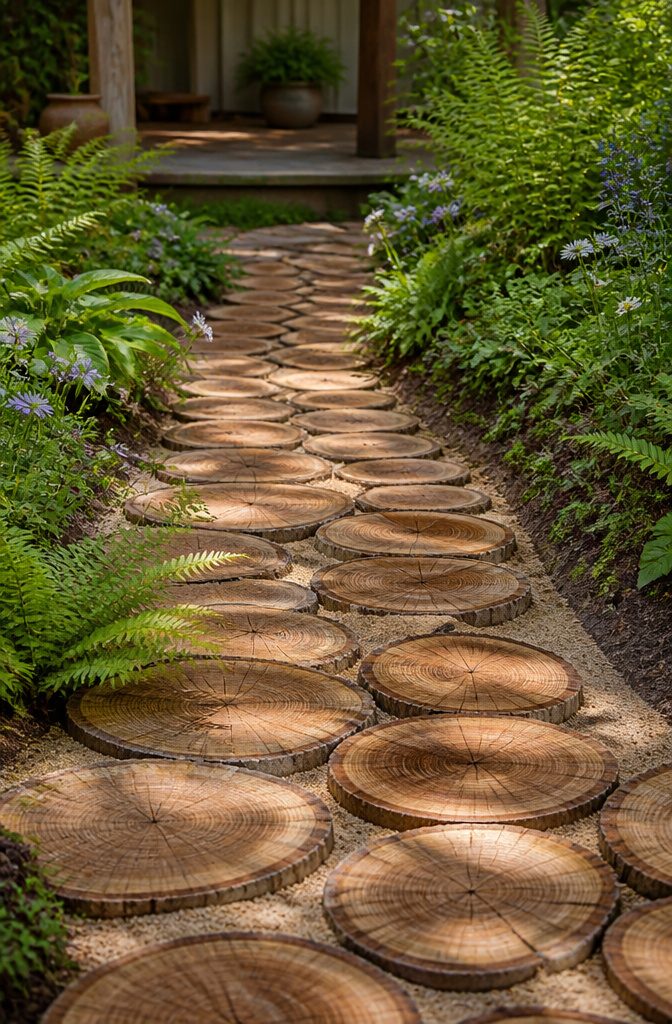
Cross-sawn logs work best when you find a local sawmill or tree service with soft maple, black locust, or white oak already on hand. Softer woods like pine will hollow out from foot traffic within two seasons, so the extra search for hardwood is worth it. Aim for slices between two and four inches thick; anything thinner warps and anything thicker is dead weight you do not need.
A chainsaw with a ripping chain or a 12-inch miter saw with depth stops handles the cuts. The miter saw gives cleaner edges if you are working indoors, but the chainsaw is faster for the initial bucking. Seal every cut surface with a penetrating oil-based sealer, not a film-forming deck stain, and reapply annually where the grain faces up. The end grain wicks water like a straw, which is why unseated rounds rot from the bottom first. Setting them on a two-inch sand bed rather than bare soil buys another year or two.
Black locust lasts the longest outdoors without treatment, though it is harder to split for kindling later. White oak is easier to source in most regions and still outlasts cedar by a fair margin. Skip the bark entirely; it traps moisture and invites ants underneath.

This high-quality, acrylic latex water-base interior/exterior paint offers excellent hiding properties with great adhesion and water repellency on textured interior and exterior surfaces

MADE FOR EXTERIOR MASONRY: Designed for concrete, cement, brick, stone, stucco and masonry walls. Ideal for refreshing exterior walls, facades, garden walls and other properly prepared vertical masonry surfaces.

MADE FOR EXTERIOR MASONRY: Designed for concrete, cement, brick, stone, stucco and masonry walls. Ideal for refreshing exterior walls, facades, garden walls and other properly prepared vertical masonry surfaces.
4. Patchwork Paving for Mixed Surfaces
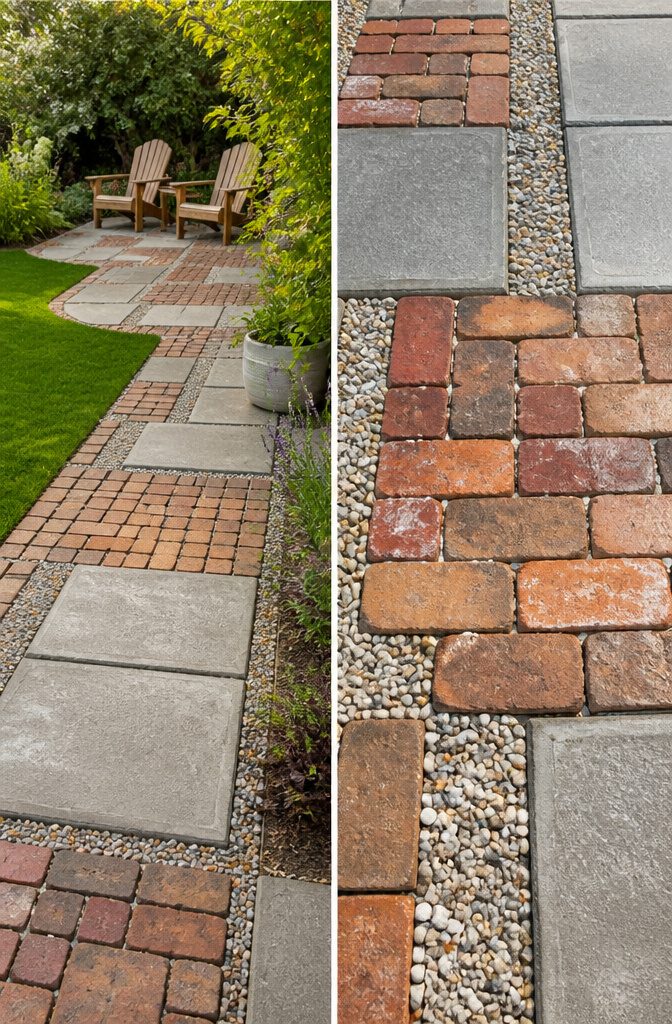
A patchwork surface reads as intentional only if the layout has some internal logic. Clustering salvaged clay bricks in one zone and new concrete pavers in another looks like a plan; alternating them at random looks like you ran out of material. The sources point to two workable approaches: concentrate mismatched pieces in a single key area for impact, or use material changes to mark functional zones like seating versus dining.
The transition between materials matters more than the materials themselves. A narrow strip of gravel or stone chippings, laid between brick and paver, absorbs the slight height differences that always show up with reclaimed stock. It also saves the frustration of trying to match thicknesses exactly, which is where most patchwork jobs start to look amateur.
Salvaged roof tiles, thick slates, even broken terracotta from old pots can fill gaps between larger flagstones. The eye registers the overall rhythm of the layout, not the individual oddity of each piece. That is how patchwork hides imperfect matches: the pattern becomes the point, and the single mismatched unit disappears into it.
For securing mixed materials, a compacted scalpings base with gaps filled by fine gravel or chippings is the practical route. It tolerates the uneven undersides of reclaimed stock far better than mortar bedding, and it drains. Budget roughly $2 to $5 per square foot for new pavers, with salvaged pieces cutting that further.

Transform dated countertops: Stone Coat Countertops Bonding Primer & Sealer creates a durable bond on slick surfaces like laminate, tile, granite, quartz, solid surface, and cultured marble, ensuring a strong foundation for epoxy applications.
Premium-quality, acrylic-urethane bonding primer-sealer with unparalleled adhesion to the most challenging surfaces, including glossy tile, PVC, vinyl, plastic, glass, glazed block, glossy paint, pre-coated siding, fiberglass, and galvanized metals.

STRONG AND SECURE BONDING — Add as a bonding grout or admixture to cement, concrete, or mortar for increased adhesion and impressive tensile strength
5. Quick-Lay Paving to Cut Labor
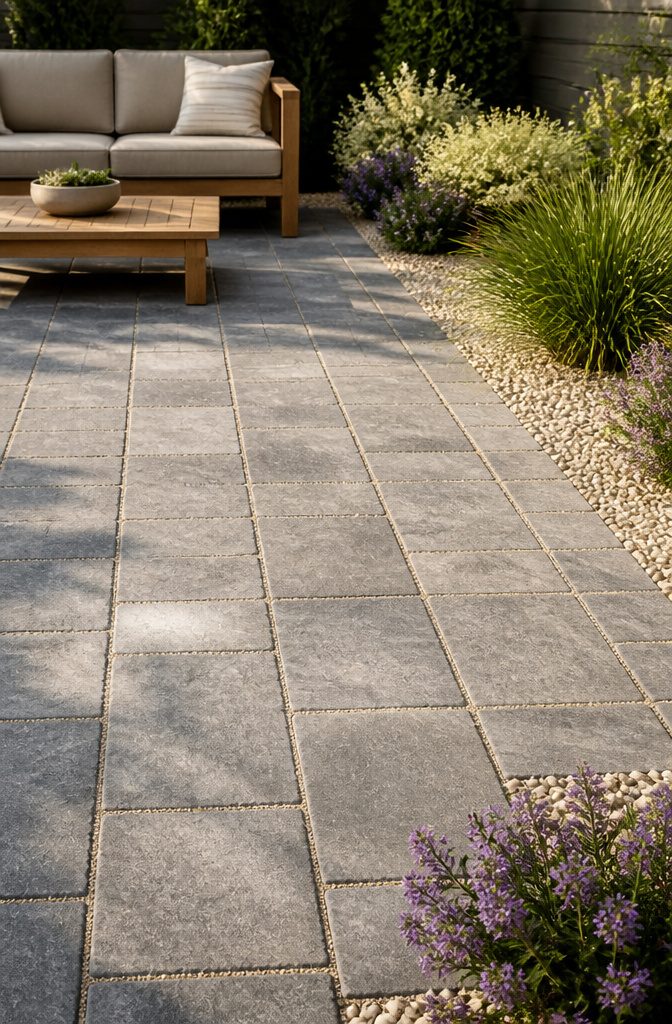
Interlocking concrete pavers run $2–$4 per square foot, which is where the savings start, but the real draw is what you skip. No mortar, no wet saw marathon, no waiting on cure times. You lay a sand bed, fit the pieces like puzzle edges, and tap them home with a rubber mallet. Sand swept into the joints locks the surface together.
The catch is what happens underneath. These pavers transfer every load straight to whatever is below, so the base prep is where the project lives or dies. A weekend of compacting gravel and leveling sand beats a week of mortar work, but skipping that step means the surface sinks in spots within a season or two. I have watched a neighbor’s quick-lay patio turn into a shallow wading pool after every rain because they trusted the existing dirt to stay flat.
This method works for foot traffic and light furniture, not for vehicle loads. Driveways need the full excavation and compacted base that the packaging often glosses over. For a renter building a small back patio or a side path you can lift up when the lease ends, the tradeoff is clean. Buy the paver thickness rated for your use, rent the plate compactor for the base, and accept that the time you save laying them will show up later if the ground was uneven to start.

Weather-Resistant & Built to Last: Crafted from durable PC+ABS resin, these stepping stones are heat-resistant, crack-proof in freezing temps, and impact-resistant. Designed for year-round outdoor use, they won’t fade, warp, or lose their shape—rain or shine.

Multi-Size Creative Design Multi-size design supports small, medium, and large path panels for customized outdoor landscaping projects, ideal for creating personalized decorative walkway surfaces.

UNIQUE OUTDOOR WALKWAY SOLUTION: Elevate your garden, lawn, or backyard with BIRDROCK HOME Rubber Stepping Stones. These durable pavers create a functional and stylish walkway, enhancing your landscape while providing a solid and reliable surface to walk on.
6. Porcelain Paving for Lower Maintenance
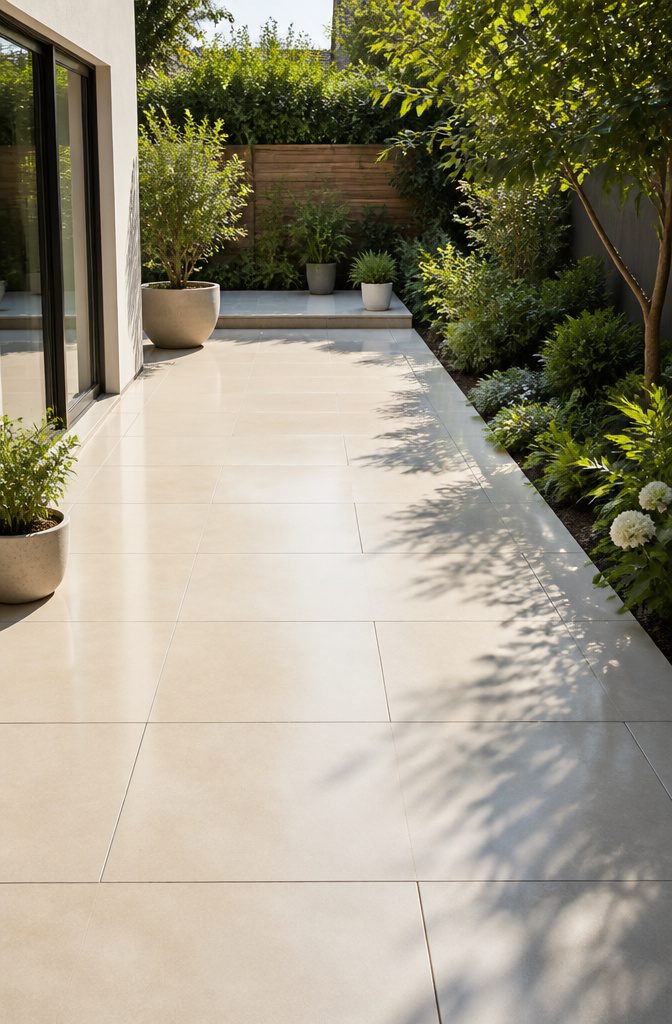
Porcelain pavers run $4 to $9 per square foot, which sits at the higher end of cheap paving ideas until you spread the cost across the years you will not spend sealing, weeding, or replacing faded stone. The surface is non-porous, so stains lift with a pressure washer and nothing grows between tiles spaced tight together. No sealing means no re-sealing; that annual weekend and $40 canister of sealant disappears from the calendar entirely.
The math tightens in small areas. A 10-by-12 patio covers 120 square feet, or roughly $480 to $1,080 in materials against natural stone that might cost half as much upfront but wants resealing every two years and weed killer in the joints each spring. Over fifteen or twenty years, the gap closes, then reverses. For a narrow path or modest landing where the total material bill stays under a few hundred dollars, the premium buys more peace than it does savings. I would put porcelain where I walk daily and save the cheaper experiments for corners I barely see.
Planks laid in a linear pattern read as decking without the rot; brick bond or offset brick bond breaks up larger rectangles if the space needs movement. Light ivory variants carry the travertine or limestone look the sources favor, especially around pool coping where slip resistance and fade resistance matter more than warmth underfoot. The catch is the install: these tiles need a level bed and tight joints, so the weekend timeline assumes the prep is already done, not that you are pouring a slab Saturday morning.

COMMERCIAL STRENGTH ADVANCED FORMULA: Cuts through the toughest oil & grease stains

Highly concentrated detergent for cleaning concrete, brick, masonry, and stone surfaces

Achieve Professional-Level Cleaning Results with This 16.5” Surface Cleaner, with Up To 4400 PSI of Pressure for Easy Cleaning of Flat Surfaces Like Decks, Patios, Driveways, Walls and More
7. Statement Paving in a Small Zone
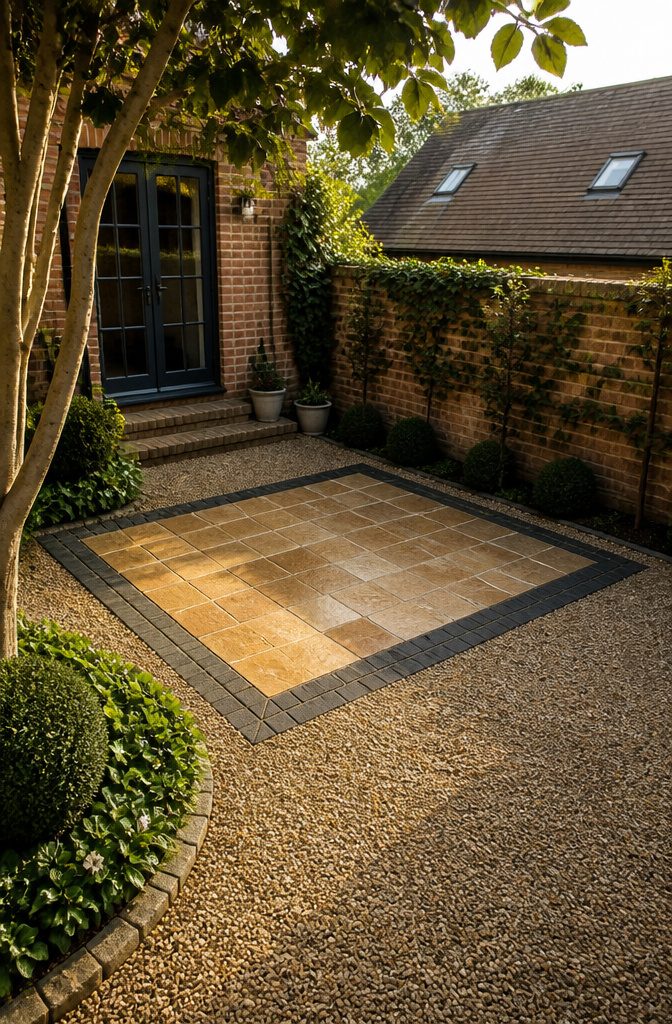
A tight pocket of Antique Honey Limestone or Amazon Black Slate can carry a whole patio if the rest of the yard stays cheap. I like keeping the statement zone to about 40–60 square feet, roughly the footprint of a small bistro set or the approach to a back door. At $3–$6 per square foot for the limestone or $4–$8 for the slate, that lands between $120 and $480 for material, which leaves room in a weekend budget for what goes around it.
A dark charcoal border in concrete or tumbled pavers, maybe a soldier course or a narrow accent band, frames the good stone and makes it read intentional rather than leftover. Everything outside that frame can be the cheapest fill you can move in a day: basic gravel, crushed limestone, or even compacted decomposed granite if your climate stays dry enough.
The limestone reads warm and slightly irregular, so the surrounding material should stay loose and light to keep the contrast clean. The slate wants the opposite. Its deep tone needs the lighter border and pale gravel nearby or it pools heat and looks like a hole in the yard. Either way, the mistake is spreading the nice stone too thin. A 4-foot path of premium material with cheap shoulders looks apologetic; the same square footage pulled into a 6-by-8 seating island reads like a decision.

This high-quality, acrylic latex water-base interior/exterior paint offers excellent hiding properties with great adhesion and water repellency on textured interior and exterior surfaces

Durable Epoxy Acrylic Formula: Resists hot tire pickup, scuffing, cracking, peeling, and fading. KILZ 1-Part Epoxy Floor Paint delivers long-lasting protection and a satin finish that looks great on concrete surfaces.
MADE FOR EXTERIOR MASONRY: Designed for concrete, cement, brick, stone, stucco and masonry walls. Ideal for refreshing exterior walls, facades, garden walls and other properly prepared vertical masonry surfaces.
8. Interesting Shapes for Plain Materials
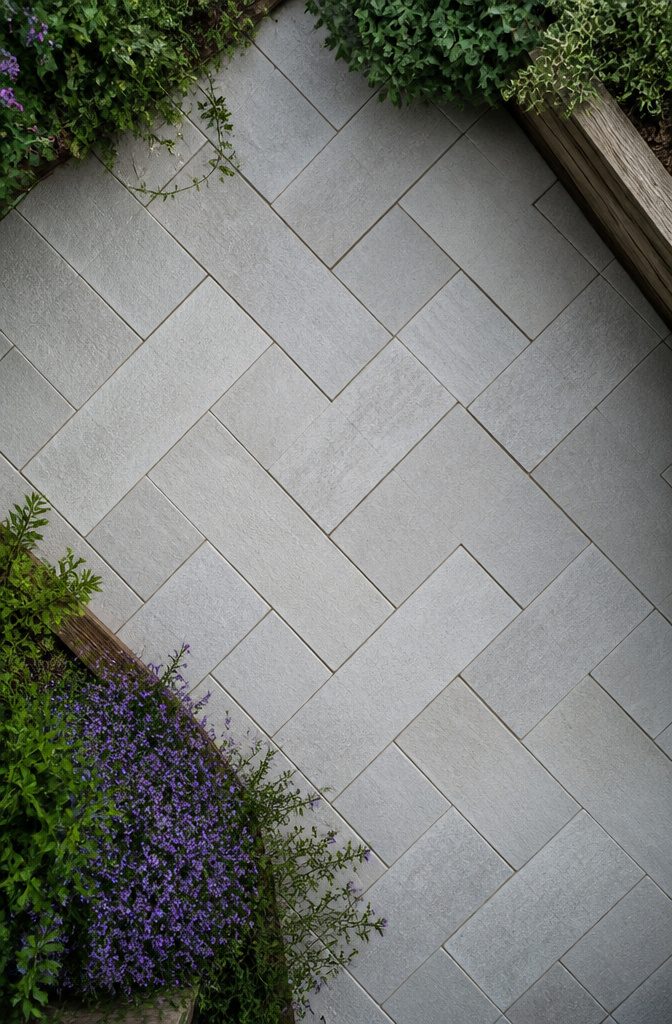
A herringbone or basketweave layout turns the cheapest rectangular paver into something that reads custom. Kandla Grey Sandstone at $3–$7 per sq. ft. sits in the same price bracket as basic concrete, but the soft gray tone and the angled joints make it look deliberate rather than budget.
The pattern matters more than the stone itself. Herringbone breaks up the grid and hides cuts along borders; basketweave softens the geometry for patios where you want the surface to recede. Circles take more planning and waste a few extra pieces, yet the result passes for a specialty install at a fraction of the cost. Running bond or stacked grid reads flat and builder-grade by comparison, so the labor of laying at 45 degrees pays back in perceived value.
Sealing afterward protects against stains, and the spare cuts from a circular layout work well for garden edges or narrow path borders. That keeps the material count tight and avoids the mismatch of ordering two different products.

QUIKRETE COMPANIES

NO SANDING OR GRINDING REQUIRED: Coats directly over previously coated or sealed concrete floors without scuffing or sanding

Remains flexible and breathable over time so it doesn’t peel or crack when the weather and temperature change throughout the seasons.
9. Reclaimed Brick Paving
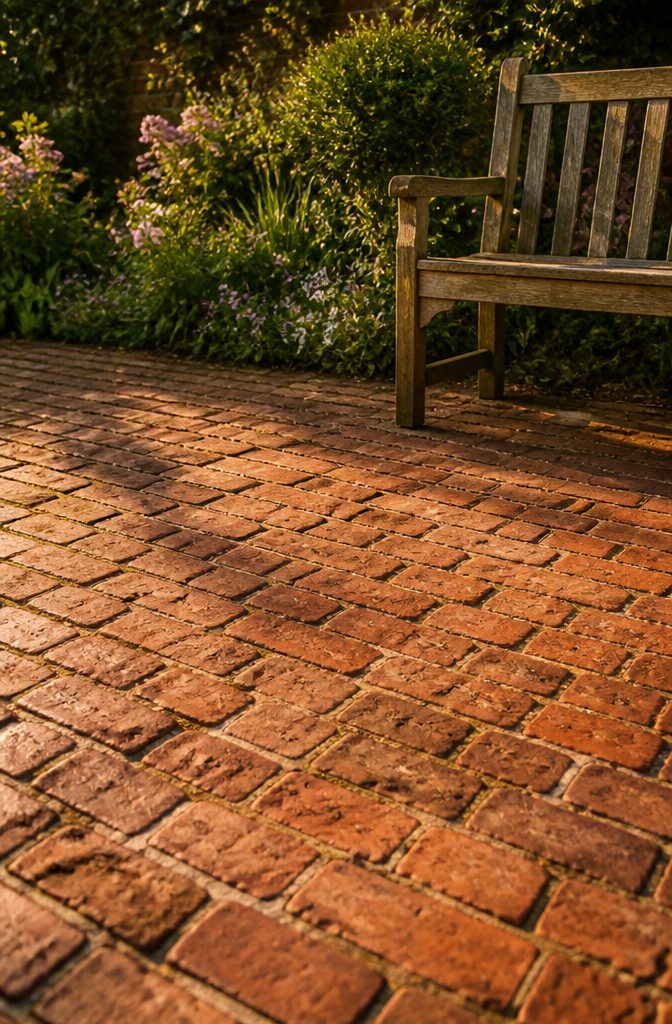
Salvage yards and online marketplaces list reclaimed brick at $1 to $3 per square foot, which is where most of the savings come from. Demolition sites are another source, though you will need permission and a willingness to sort through what is essentially construction debris before it leaves the property.
The real work starts after you haul it home. Old bricks arrive with mortar still clinging to them, and the thickness varies from piece to piece. Cleaning them is non-negotiable, and sorting by thickness matters more than sorting by color. Bricks that look identical on top can sit a quarter inch off from their neighbors once laid, and that gap telegraphs through sand or mortar alike.
Settling is the other thing salvage sources rarely warn you about. Reclaimed brick has already spent decades compressing under weight, weather, and time. It will not settle evenly with new material around it, so mixing reclaimed and new brick in the same field is asking for a wavy surface by the second season. Stick to all reclaimed for a single patio or path, or use it as a border where the height difference reads as intentional rather than failed.
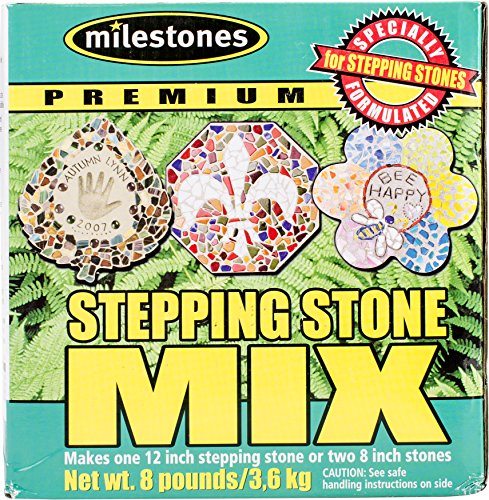
Premium stepping stone mix is a specialized mix of super-fine cement, latex, and curing agents
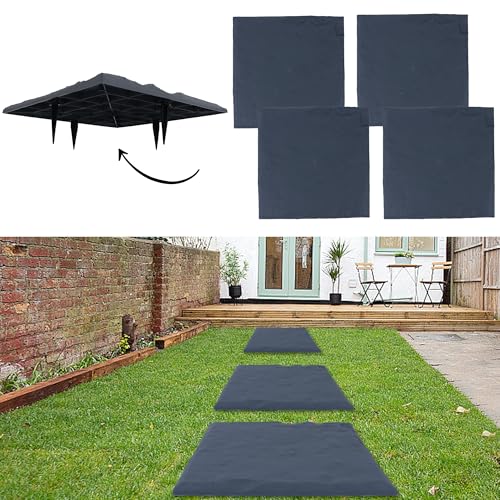
Durable & Easy: These 15.5" stepping stones are made of weatherproof resin, so they can withstand rain, hail, UV rays, and cold temperatures. They also feature four ground stakes for secure installation, making them perfect for patios, walkways, and gardens.

Package Dimensions: 13 L x 13 H x 2.25 W (inches)
10. Gravel as Full Surface Paving
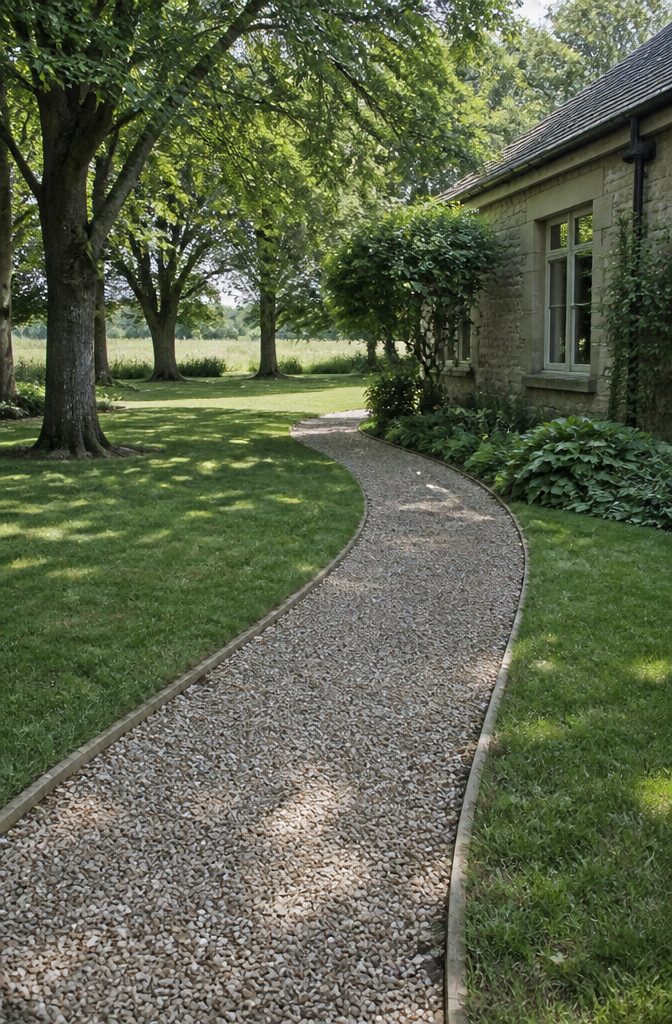
Gravel is the cheapest square-foot surface you can actually live with, and the reason it works comes down to what sits underneath. Dig out 4–6 inches for the base, lay your gravel, and run a plate compactor over it while the stone is damp. That compaction is what keeps the surface from turning into a washboard after the first hard rain.
Stone type matters more than the bag’s label suggests. Dust or fines in the mix lock together and walk more like a path; clean stone drains faster but shifts underfoot. If you want the path to stay put, a retaining edge is non-negotiable. Granite setts do the job, though flexible metal edging bends around curves and installs faster. Without something solid at the border, your gravel becomes your lawn within a season.
A 10mm rounded grade is the size that balances walkability with staying where you put it. Larger stone rakes back into place less often; smaller stuff migrates to shoe treads and flower beds. The raking itself becomes the maintenance rhythm. Plan on it twice a season for heavy traffic, less for a seating corner you reach by stepping stone.

IMPORTANT FITMENT NOTE – Equipped with a 1/4" quick-connect plug, this attachment fits most 2000–4000 PSI pressure washers. It connects to your pressure washer gun/wand only — garden hoses will NOT work. Machines with 3/8" outlets need an adapter (not included). Not sure? Check your pressure washer's specs before ordering.

12” CLEANING WIDTH : works great for driveways, sidewalks, patios and decks.

IDEAL FOR FLAT AREAS: This 15” surface cleaner can concentrate up to 3400 PSI for quick cleaning of large areas like decks, patios, driveways, walls and more
11. Pebbles Between Pavers to Stretch Material
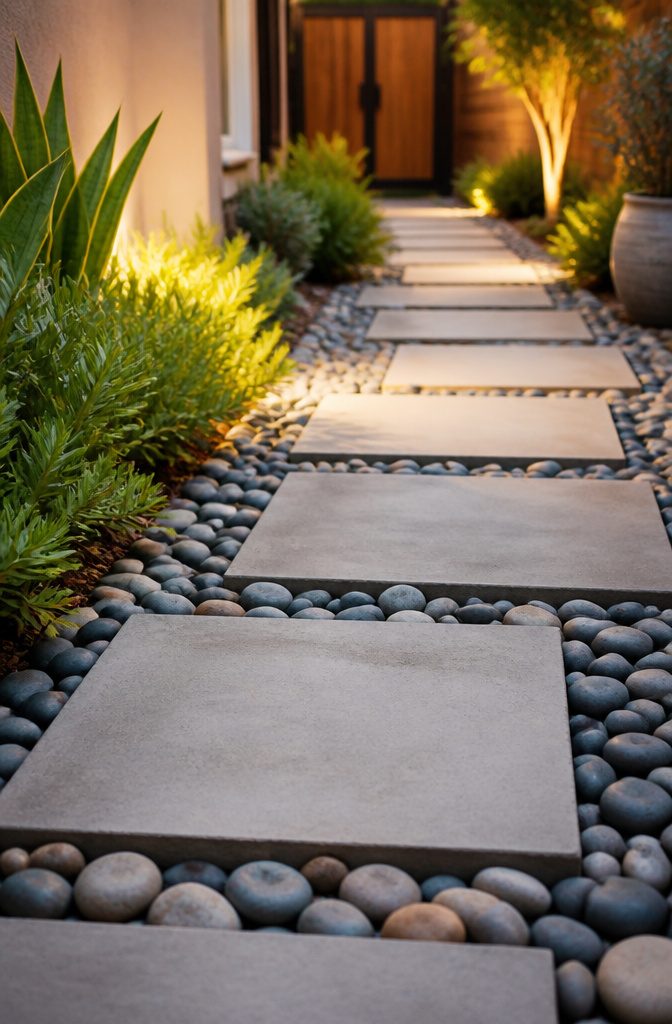
Widening the gaps between pavers from the usual quarter-inch to 2–3 inches cuts the paver count by a third or more, and the space fills cheaply with river rock or pea gravel bought in bulk bags. The look shifts from formal to something closer to a Japanese garden path or a Mediterranean courtyard, and the extra drainage is real: rainwater filters straight through instead of sheeting off.
Landscape fabric underneath keeps the stones from sinking into the soil over a wet winter. Rigid edging along the perimeter stops them from migrating into the lawn, which they will do without it. For the weed problem, sand or fine gravel swept between the stones and settled with water works better than waiting for problems to show up. Pull what sprouts early, top off the infill once a season, and the maintenance stays minor.
Material Cost Comparison
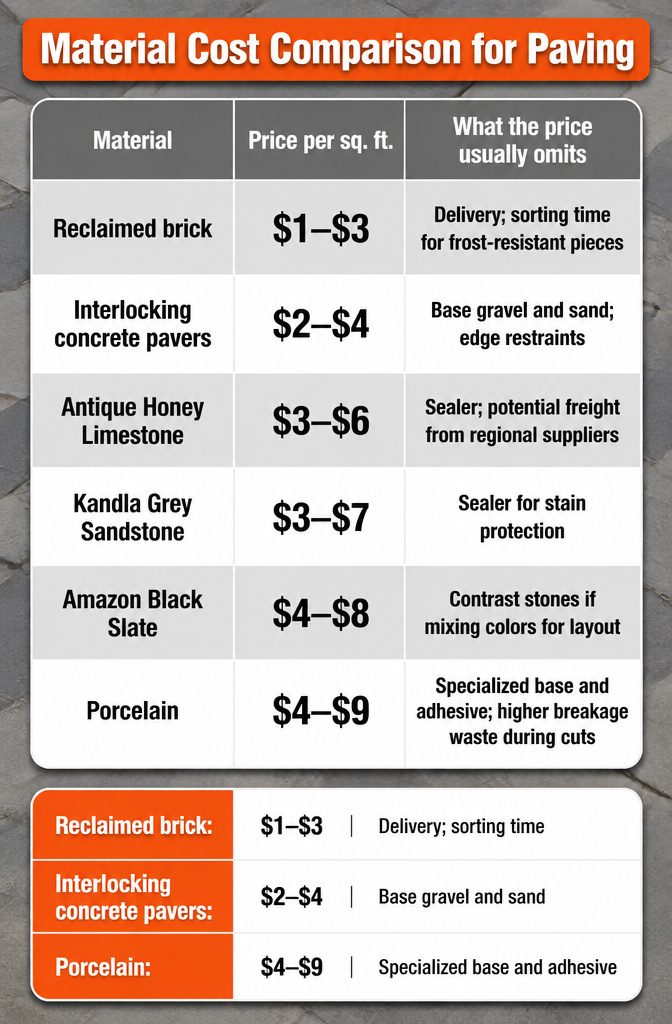
Raw prices only tell part of the story. Delivery fees, base material, and sealing all sit outside the square-foot number, and some options hide more of those extras than others.
| Material | Price per sq. ft. | What the price usually omits |
|---|---|---|
| Reclaimed brick | $1–$3 | Delivery; sorting time for frost-resistant pieces |
| Interlocking concrete pavers | $2–$4 | Base gravel and sand; edge restraints |
| Antique Honey Limestone | $3–$6 | Sealer; potential freight from regional suppliers |
| Kandla Grey Sandstone | $3–$7 | Sealer for stain protection |
| Amazon Black Slate | $4–$8 | Contrast stones if mixing colors for layout |
| Porcelain | $4–$9 | Specialized base and adhesive; higher breakage waste during cuts |
Reclaimed brick looks cheapest on paper until you factor in the hunt. Clay pavers have to be fully frost-resistant, and confirming that on salvaged stock means inspecting each one or buying from a seller who already has. That time cost is real on a weekend project. Concrete pavers spread the load better but still need that buried layer of compacted gravel nobody prices into the sticker. Stone and porcelain climb fast once sealer and precision cutting enter the math. For a few hundred dollars and two days, the mid-range stones only win if the surface stays small enough that the extras do not multiply.
What Works for a Weekend
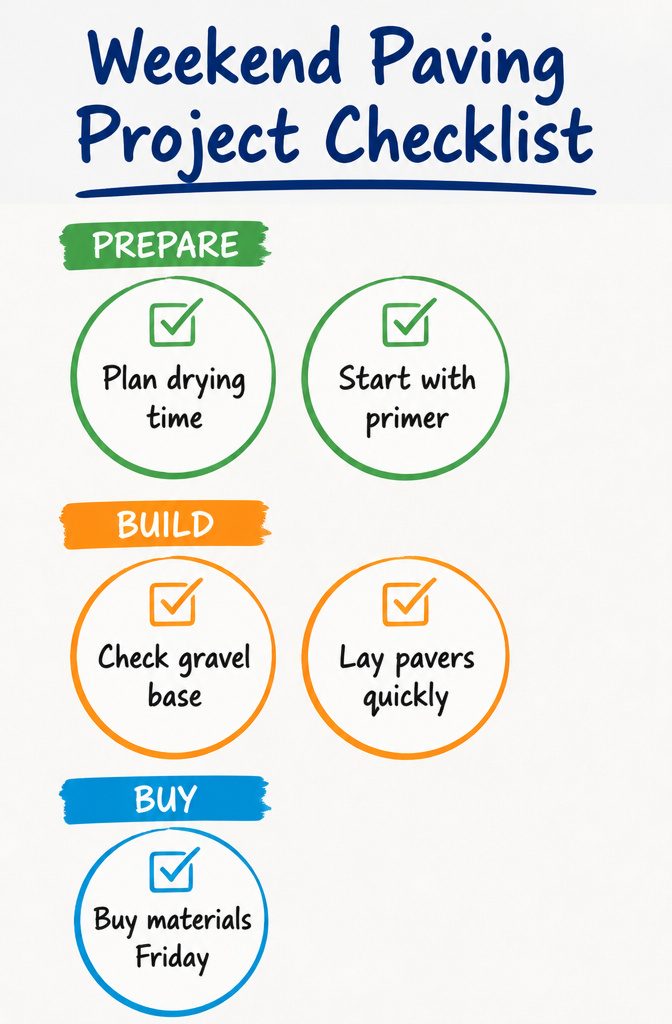
Painting old paving fits a weekend if you plan for the drying time, not just the brushing. One homeowner spent three days on hers: one to clean, one for the white base, one for the terrazzo pattern. The lesson is to start with primer and a roller on a long handle so your knees survive Saturday, then keep Sunday loose for the second coat and any touch-ups.
Concrete pavers and a simple fire pit circle are the other realistic solo builds. Digging and leveling eats Saturday morning; laying tumbled or neutral porcelain pavers runs faster than the prep once the bed is flat. I would not mix a full mortar bed in two days alone, but dry-laid concrete on a gravel base is manageable.
Gravel alone is fastest, though edging it straight still takes half a day most people underestimate. The honest limit: two projects out of the eleven belong to a real weekend, and even those need the Friday night hardware run done first.
Weed Prevention Between Pavers
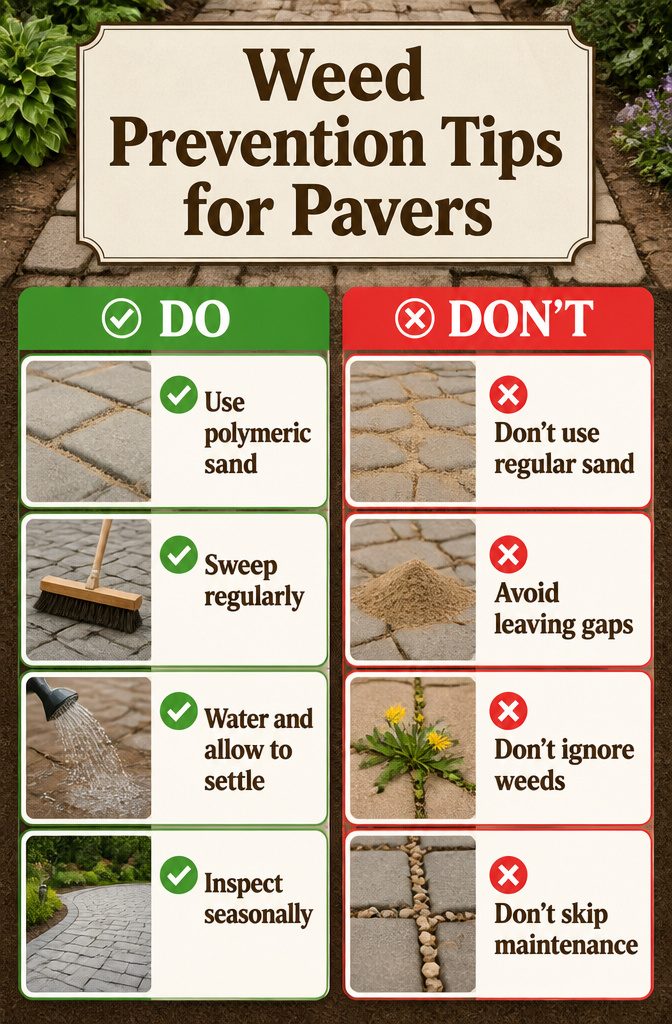
Narrow joints look cleaner, but they still fill with debris and anything the wind carries in. Polymeric sand is the upgrade that actually solves this. It binds into a flexible seal between pavers, so weeds have nowhere to take root and the surface stays visually consistent.
Regular sand or fine gravel works too, and it costs less upfront. You sweep it into the gaps, water it to settle, then sweep again once the surface dries. The cycle repeats every season or two, because ordinary sand washes out and migrates. I have watched wind lift dry sand straight out of a patio I finished on Saturday; by Wednesday the gaps were half empty and dandelions were already testing the real estate.
Gravel infill between large concrete steppers or textured gray slabs reads as intentional, especially in Japanese-inspired or desert landscapes where you want that softer, organic transition. It does not lock in place though. Foot traffic kicks it around, and you are back with the broom.
Polymeric sand is the one infill I would not skip again on a permanent patio. The bag costs more than builder’s sand, but the hours you spend weeding and refilling gaps cost more over two summers. On stepping-stone paths where I left wider gaps deliberately, I still use gravel, because the look matters more than the maintenance and the stones move less.
Frequently Asked Questions
Can I install patio pavers without the help of a professional?
Yes. Most cheap paving projects use dry-laid methods with basic tools: a shovel, a level, and a rubber mallet. The article covers stepping stones, interlocking concrete pavers, and quick-lay systems that skip mortar and cure times entirely, though base prep with compacted gravel still matters for keeping the surface flat.
Where can I get some cheap or free pavers for my patio?
Local salvage yards, online marketplaces, and demolition sites list reclaimed brick at $1 to $3 per square foot. Neighbors with leftovers and community boards are worth checking too. The article notes that broken concrete from local teardowns and old terracotta pots can also fill gaps or form entire paths at the cost of fuel for pickup and a bag of sand.
How do I prevent weeds from sprouting between my pavers?
Polymeric sand is the most reliable barrier; it binds into a flexible seal that weeds cannot penetrate. For wider gaps, sweep in ordinary sand or fine gravel, water to settle, and repeat once a season or two. Landscape fabric under gravel infill also helps, though you will still need to pull early sprouts and top off the fill.