You can build a functional window shade for under $10 using nothing but kraft paper and adhesive strips, provided you accept that it will not survive a humid bathroom.
The same paper method that works in a dry bedroom dissolves in kitchen grease, which is why the article tests materials by room before recommending them.
1. No-Sew Fabric Shades
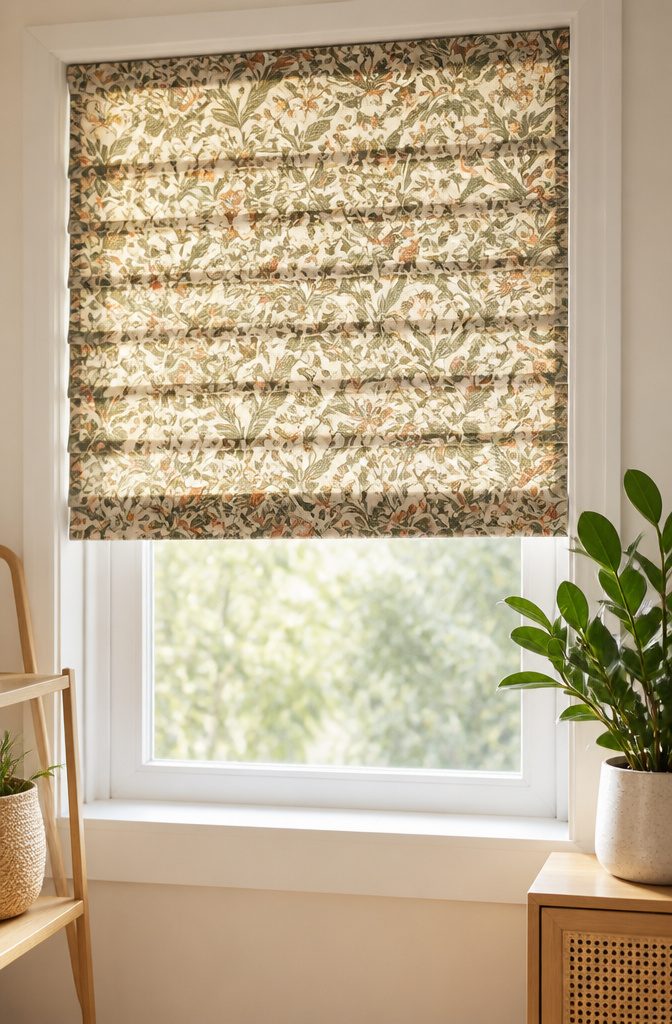
Adhesive fabric tape lets you wrap a basic vinyl mini blind in new fabric without threading a needle, which is why this is the first method I mention to renters.
The process strips most of the slats from a cheap mini blind, leaves a few spaced out as ribs, and fuses fabric to them with iron-on hem tape. Medium-weight cotton or linen blend works.
Too sheer and the mechanism shows through. Too heavy, like upholstery velvet, and the folds stack wrong.
Fabric glue is the other path. A plain roller shade becomes the backing; you brush on adhesive and smooth your chosen material over it.
Jacquelynne Steves tried this six times before she got the sequence right, and her account saved me the same trouble: work top-down in sections, keep the tension even, and do not rush the tack time.
For windows where drilling is not an option, a tension rod inside the frame holds a simple roll-up: fabric draped over the rod, ribbons looped front and back, tied in bows to secure the rolled height.
The weight rating on that rod matters more than people expect. A sheer panel asks almost nothing; a cotton or canvas shade asks more, and a rod rated too light will sag or drop within a week.
Cost stays low either way.
Mini blinds run a few dollars, hem tape or fabric glue under ten, and tension rods sit in the same range. Compared to ordering custom fabric shades, the out-of-pocket difference is roughly ten to one.

100% Blackout Roller Shade: Made of polyester fabric coated with blackout backing. Blocking out 100% light for complete privacy, light control and UV protection for bedrooms, children’s rooms and movie rooms. Excellent for deeper and longer sleepers.

Ready-Made: Package includes 1 panel magnetic linen door curtain + pole accessories + free sticky strap. The door curtain is finished with sticker for easy to install. The back of the door curtain is also designed rod/pole pocket, to meet your various needs.

No Tools Installation: Trim your shade with a straight-edged kitchen knife using included patented trimming scale and guide; then permanently install in seconds with Simple Stick No Tools peel-and-place application
2. DIY Roller Shades
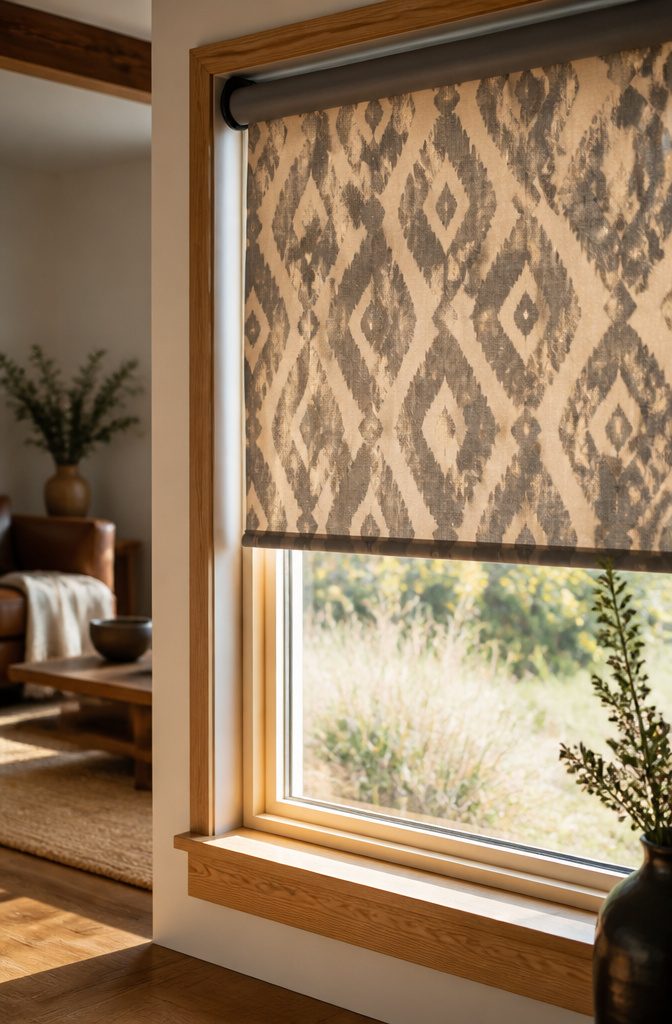
A roller mechanism turns a plain rectangle of fabric or paper into something that disappears when you want light and reappears when you do not.
The hardware kits run about ten to twelve dollars, and a couple yards of medium-weight fabric or a heavy craft paper fills the rest of the frame.
The whole shade costs roughly $33, which lands well under anything store-bought in that width.
Measuring comes before ordering anything. Inside-mount shades need the width at three points across the top of the window frame, then the height from top sill to where you want the bottom to rest.
Use the narrowest width and the full height; the roller brackets add a small fraction of an inch on each side, and a shade cut too wide will bind or scuff the frame every time you pull it.
Paper gives the most minimal look, almost invisible when rolled, but it will not survive a humid bathroom or a kitchen grease layer.
Fabric holds up better and takes dye or paint if the color you want does not come off the bolt.
Either way, the roller tube itself is the same standard width, so the hardware decision does not lock you into one material forever.

【Quantity & Packaging Notice】 2 Rolls Included in 1 Pack: Contains 1 roll of 1/4" x 49ft and 1 roll of 1/2" x 49ft (Total 98FT). Note: Both rolls are securely packed together in a single package—please check the inner layer if you think any roll is missing. Specifically designed for clothing repair, folding, and crafting. Whether used for temporary or daily repairs, these sizes ensure efficient and convenient use.

Effortless Garment Transformation: Transform your garments effortlessly with our hem tape for pants and dress! This 3/4 INCH x 32 Yards - 60GSM iron hem tape is suitable for quick, temporary fixes

REMOVABLE DOUBLE-SIDED FABRIC TAPE: 1 roll of Scotch Removable Double-Sided Fabric Tape offers adhesive that holds fabric securely yet is easy to reposition
3. Paper Window Shades
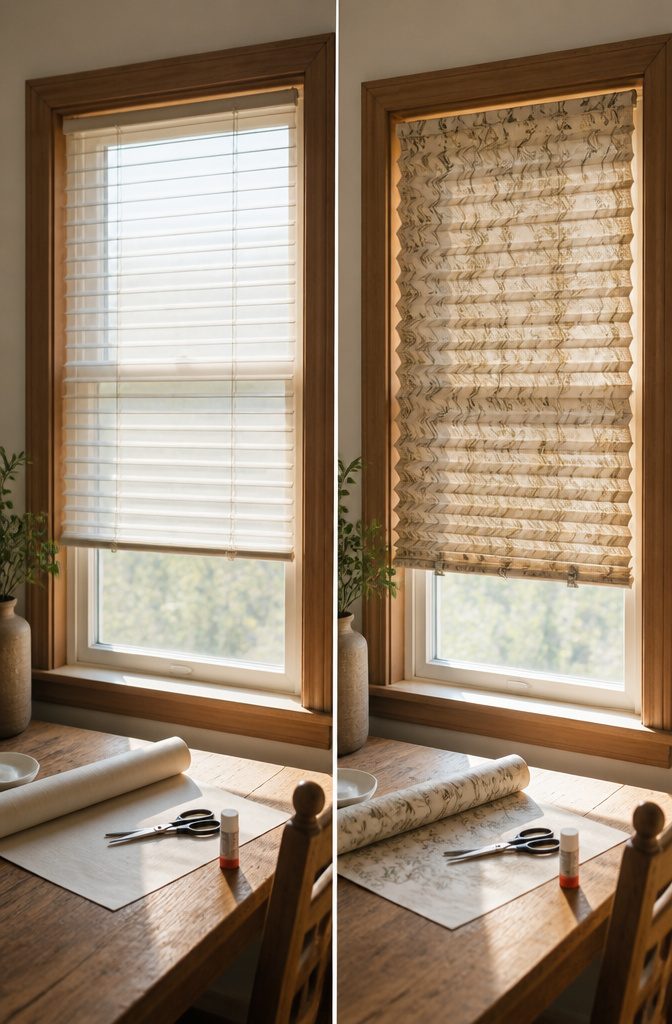
Kraft paper and patterned wallpaper both fold into pleated shades that roll up and clip in place, or you can run adhesive strips along the top edge and stick them straight to the frame.
The temporary pleated paper shades you see in big-box stores cost less than $10 per window, which is hard to beat for a first apartment or a room you have not figured out yet.
I like the wallpaper route for the pattern options, but the weight matters: standard wallpaper paste adds stiffness that fights a tight roll, so test a scrap before you commit the full sheet.
Cornstarch paste works on lightweight fabric or lace pressed directly to the glass for a frosted effect, and it peels off with warm water when the lease ends.

Clear Horizontal Mini Blind Slat Repair Kit

【Material】Enjoy a collection of 25 colors in premium fabrics, perfect for creating your ideal smart matter shades

【100% Blackout Shades】Featuring upgraded double sided texture fabric, our motorized blinds with remote control can effectively avoid strong sunlight and ensure your family sleep peacefully! JOYENG automatic smart blinds provide absolute privacy, extra insulation and noise reduction to help you reduce energy costs and achieve a more sustainable lifestyle. Additionally, cordless design is friendly to your home, children and pets. The motorized blackout shades are perfect for indoor windows, bedroom, living room, bathroom, kitchen, restaurant, office, etc.
4. Drop Cloth Shades
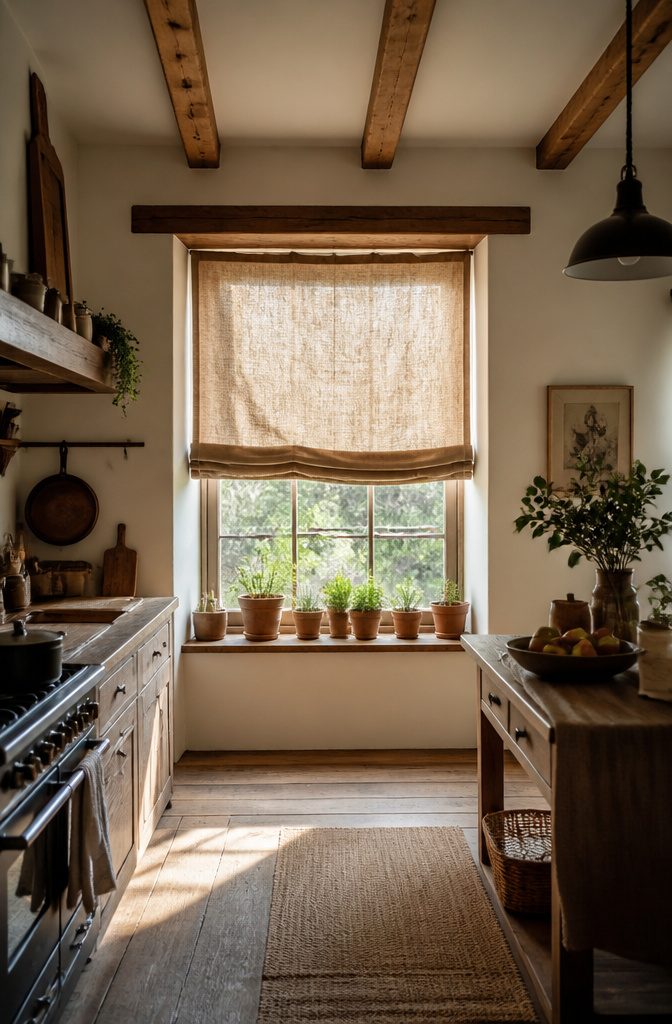
Heavy-duty canvas drop cloths, the ones painters use, run about nine by twelve feet and cost a fraction of decorator fabric. That size drapes a standard window with room to spare, and the weight holds a straight fold without flopping.
The neutral, slightly irregular weave reads as relaxed linen from across a room.
Some people bleach theirs toward off-white; I prefer the original warm beige, which hides dust and sun-fading better. Stencils or a simple painted border dress it up if the plain cloth feels too utilitarian.
What makes this project forgiving for beginners is the material itself.
Canvas forgives crooked cuts, covers uneven hems, and softens into a better drape after a wash. Wash and dry it on high heat before you measure anything, or you will fight stiffness and a chemical factory smell for weeks.
Curtain rings with clips are the no-sew route, and the slight rumple at the top looks intentional on this fabric, not sloppy.
The rustic aesthetic is durable in a real way.
Canvas stands up to daily pull and release, and when the lower edge eventually grimies from being handled, you trim it shorter and re-hem. No delicate mechanism to break, no vinyl to crack.

Main Material: POM + thickened stainless steel core; high hardness, high rigidity, high wear resistance

MUST-CHECK BEFORE PURCHASE | ONLY FOR 1-1/4" (32mm) OUTER-DIAMETER ALUMINUM TUBES--This repair kit works ONLY for roller shades with 32mm (1-1/4 inch) OUTER diameter aluminum tubes. NOT for 32mm inner-diameter tubes, 1.5"(38mm) / 2"(50mm) tubes, or other sizes, Measure your TUBE OUTER DIAMETER first before ordering (see size-check diagram in images) Kit Includes: 1xHead Bracket, 1×End Bracket, 1xClutch, 1xEnd Plug, 3m Beaded Chain

★【Basic Information】The Bungee Kit is a universal replacement for outdoor/indoor sun shades and roller blinds, it can prevent the rolling curtain from blowing away.
5. DIY Roman Shades
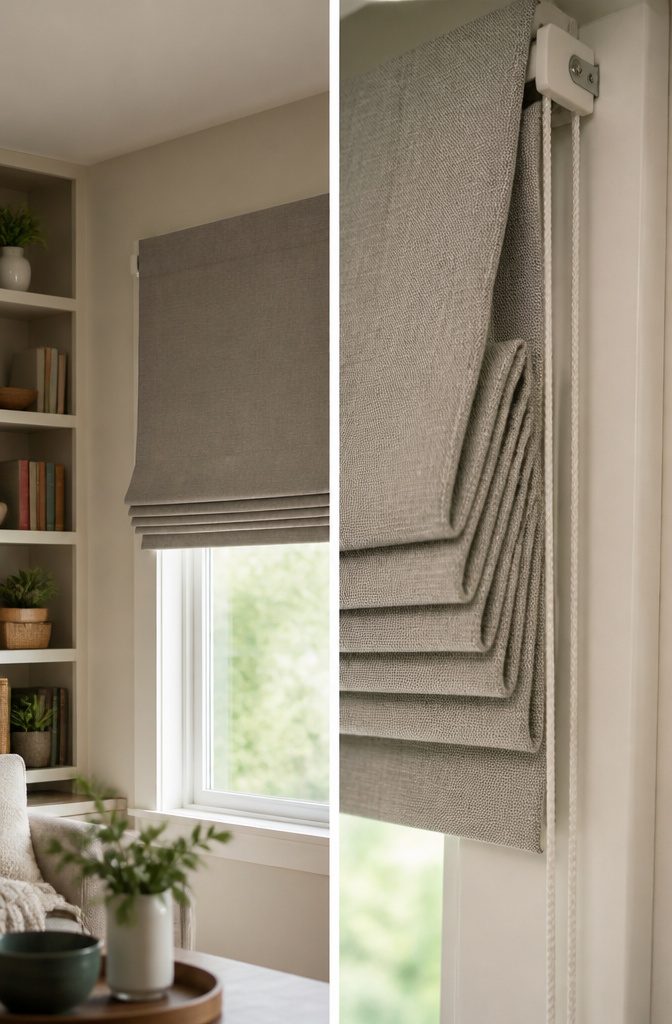
Roman shades fold themselves into clean horizontal pleats when you raise them, a neat trick that hides the mechanism behind the fabric.
The build starts with a mini blind stripped down to its headrail, lift cords, and a handful of spaced slats that act as ribs.
Medium-weight cotton or linen blend drapes best here; sheer fabric exposes the hardware underneath, and heavy upholstery velvet refuses to stack evenly.
For a finished width of 35 inches, cut the raw fabric at 37 inches to leave one inch for each side seam.
The height needs extra too: finished length plus whatever wraps the headrail plus the bottom hem. A framing square helps keep the fabric edges truly square, which matters more than it looks, since any skew telegraphs through the folds.
Curtain rings threaded onto the lift cords let the shade glide up and down. No-sew versions use fusible bonding web to lock the fabric around the slats, though a machine line through the side channels holds up longer.

1【Our Strengths】Over 100 Years Window Covering Expertise (SCHOENBERGER GROUP est.1878)

【Linen Fabrics】Made from high-quality linen fabric, our light filtering shades are designed to be soft and skin-friendly, transparent to light, opaque to sight. Perfect for creating a cozy and peaceful atmosphere in any room. The fabric is precisely cut with a laser without any rough edges. Linen fabric is predominantly made from natural linen fibers, which are completely natural and odor-free, providing you a more comfortable and enjoyable environment.
1【Our Strengths】Over 100 Years Window Covering Expertise (SCHOENBERGER GROUP est.1878)
6. DIY Tie-Up Shades
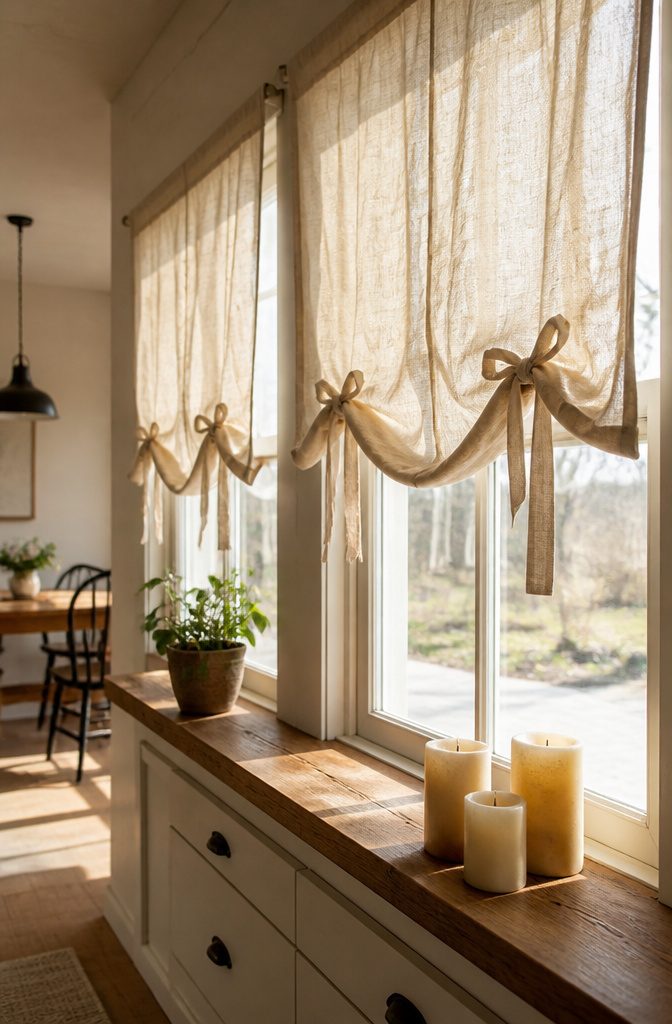
Tie-up shades reward the simplest sewing skills with a mechanism you can actually understand. Two fabric panels hang flat, and fabric ties at two or three heights let you roll the shade up and secure it in place.
No rings threaded through cords, no battens sewn into channels, no wall-mounted cleat to keep the whole thing from crashing down.
The difference from Roman shades is real: those need precision spacing, weight-bar pockets, and a cord lock that behaves. Tie-ups skip all of it.
The beginner’s win here is forgiving construction. A crooked hem on a tie-up gets hidden by the gathered fabric; on a Roman shade, that same crooked line telegraphs across the flat face every time you lower it.
Measure the window, add seam allowance, and cut the ties at least 18 inches or they will not reach around a bulky roll of cotton or linen.
I have watched people assume tie-ups look sloppy because they are easy. The truth is the opposite: the casual drape suits kitchens and bathrooms where a rigid Roman shade would feel overworked.
Choose a medium-weight fabric that creases softly. Stiff upholstery canvas stands away from the glass like a board; washed linen falls back on itself and looks intentional.
Thread a curtain rod through a simple casing at the top, and the whole thing lifts down in five minutes when your lease ends.
No Tools Installation: Trim your shade with a straight-edged kitchen knife using included patented trimming scale and guide; then permanently install in seconds with Simple Stick No Tools peel-and-place application
1【Our Strengths】Over 100 Years Window Covering Expertise (SCHOENBERGER GROUP est.1878)
7. Fabric Covered Window Shades
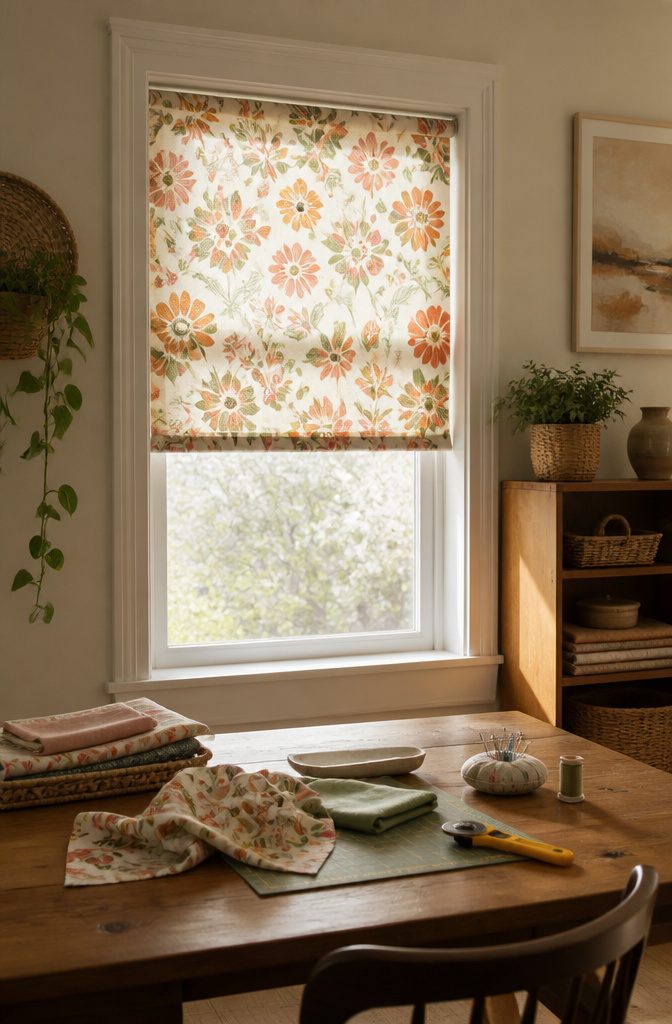
Covering an existing vinyl shade with fabric is the fastest way to get a custom look without touching a sewing machine.
The vinyl backing already blocks light, so the question I see most is whether it can stay: yes, the original vinyl works as your base.
Spray adhesive bonds the fabric straight to it, and the shade keeps rolling up and down the same way.
The catch is the edge. Fabric needs to wrap around the vinyl cleanly, or you get a visible seam that catches when the shade rolls.
Lay the fabric face-down, center the shade face-down on top, and leave about an inch of excess on each side and an extra inch and a half past the bottom.
Spray the wrong side of the fabric, not the vinyl, and smooth from the center out. Too much adhesive will melt the vinyl; too little lets the center bunch when the shade rolls up.
Work in halves, fold the shade back as you go, and keep the windows open. The glue stinks and it travels.
A yard of blackout fabric runs about $8 if you want extra light blocking, though plain cotton works fine for rooms where you just want color. Either way, this is a single-afternoon project once you have the measurements.

KEEP YOUR CLOTHES IN PLACE: Take control of your clothes with our premium double sided tape for clothes. Designed to handle fashion emergencies like sagging necklines or slipping straps, this clothing tape for women double sided provides a secure hold for your clothing. Experience comfort and confidence in any outfit, knowing your clothes will stay perfectly in place, whether used as dress tape or a discreet boob tape alternative.
PERMANENT NO-SEW FABRIC TAPE – Double-sided adhesive tape creates instant, permanent hems and fabric bonds without heat or sewing. Just peel, press, and you're done. Perfect for quick fixes and alterations on woven fabrics.

1 roll of Iron-on, double-sided adhesive for easily and permanently hemming garments and home décor without any sewing
8. Bamboo-Style DIY Blinds
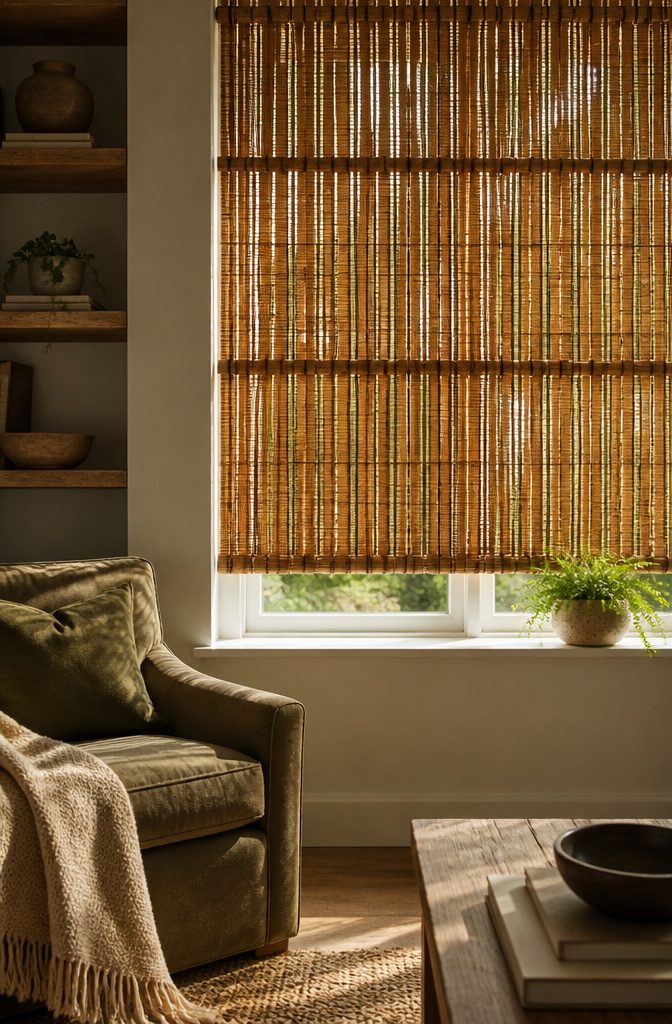
Bamboo fencing from a hardware store runs about $25–35 for a 6-by-8 foot panel, enough material for two average windows if you cut carefully.
Thin wood slats work too; cedar lath or paint-grade strips cost less but need sanding to avoid splinters.
The natural texture reads as high-end from the street, though this is the project on this list most likely to need a saw you do not own and a drill with a decent bit.
The build itself is straightforward: measure your window width, cut the slats to length, and bind the edges with canvas trim to keep the whole roll from fraying.
A hook-and-eye system at top and bottom lets you raise and lower the shade in stages. What slowed me down, reading through the how-tos, was the weight.
Bamboo picks up more heft than fabric once it is hung, so plan for sturdier anchors than you think you need, especially in drywall where a standard shade bracket will sag inside a month.

Remote control included: Adjust your motorized zebra shade with the handheld remote. The built-in rechargeable battery charges through USB-C; no app, Wi-Fi setup or hub is...
What You Need Before Starting
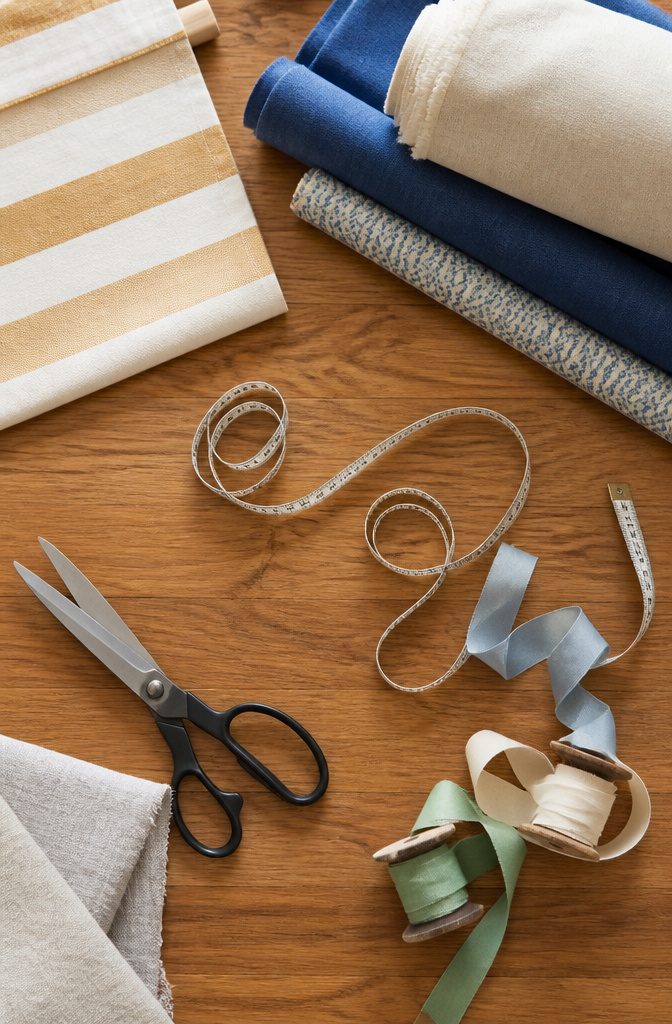
Medium-weight fabric, cotton or canvas, sits at the center of almost every DIY window shade project. The sources keep coming back to it because it holds a fold without fighting you and feeds through a roller mechanism without bunching.
I keep fabric scissors, a measuring tape, and iron-on hem tape within arm’s reach on the ironing board.
Fabric glue and decorative ribbon round out the no-sew kit; a tension rod that actually fits your frame replaces drilled hardware for renters.
The mistake that ruins more of these projects than anything else is assuming your window is square.
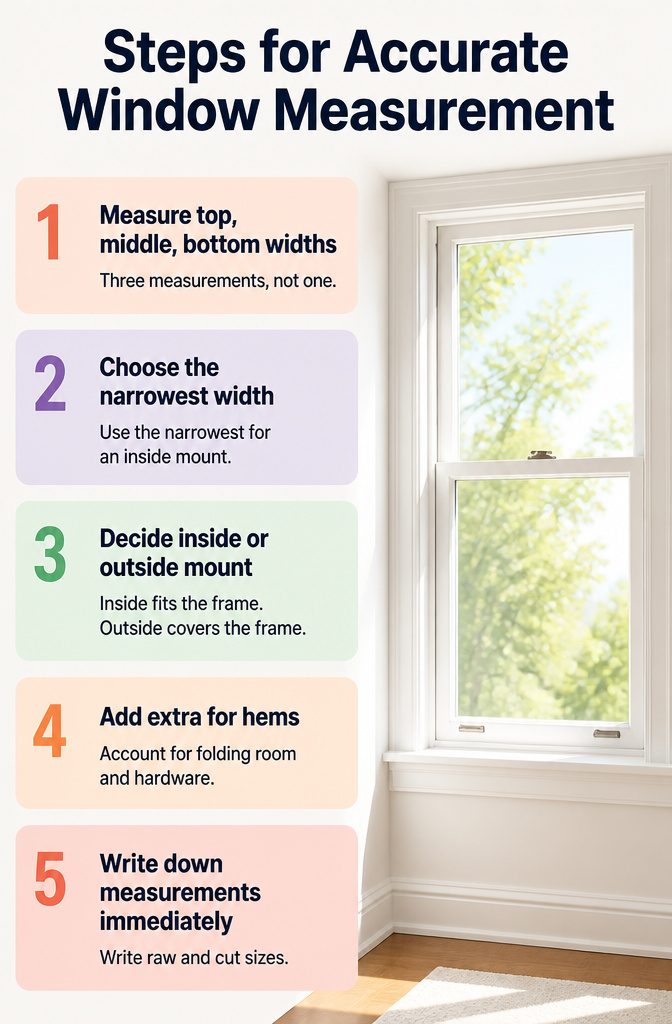
Measure the width at the top, middle, and bottom of the frame, then the length on the left, right, and center. Use the narrowest width for an inside mount.
Write it down immediately, not from memory. I have watched a half-inch gap at one corner turn a Saturday project into a Sunday redo, and the sources agree: that gap is where most first-timers quit.

Usage: Only suitable for blind tubes with a diameter of 1.5"(38mm). Please measure the internal dimensions of the tube before purchasing

【Premium & Sturdy Construction】Crafted from high-quality iron in a sleek silver finish, these roller shade brackets for curtain rods over blinds are built to last. They provide robust support for various window roller shades and roller window blinds, ensuring your window treatments stay securely in place without sagging or falling.

4 Sets Available: Size 36×45.5×20mm. This Roman shade hardware kit includes 4 complete sets (each containing 1 bamboo cord lock and 2 swivel pulleys) of premium-quality components, ensuring smooth and secure operation. Each set allows for effortless adjustment, making it ideal for multiple blind installations or replacements
How to Measure Right the First Time
A window that looks square rarely is.
The top width of my last rental’s frame measured 35 inches, the middle 34¾, and the bottom 34⅜. Use the narrowest of the three for an inside mount, or the shade will jam halfway down and never sit flush.
Inside mount versus outside mount is the first choice, and it changes what you measure.
Inside mount fits the frame itself, clean and recessed. Outside mount covers the frame and needs extra width on both sides to block side light, plus extra length if you want the shade to overlap the sill.
Add for hems before you cut anything. The fabric or paper needs folding room at top and bottom, and the mounting hardware eats an inch or two.
Write the raw window numbers down immediately, then write the cut size beside them. I have trusted memory twice and ended up with a Roman shade that hung crooked because the left and right lengths started from different figures.
Common mistakes: measuring once instead of three times, assuming the frame is level, forgetting the overlap for outside mount, and subtracting for hems instead of adding.
A too-tight fit tears the mounting tape; a gap lets morning light stripe the room.
1【Our Strengths】Over 100 Years Window Covering Expertise (SCHOENBERGER GROUP est.1878)

【Product Dimension】Blind size: 20.5"W x 72"H, fabric size: 19.7"W x 72"H, color: White. No-drill device on the top right side can extend 0.5" in total, allow the blind to fit for window width 20" - 20.5". 【ONLY FOR INSIDE MOUNT】Minimum 2" depth of window frame required for inside mount.

【Quality service】We will use the good logistics provider for delivery, and provide 24 months warranty service, if there is any problem with the product, please feel free to contact us, our most professional after-sales team will solve your problem by the best way.
What Each Shade Costs and Saves
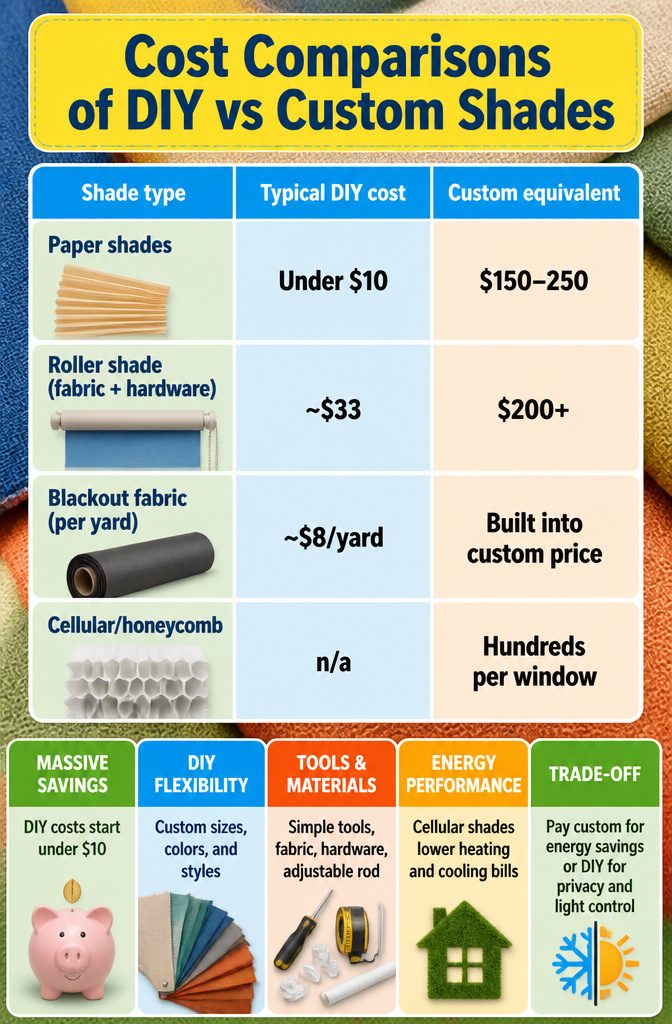
Custom shade quotes start around $200 per window and climb fast from there.
Doing the work yourself drops that number to under $10 for paper shades, about $8 per yard for blackout fabric, and roughly $33 per finished roller shade once hardware and an adjustable rod are counted in.
The savings are real enough to matter on a renter’s budget or a first homeowner’s tight timeline.
| Shade type | Typical DIY cost | Custom equivalent |
|---|---|---|
| Paper shades | Under $10 | $150–250 |
| Roller shade (fabric + hardware) | ~$33 | $200+ |
| Blackout fabric (per yard) | ~$8 | Built into custom price |
| Cellular/honeycomb | n/a | Hundreds per window |
What the cheaper materials do not give you is trapped-air insulation.
Cellular shades cost more even off-the-shelf because that honeycomb structure actually lowers heating and cooling bills. A thermal blackout liner added to curtains you already own splits the difference for less, though it will not match the full cellular performance.
For a weekend project with a few hundred dollars, the math favors the DIY route on every option except heavy insulation.
That is the trade: pay the custom price for energy savings, or pay the DIY price for privacy and light control and accept the utility bill you already have.
Fabric That Works for Which Room
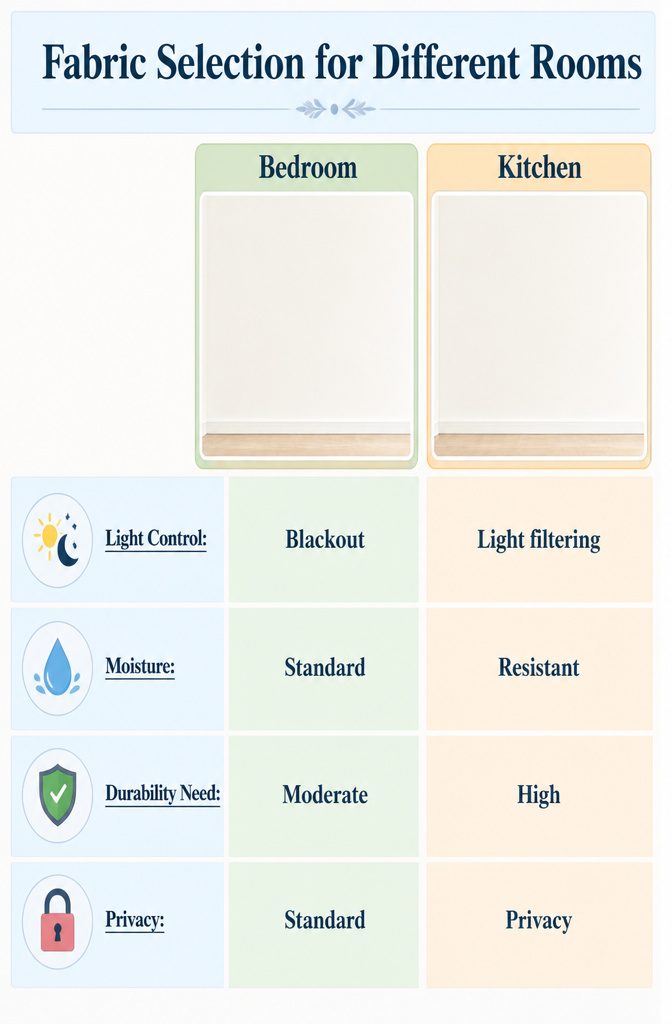
The fabric you hang matters as much as how you hang it.
A kitchen window above the sink needs moisture resistance if you want the shade to last more than one humid summer, and a bedroom east-facing window wants blackout weight, not the light-filtering cotton that works fine in a living room.
I learned this the hard way with a linen shade in a bathroom that mildewed inside two months.
The general rule holds: polyester blends or treated fabrics handle kitchens and baths, while bedrooms and media rooms call for heavier, light-blocking weaves. High-traffic areas near doors or kids’ hands need tighter weaves that won’t snag or show every fingerprint.
| Room | Light Control | Moisture | Durability Need |
|---|---|---|---|
| Bedroom | Blackout | Standard | Moderate |
| Kitchen | Light filtering | Resistant | High |
| Bathroom | Privacy | Resistant | Moderate |
| Living room | Light filtering | Standard | Moderate |
| Home office | Adjustable | Standard | Moderate |
Roll-up styles in kitchens and baths stay casual and practical, held with ribbon ties rather than complex hardware that corrodes.
For bedrooms, the heavier fabric pays off in sleep quality. The mistake is treating "fabric" as one material and expecting it to perform everywhere the same.
Renter-Friendly Ways to Hang Anything
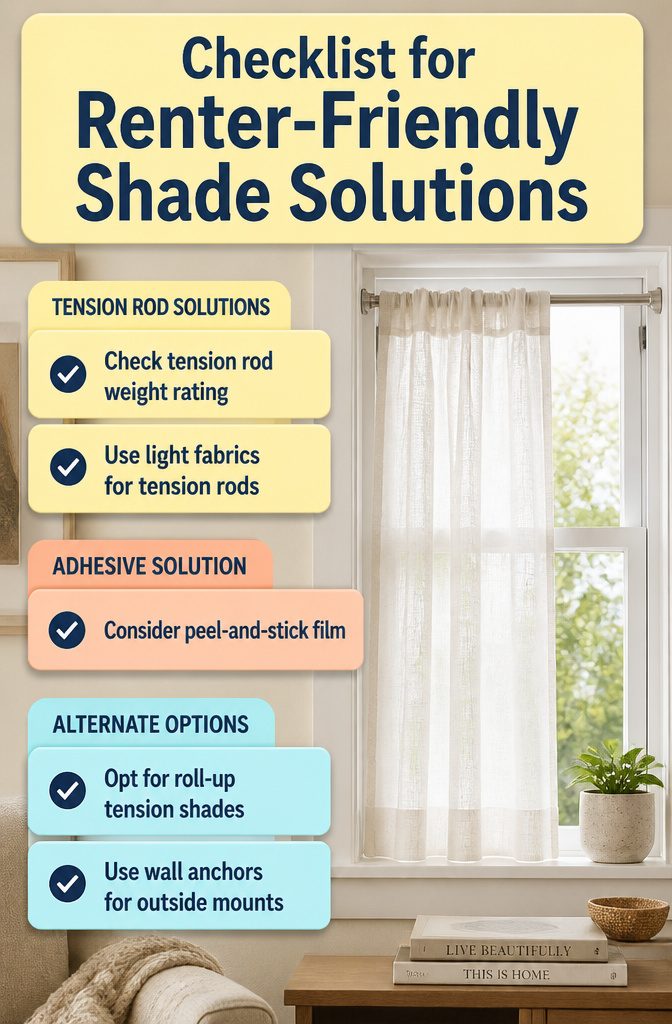
Tension rods and adhesives are the two paths that actually work for renters who need diy shades for windows without a drill. Each has a hard limit you need to know before you buy.
- Tension rods carry a weight rating printed on the package, and the number matters more than the color or finish. A sheer linen curtain asks almost nothing of the rod; a heavy cotton panel or canvas drop cloth will pull a lightweight rod straight out of the frame. Check the rating against your fabric before you check out.
- Sheers and lightweight curtains hang perfectly on tension rods wedged inside the window frame. The spring-loaded mechanism works exactly like a shower rod: twist to expand, wedge, and the pressure holds.
- Peel-and-stick window film is its own kind of shade. It mimics frosted glass or stained-glass patterns, adds texture, and changes how light moves through the room. No hardware, no weight to support, and it comes down when the lease does.
- The tension rod fabric roll-up shade needs no sewing and no mounting hardware at all. It is the shade type built specifically for this situation: fabric loops over the rod, rolls up by hand, and the rod itself is the entire support system.
- Wall anchors are the alternative when you do mount outside the frame, but that is no longer drill-free. For true renters, the choice is tension for fabric or adhesion for film; mixing them up is how shades end up on the floor.
Frequently Asked Questions
What is the absolute cheapest way to cover a window for privacy?
Temporary pleated paper shades cost less than $10 per window.
You cut them to size and stick them to the frame with a pre-attached adhesive strip. For a reusable option, cornstarch paste holds lightweight fabric or lace to the glass for a frosted look that peels off with warm water.
How can I make cheap blinds look more expensive?
Layer a sleek DIY Roman shade or roller shade with floor-length curtain panels.
Use a light-filtering shade as the base and frame the window with heavier drapes. The combination makes the window look larger and the ceilings higher.
Are there any cheap window options that also save energy?
Cellular shades are the budget pick for energy savings because their honeycomb structure traps air and insulates.
Off-the-shelf versions cost less than custom. Adding a thermal blackout liner to curtains you already own is another inexpensive way to split the difference on insulation.
How do I measure for DIY window shades?
Measure the width at the top, middle, and bottom of the frame, then the height on the left, right, and center.
Use the narrowest width and the full height for an inside mount. Add extra for hems and hardware before you cut anything, and write the numbers down immediately rather than trusting memory.
Can I use existing vinyl shades for my DIY project?
Yes, the original vinyl works as your base. Spray adhesive bonds fabric straight to it, and the shade keeps rolling up and down the same way.
Leave about an inch of excess fabric on each side and an extra inch and a half past the bottom, wrap the edges cleanly, and work in halves so the center does not bunch.